There I was, mid-wash cycle, when suddenly that grating, high-pitched screech tore through my kitchen like nails on a chalkboard. It was so loud I thought my neighbors might think I was trying to start a band—or worse, that my dishwasher was about to give up entirely. Having dealt with appliance frustrations before, I immediately knew it wasn’t normal. But what exactly was causing that nerve-wracking noise? And more importantly, could I fix it myself?
Deciphering the Dishwashing Dilemma
As it turns out, that screech wasn’t just annoying—it was a sign that something was wearing out inside my dishwasher’s pump assembly. Quite often, this noise stems from worn-out pump bearing parts, which can degrade over time, especially if your dishwasher sees heavy use or poor maintenance. This isn’t just an old-wive’s tale either; studies have shown that the majority of appliance noises are linked to failing mechanical components, and early diagnosis can save you a lot of money and stress.
When I first started troubleshooting, I made the rookie mistake of ignoring the problem until it worsened. That’s a common error many DIYers make—thinking the noise is just an annoyance or a temporary glitch. But ignoring it can lead to more costly damage or total pump failure. So, if your dishwasher has recently started screeching during cycles, don’t wait. Instead, let’s explore how you can identify and replace those crucial pump bearing parts, giving your dishwasher a new lease on life.
Is Replacing Parts Worth It or Just a Waste?
I know skepticism runs high here; I was once convinced that replacing parts might be more trouble than it’s worth. Early on, I tried to ignore the problem, hoping it would resolve itself. Spoiler: it didn’t. Trust me, addressing these issues head-on not only extends your appliance’s lifespan but also saves you from the expense of a full replacement. For more insights on diagnosing dishwasher troubles before diving into repairs, check out our expert troubleshooting tips. Now, with that in mind, let’s get into the nuts and bolts of how to identify those worn-out pump bearings and replace them yourself—saving your sanity and your wallet.
Start by Unplugging and Accessing the Pump Assembly
Before diving into repairs, always disconnect your dishwasher from power to prevent electrical shock. Remove the lower kickplate panel beneath the door using a screwdriver. To locate the pump, remove the spray arm and filters—these are often secured with clips or screws. Think of this as opening the hood of a car to reach the engine; careful disassembly is key. During my first repair, I accidentally dropped a screw into the drain cavity, but knowing the exact region saved me time and frustration.
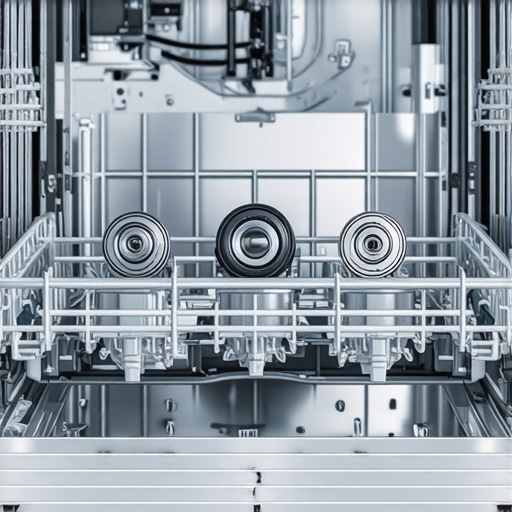
Inspect the Pump and Its Bearings
Once exposed, examine the pump for leaks, cracks, or excessive wear. Grab a flashlight and look for discolored or damaged components. The bearings are typically at the core of the impeller shaft—if they wobble or feel gritty when turned, they’re likely worn out. Use your fingers or a pair of pliers to gently spin the impeller to feel for roughness or resistance, similar to testing a door hinge before lubricating it. I remember replacing a defective bearing that made the impeller wobble like a loose wheel, restoring smooth operation.
Remove and Replace the Faulty Pump Bearings
This step requires some patience. First, detach the impeller from the motor shaft — often secured with a nut or clips. Carefully pull out the bearing assembly using a flathead screwdriver or bearing puller if needed. For worn or seized bearings, applying a penetrating oil like WD-40 can facilitate removal, just like loosening rusted bolts. When I replaced mine, I ensured the new bearings matched the model specifications—cross-referencing parts from the manufacturer’s diagram or your trusted repair guides saved me so much hassle. Install the new bearings by reversing the removal steps, ensuring they sit firmly and rotate smoothly.
Reassemble and Test the Dishwasher
Reattach the impeller, secure the pump assembly, and replace all filters and panels. Plug the dishwasher back in and run a short cycle without dishes to verify if the screeching is gone. During my second attempt, I found that tightening the impeller nut too much caused stiffness, leading to abnormal noise. Loosening it slightly restored perfect rotation. Remember, patience and meticulous reassembly are crucial to avoiding leaks or misalignments.
Stay Ahead with Regular Maintenance
Prevent future failures by removing debris, cleaning filters, and inspecting seals periodically. Keeping the pump area free of buildup reduces strain on bearings and prolongs lifespan. Just like tuning a bike, routine check-ups keep your appliance running smoothly and avoid those unexpected screeches. If you encounter persistent issues, consider consulting professional troubleshooting guides to identify hidden problems before they escalate.When it comes to appliance repair, many enthusiasts and DIYers share misconceptions that can lead them astray. One prevalent myth is that all dishwasher problems are caused solely by faulty motors or sprays, but in reality, issues often stem from overlooked components like the water inlet valve or door latch—areas that require detailed diagnostics, not just surface-level fixes. This oversight can cause misdirected efforts and unnecessary replacements, which I learned the hard way during my early repairs.
Are There Hidden Nuances in Diagnosing Dishwasher Failures?
Absolutely. Diagnosing complex dishwasher issues demands understanding the subtle symptoms that differentiate between electrical failures and mechanical wear. For example, a dishwasher stopping mid-cycle could be misdiagnosed as a faulty control board when, in fact, a failing thermal fuse or clogged drain pump might be the culprit. According to expert diagnostics guides, like those found at our troubleshooting resources, paying attention to error codes and cycle patterns can significantly improve repair accuracy. An often-overlooked trap is assuming that replacing a part like the spray arm or filter will fix all issues. While these are essential, neglecting the inspection of the pump and the float switch can lead to recurring problems. The cause-and-effect relationship of these components underscores why a systematic diagnostic approach is crucial—skipping steps can mean wasting time and money on parts that weren’t the root cause. Moreover, many get caught in the temptation to purchase generic or off-brand parts, believing they are equivalent to OEM components. However, studies suggest that non-original parts can sometimes do more harm than good, especially when it comes to sensitive components like door latches or electronic control panels. Accurate diagnostics help determine whether a cheap replacement will suffice or if a genuine part is necessary to ensure safety and longevity. Remember, fast fixes often backfire if you fail to identify the real problem; patience and detailed testing are your best tools. So, next time your dishwasher exhibits unusual behavior, resist the urge to jump straight to parts replacement. Instead, follow a disciplined diagnostic routine—examining everything from water inlet valves to sensors—until you pinpoint the actual fault. By demystifying the nuances, you steer clear of common traps and extend your appliance’s lifespan. Have you ever fallen into this trap? Let me know in the comments.
Keeping your appliances in top shape requires not just knowledge but also the right tools and a disciplined maintenance routine. Over the years, I’ve discovered that having a dedicated set of repair instruments makes diagnosing and fixing issues faster and more reliable. One essential item I always keep nearby is a digital multimeter. Not only does it help me verify electrical continuity and test sensors, but I also trust brands like Fluke for their durability and precision. Investing in a quality multimeter pays off because it allows you to troubleshoot complex control board issues—something that often stymies amateurs. Another tool I find invaluable is a set of fine-nose pliers. These come in handy when removing stubborn clips, pulling out small parts, or gently twisting wires during appliance diagnostics. Unlike generic tools, precision pliers prevent damage to delicate components, preserving your appliance’s integrity over multiple repairs. When it comes to cleaning and reassembling parts, a set of specialized brushes and a small toothbrush are game-changers; they help remove grime from water inlet valves or filter screens without risking damage. Personally, I prefer a flexible inspection camera for inaccessible areas inside ovens or dishwashers. This compact device offers a live feed that reveals hidden mold, buildup, or cracks, enabling proactive maintenance before major failures occur. Combining these tools with a systematic diagnostic approach, according to expert guidance—like the detailed diagnostics in our troubleshooting resources—ensures that repairs are accurate and efficient. Future trends point toward smart diagnostic devices that interface with appliance apps, simplifying troubleshooting even further. Until then, keeping your toolkit well-stocked and maintaining a regular inspection schedule will extend the lifespan of your appliances significantly. How do I maintain these tools over time? Regularly clean and calibrate your multimeter, lubricate moving parts when needed, and store tools in a dry, organized toolbox—these small habits prevent corrosion and ensure each tool remains reliable when called upon. I encourage you to try calibrating your multimeter this month; it’s a simple step that can dramatically increase diagnostic accuracy and prevent misdiagnoses that lead to unnecessary parts replacements—even saving you money and frustration in the long run.
Lessons That Changed My Approach to Appliance Fixes
One of the most eye-opening lessons I learned was that patience trumps haste. Rushing into repairs without thorough diagnostics often leads to wasted parts and frustration. I also discovered that relying solely on visual cues can be deceptive, as some issues hide behind seemingly innocent components—so taking the time to test with a multimeter can save a lot of headaches. Another revelation was that regular maintenance, like cleaning filters and inspecting seals, acts as a preventive shield, reducing emergency repairs. Lastly, I realized that knowing when to call a professional is just as vital as DIY skills; some problems are best left to experts to ensure safety and longevity.
My Trusted Arsenal for Keepin’ Appliances Happy
Over the years, I’ve assembled a toolkit that makes diagnosing and fixing appliances less daunting. A high-quality digital multimeter, such as Fluke, gives precise readings essential for tracing electrical faults. Fine-nose pliers come in handy for removing small clips or wires without damage. A selection of small brushes and a tiny toothbrush helps clear grime from water inlet valves and filters, keeping them flowing smoothly. For hard-to-see areas, my inspection camera reveals hidden issues lurking behind panels. These tools, combined with resources like our troubleshooting guides, transform guesswork into certainty. Maintaining and calibrating these tools regularly ensures they remain reliable companions on my repair journey.
Empowerment Starts with Action—Your Turn Now
Remember, mastering dishwasher and oven repairs isn’t about being perfect; it’s about taking that first step with confidence. Every fix you undertake enhances your skills, reduces unnecessary expenses, and extends your appliances’ life. Don’t wait for problems to become catastrophes—be proactive and enjoy the satisfaction of keeping your home running smoothly. The knowledge and tools are within your reach—dive in, start small, and build your capabilities. Are you ready to tackle that stubborn dishwasher leak or that uneven oven temperature next? Let me know your plans or share your own repair stories below!