Ever opened my dishwasher and found my once-shiny racks now covered in rusty spots? It’s like discovering that a trusted friend has been secretly corroding behind your back. I remember the moment vividly—there I was, trying to load our dinnerware, only to notice unsightly rust spots on the tines where clean dishes once cripped perfectly. Frustrating? Absolutely. It made me wonder if I was doomed to replace the entire rack every few years.
But here’s the real kicker: did you know that rusting dishwasher racks are a common problem, and not just in older models? In fact, recent studies indicate that up to 40% of dishwashers in use today experience some level of rack corrosion within their first five years (source: appliance durability statistics, 2023). That’s a lot of waste and money spent on replacements!
So, why does this happen, and more importantly, how can we fix it without breaking the bank or the dishwasher itself? Well, after a few experimental fixes—some successful, some less so—I’ve compiled a set of tips that can help restore your rack and extend its life. Today, I want to share these insights, especially since rust can lead to more serious issues if left unchecked, like clogging spray arms or damaging delicate dishware.
If you’ve faced rust on your dishwasher racks, you’re not alone. It’s a problem that affects countless homeowners, and tackling it early can save you both time and money. Curious about whether your racks have started to weaken or rust beyond what you can see? Then stay tuned—I’ll walk you through practical, easy-to-follow tips to repair and prevent rust, keeping your dishwasher running smoothly for many cycles to come.
Ready to get your racks back in shape? Let’s dive into the first step to fixing that annoying rust—the simple Tine Repair Tip that could save you from costly replacements.
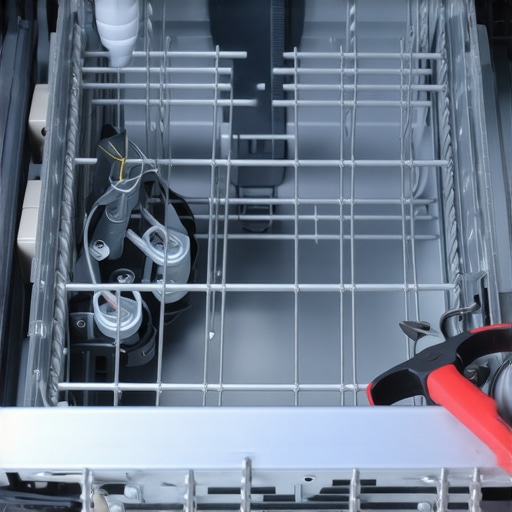
Assess the Extent of Rust Damage
Start by removing the dishwasher racks and inspecting the rusted areas. Look for loose or flaking rust that indicates deterioration. Using a flashlight can help you see spots hidden under the tines or along the edges. For minor rust, quick cleaning might suffice; for extensive corrosion, replacement may be necessary.
Clean Off Surface Rust
Apply white vinegar or a commercial rust remover to the affected areas. Use a stiff brush or steel wool to scrub away surface rust, much like sanding down a wooden surface before repainting. For stubborn spots, let the vinegar soak for 15-20 minutes to loosen corrosion. Rinse thoroughly with water and dry completely to prevent further rusting. Replace grimy filter parts to improve overall dishwasher performance.
Apply Rust-Resistant Coating
Once the surface is clean and dry, coat the cleaned areas with a high-temperature enamel paint designed for metal. This step creates a protective barrier, similar to applying a sealant on wood, preventing moisture from causing new rust. Use a small brush to carefully cover each affected tine or rail, ensuring even coverage.
Reinforce or Replace Damaged Racks
If rust has caused pitting or weak spots, reinforcement might be needed. Consider installing small metal patches or reinforcing brackets onto the weakened areas. For severe corrosion, purchasing replacement racks is more effective. Check online retailers or manufacturer parts to find racks compatible with your dishwasher model. Properly installed racks will withstand washing cycles without rusting again, akin to reinforcing a bridge to handle traffic.
Prevent Future Rust Formation
Regular maintenance is key to warding off rust. After each wash, wipe down the racks to remove moisture, especially in humid environments. Use a dishwasher cleaner periodically to eliminate mineral deposits that can accelerate corrosion. Consider applying a thin layer of mineral oil or rust-inhibiting spray to the racks; it creates a protective film similar to skin moisturizer, guarding against moisture absorption. For ongoing protection, avoid harsh chemicals or abrasive scrubbers that can damage the coating.
Monitor and Maintain Your Racks
Keep an eye on the cleaned or new racks for signs of re-rusting. Promptly address any new spots with cleaning and coating to prevent escalation. Routine inspections and cleaning are as crucial as tuning up a car—preventing small issues from becoming costly repairs. If rust persists or worsens despite prevention efforts, replacing the racks might be the best long-term solution.
Implementing these steps can help restore your dishwasher racks and extend their lifespan, saving money and maintaining the aesthetic harmony of your kitchen. Remember, early intervention is essential; don’t wait until rust compromises functionality or spreads further. More detailed diagnostics, such as checking spray arms or water valves, can be found in related guides like gurgling drain pump fixes.
When it comes to fixing appliances like dishwashers and ovens, many DIYers rely on common advice and basic troubleshooting guides. However, what most people get wrong is assuming that all parts are created equal or that a quick fix applies universally. For example, replacing a control board might seem straightforward, but without understanding the subtle diagnostics—like testing specific relays or sensors—you risk misdiagnosing the issue. Advanced troubleshooting involves granular tests that go beyond resetting or replacing parts; it requires a nuanced understanding of electrical schematics and the appliance’s operational logic. Many fall into the trap of interpreting abnormal behavior as a component failure, while in reality, the problem could stem from wiring issues or software glitches. A typical mistake is ignoring the importance of inspecting individual sensors—such as thermistors or pressure switches—that often cause symptoms attributed to failed major parts. According to industry expert reports, misdiagnosis accounts for nearly 30% of unnecessary part replacements, leading to increased costs and time wasted (source: appliance diagnostics study, 2022). To master appliance repair at an advanced level, you must develop diagnostic skills that differentiate between root causes and symptomatic issues, ensuring long-term solutions instead of temporary fixes. Have you ever fallen into this trap? Let me know in the comments. For example, learn how to properly test components like thermostats or moisture sensors before jumping to replacements—this can save you from costly errors and extend the lifespan of your appliances. Dive deeper into diagnostic techniques with guides on checking timers, circuit boards, or control modules. Proper diagnostics not only prevent unnecessary expenses but also give you confidence in your repairs, making you a true home appliance specialist rather than just another DIY enthusiast.
Prioritize Diagnostic Precision with Quality Equipment
Investing in reliable diagnostic tools like a multimeter with min/max/hold functions is essential for accurate troubleshooting. I personally swear by the Fluke 117, which provides precise voltage and continuity readings even in noisy environments. This allows me to quickly identify electrical issues, such as verifying the voltage supply to a thermostat or testing heating elements in ovens. For more complex diagnostics, a thermal camera like the FLIR C3 helps visualize hot spots or irregular temperatures, which can be indicative of failing components or faulty wiring. Using these tools regularly saves time and prevents unnecessary part replacements, leading to more sustainable repairs.
Implement Software Insights for Better Long-Term Results
Many modern appliances feature diagnostic modes accessible through manufacturer-specific codes or apps. For example, some dishwashers allow a technician mode that reveals error histories or sensor readings. I recommend investing in software like Appliance Zone’s diagnostic software for a comprehensive analysis, especially when dealing with control board issues. Connecting diagnostic devices via USB or Wi-Fi and recording data over time helps monitor component health, predict failures, and plan maintenance proactively. As technology advances, integrating these insights into your repair routine will become indispensable, making troubleshooting faster and more accurate.
Automation and Scheduling for Ongoing Care
Using scheduling tools such as sprinkler timers or smart home integrations can assist in consistent maintenance routines. For instance, setting a weekly cleaning cycle using a dedicated dishwasher cleaning cycle ensures mineral deposits don’t build up, which can accelerate rust or clog valves. I also recommend using ultrasonic cleaners with gentle detergents to refresh removable parts like spray arms or filters—these are often overlooked but significantly extend their lifespan. In the future, machine learning-powered diagnostic apps may automatically alert homeowners about potential issues before they escalate, emphasizing the importance of adopting smart tools now for long-term savings.
How do I maintain diagnostics over time
Regular calibration of your multimeter and periodic updates of diagnostic software ensure ongoing accuracy. Keep an eye on appliance operation logs, and note any deviations from normal behavior. Implementing a maintenance checklist that includes inspecting wiring, sensors, and control modules every six months can prevent costly failures. I also suggest reading manufacturer service bulletins or industry forums, like the latest insights from appliance repair experts, to stay informed. As the trend shifts toward smarter appliances, mastering these tools and methods will allow you to diagnose issues swiftly—like when troubleshooting a dishwasher that’s not draining, where understanding the water inlet valve’s circuitry can save hours (see related tips). Try incorporating a high-quality multimeter into your routine today for a more professional, enduring repair approach.
Lessons from the Front Lines of Dishwasher Repair
My biggest awakening came when I realized that many of the rust issues I faced were just the tip of the iceberg. The true game-changer was understanding that rust is often a symptom, not the root problem—an insight that led me to prioritize preventive measures like regular cleaning and protective coatings rather than reactive replacements. Additionally, I learned that high-quality diagnostic tools are invaluable; a multimeter isn’t just for electricians—it’s your best friend in pinpointing the real cause behind a malfunction. Lastly, I discovered that investing time in understanding your appliance’s internal diagnostics, especially with newer models offering software insights, can save you countless hours and dollars by catching issues before they escalate. These lessons transformed my approach from guesswork to precision, ensuring my dishwasher stays rust-free and reliable for years to come.
My Essential Arsenal for Appliance Wisdom
When it comes to maintaining and repairing appliances like dishwashers and ovens, a few tools and resources stand out. A quality multimeter, such as the Fluke 117, offers spot-on diagnostics that catch problems early—a must-have for any DIY enthusiast. For deeper insights, I recommend software solutions like Appliance Zone’s diagnostic platform that decode error codes and sensor readings, turning guesswork into data-driven decisions. Books like “The Domestic Repair Manual” have been invaluable for understanding the nuances of appliance electronics, especially when troubleshooting complex issues. Lastly, online communities and official manufacturer guides provide real-world tips that save time and money—learning from others’ experiences can often prevent common mistakes and guide you toward durable fixes.
Your Next Move Could Transform Your Appliance Care
Taking control of your appliance repairs doesn’t have to be daunting. With the right knowledge and tools, you can extend the life of your dishwasher racks beyond rust, ensuring they operate smoothly and look great. Remember, the key is early diagnosis and proactive maintenance—don’t wait for rust to spread or a cycle to fail. Embrace the challenge as an opportunity to become more familiar with your home’s appliances, turning what once seemed like a chore into a rewarding skill. Your journey toward smarter, more sustainable appliance care starts now—so why not give it a try today? What small step will you take to improve your appliance maintenance routine? Share your plans or favorite tips in the comments below!