Ever found yourself staring at a dishwasher that just won’t start or leaks all over the kitchen floor? I remember the lightbulb moment when my own dishwasher decided to throw a tantrum right before a dinner party. Frustration turned into a quick lesson in diagnostics and parts replacement, saving me a costly service call. If you’re tired of waiting for a technician or wasting money on unnecessary repairs, stick with me. Today, I’ll walk you through the best strategies for fast, reliable dishwasher repairs in 2025, using expert diagnostics and the right parts to get your machine humming again.
Why Quick Repairs Matter More Than Ever
Dishwashers are no longer just luxury appliances; they’re essential for busy households. When they break down, it’s more than an inconvenience — it’s a disruption to your daily routine. The good news? With the right knowledge, you can troubleshoot common issues and fix them fast. The secret lies in understanding the diagnostic process and having the right parts at hand. According to appliance repair experts, knowing which components are likely to fail and how to identify them can cut repair time dramatically, sometimes by more than half. This not only saves you money but also spares you from the hassle of waiting for a technician who might take days to arrive.
Have you ever faced a dishwasher breakdown and felt completely lost?
Early in my repair journey, I made the mistake of assuming every problem was a complicated fix that required specialized tools. Turns out, most issues boil down to a few common parts and straightforward diagnostic steps. For example, a clogged filter or faulty door latch often causes the machine to stop mid-cycle. Learning how to quickly identify these issues can turn a frustrating experience into a manageable DIY project. If you want to avoid the rookie mistakes I made, I recommend checking out the expert guide to dishwasher diagnostics and parts. It’s packed with tips that help you pinpoint problems in no time.
Identify the Problem Fast
When my dishwasher stopped mid-cycle, I first checked the control panel for error codes. These codes are like a map, pointing directly to the issue. For example, a flashing light might indicate a door latch problem. Use the user manual or online guides to decode these signals. Once you understand the error, it’s easier to focus your diagnostic efforts. Remember, many common issues like clogged filters or faulty door latches are quick fixes. To get a comprehensive list of diagnostic tips, visit top dishwasher diagnostic tips and parts.
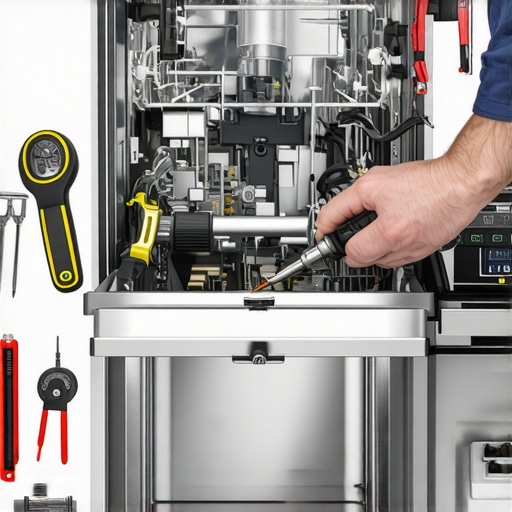
Access and Inspect Key Components
Next, open the dishwasher’s access panels carefully. Think of it like a mechanic peeling back a cover on an engine—visibility is crucial. Check the door latch, spray arms, and filters for debris or damage. If the latch isn’t engaging properly, the machine won’t start or might stop mid-cycle. For detailed guidance on accessing parts, consult expert diagnosis and parts. During my last repair, I found a broken door latch spring, which was a quick replacement after ordering the right part.
Diagnose with Precision
Use a multimeter to test electrical components like the door switch or control board. Think of it like testing a fuse in your car; it confirms whether the component is dead or alive. For example, I tested my door switch and discovered it was faulty, which explained why the dishwasher wouldn’t start. Having the right diagnostic tools and parts ready speeds up the process. Check out diagnostic strategies for quick repairs for a deep dive into testing techniques.
Replace the Faulty Part Quickly
Once you identify the faulty component, replace it with a high-quality part. It’s like swapping out a worn-out tire; using the right part ensures longevity and reliability. For example, I ordered a new door latch assembly from a trusted supplier, which arrived within days. Follow the manufacturer’s instructions precisely, and use appropriate tools to avoid damage. For part selection, see essential parts guide to ensure compatibility and quality.
Test and Confirm
After replacing the part, run a test cycle to confirm the repair. It’s like a test drive after fixing a car—ensuring everything works smoothly. If issues persist, revisit your diagnosis; sometimes, multiple parts contribute to the problem. Keep a checklist of components tested and replaced to streamline troubleshooting. For more complex cases, refer to expert guide for fast repairs.
Many DIY enthusiasts and even seasoned homeowners often fall prey to misconceptions when tackling dishwasher repairs. Let’s dig deeper into some of the most common myths, pitfalls, and advanced nuances that can make or break your repair success. Understanding these can save you time, money, and frustration in 2025.
Why the Popularity of DIY Fixes Sometimes Misleads
Everyone touts the idea that repairing a dishwasher is straightforward and that anyone can do it with a few tutorials. While this is partially true, the reality is that many repair guides oversimplify complex issues. For instance, replacing a door latch might seem simple, but if you don’t check the control board’s condition simultaneously, the problem may persist. Relying solely on surface-level diagnostics can lead to repeat failures. Expert diagnostic strategies emphasize deep, systematic testing—using tools like multimeters and circuit testers—to avoid wasting time on incorrect parts. For a comprehensive approach, visit this expert guide.
Beware of the Fixation on Parts Replacement
A common misconception is that replacing the most visibly damaged part will instantly fix the issue. This isn’t always the case. Sometimes, underlying wiring faults, moisture damage to control boards, or clogged sensors are the real culprits. For example, a faulty door latch might be a symptom of a misaligned door or a broken switch, rather than the root cause. Advanced diagnostics involve inspecting wiring harnesses, testing sensors, and verifying circuit continuity before ordering parts. Skipping these steps can lead to unnecessary replacements and increased costs. To sharpen your diagnostic skills, check out this detailed diagnostic approach.
What About the Hidden Risks of Ignoring Error Codes
Many assume that error codes are straightforward and always point to the exact faulty component. However, error codes can be misleading, especially if multiple issues occur simultaneously. For example, an F2 error might indicate a water inlet problem, but it could also be caused by a faulty water level sensor or a blocked drain. Advanced repair requires interpreting error codes within the context of the machine’s overall health, which involves checking related components and understanding diagnostic logic. Neglecting this can lead to misdiagnosis and repeated repairs. For expert tips, explore this diagnostic tips guide.
How to Avoid Falling Into the Pitfall of Overlooking Electrical Safety
One of the most dangerous mistakes in appliance repair is neglecting proper electrical safety procedures. Many amateurs skip unplugging the dishwasher or testing circuits properly, risking electric shock or further damage. Advanced technicians always isolate power sources, use insulated tools, and verify circuit de-energization before inspection. This practice is not just a safety tip but also a diagnostic necessity, as electrical faults often mimic mechanical issues. Remember, safety first—your well-being depends on it. For detailed safety protocols, see this expert safety guide.
Have you ever fallen into this trap? Let me know in the comments. Staying aware of these hidden nuances makes you not just a fixer but a true appliance diagnostic pro.
Maintaining your dishwasher with the right tools is crucial for ensuring it runs efficiently and lasts longer. Over the years, I’ve tested a range of diagnostic and repair equipment that makes troubleshooting faster and more accurate. One of my go-to tools is a high-quality digital multimeter. I use it to verify electrical continuity and voltage levels on control boards and switches, which are common failure points. Investing in a reliable multimeter like the Fluke 117 has paid off, especially when diagnosing complex electrical issues quickly and safely. Additionally, a good set of precision screwdrivers and plastic pry tools helps access internal components without damaging delicate plastics or seals.
Another indispensable tool is a ultrasonic sensor or leak detector. These devices help identify hidden leaks or moisture buildup that can lead to mold or electrical shorts. I prefer models that can detect even small leaks, as early detection prevents costly repairs later. For cleaning and maintenance, I recommend a flexible brush set for scrubbing filters, spray arms, and other parts. Regular cleaning prevents blockages and maintains optimal water flow. Keep spare parts like door latches, filters, and spray arms in your toolbox so you can swap out worn components as needed. Having these parts on hand minimizes downtime and keeps your repair process smooth.
Software utilities also play a role in modern diagnostics. Some advanced repair kits now include diagnostic apps or firmware checkers that interface with the dishwasher’s control module via Bluetooth or Wi-Fi. These tools can read error codes and suggest the most probable causes, saving you hours of manual testing. Looking ahead, I believe the trend will move towards even smarter diagnostics, with AI-powered apps that analyze patterns and predict failures before they happen. This proactive approach will redefine how we maintain appliances, making repairs more predictive and less reactive.
How do I maintain my dishwasher over time?
To keep your dishwasher in top shape, follow a routine maintenance schedule. Regularly clean filters and spray arms to prevent clogging. Use a mixture of vinegar and baking soda monthly to remove mineral buildup and odors. Check the door latch and seals for wear and replace them if they become loose or cracked. Inspect electrical connections periodically, especially after power surges or storms. Keep a repair log to track parts replaced and issues encountered, which can help diagnose recurring problems more efficiently. Remember, staying ahead with preventive maintenance reduces emergency repairs and extends your appliance’s lifespan. For detailed maintenance strategies, visit this guide on oven repair tips—the principles are similar across appliances.
If you haven’t already, I recommend trying an advanced diagnostic method like using a multimeter to test the control board’s voltage outputs directly. This technique often reveals subtle electrical faults that aren’t obvious with visual inspection alone. Practicing these precise tests will make you a more confident DIY repairer and help you catch issues before they escalate. Remember, the right tools paired with consistent maintenance are your best defense against costly breakdowns. Keep your dishwasher running smoothly in 2025 by investing in quality diagnostic tools and sticking to a maintenance routine. Your future self will thank you for it!
Ever struggled with a dishwasher that refuses to start or leaks unexpectedly? My own experience with a stubborn dishwasher just before a big family gathering turned into a valuable lesson in diagnostics and quick fixes. Instead of calling a technician and waiting days, I learned to troubleshoot efficiently, saving time and money. If you’re eager to become more self-reliant and fix your dishwasher faster this year, keep reading. I’ll share insider knowledge, proven strategies, and the best tools to streamline your repair process in 2025.
Lessons That Changed My Approach to Repairs
- Deep diagnostics trump surface fixes: I used to replace parts based on visible damage, but I realized that electrical wiring and control boards often hide underlying issues that need testing with a multimeter.
- Knowing error codes is just the start: Decoding error signals without understanding their context can lead to misdiagnosis. I now cross-check error codes with physical inspections for better accuracy.
- Safety is non-negotiable: Always disconnect power before opening the dishwasher. Using insulated tools and verifying circuits has kept me safe during every repair.
- Preparation saves time: Having a set of quality spare parts and diagnostic tools ready means I can fix issues on the spot, avoiding multiple trips to the store.
- Preventive maintenance is key: Regular cleaning of filters, spray arms, and seals drastically reduces breakdowns and extends appliance lifespan.
Tools and Resources That Made a Difference
- Multimeter: I trust the Fluke 117 for its accuracy in testing electrical components, helping me quickly identify faulty switches or control boards.
- Diagnostic apps: Some smart dishwashers connect to apps that display error codes and troubleshooting steps, saving me guesswork.
- Spare parts kit: Having door latches, filters, and spray arms in stock allows for immediate replacements. I recommend sourcing from reputable suppliers listed on this guide.
- Inspection tools: Small mirrors, flashlights, and leak detectors help me find hidden issues behind panels or under the machine.
- Cleaning supplies: Vinegar, baking soda, and brushes keep my dishwasher running smoothly and prevent problems before they start.
Take Action and Transform Your Repair Skills
Now is the perfect time to embrace DIY dishwasher repairs with confidence. The key is systematic diagnosis, safety-first practices, and having the right tools at hand. Remember, every repair is a learning opportunity—so don’t be discouraged by setbacks. With patience and the right approach, you’ll save money, extend your appliance’s life, and gain a satisfying sense of accomplishment. Ready to tackle your next dishwasher issue? Dive into expert guides and start practicing today. Your future self will thank you for it!