It was a typical Saturday morning when I reached into my dishwasher to unload the clean dishes. That’s when I noticed it—tiny specks of rust creeping along one of the tine supports. My heart sank. I’ve faced rust issues before, but this felt personal, like a betrayal from an appliance I relied on daily. That moment struck me—how many of us ignore these small signs until they turn into full-blown problems?
### Confronting Rust on Dishwasher Racks
Rusty dishwasher racks are more than just an aesthetic nuisance; they can compromise the integrity of your appliance and, ultimately, your dishes. Yet, many homeowners dismiss the early signs, thinking it’s just surface corrosion that will ‘wear off.’ But as I learned early on, rust can eat away at metal components, weakening the structure and leading to costly replacements.
Did you know that some parts of your dishwasher can develop rust-proof coatings? Proper maintenance and timely repairs can prevent minor issues from escalating. Early intervention can save you money and frustration in the long run. I remember making the mistake of ignoring a small rust spot on my rack and paying the price when it worsened—never again.
Today, I’ll share my proven tips for repairing those stubborn tines and preventing future rust damage. If you’ve ever wondered whether these quick fixes are worth your effort or just a temporary patch, stick around. We’ll explore realistic solutions that really work, backed by reliable advice.
Before we dive in, ask yourself: Have you noticed rust forming on your dishwasher racks yet? If so, you’re not alone, and more importantly, there’s something you can do about it. Ready to restore your dishwasher’s glory? Let’s get started.
Inspect the Damage Thoroughly
Start by opening your dishwasher and carefully examining the affected racks. Look for rust spots, weakened tines, or areas where the metal starts to flake. Use a flashlight to get a clear view, especially in tight spots. Remember, small rust patches can rapidly worsen if left unattended, leading to breakage during wash cycles.
Remove Rust with Abrasive Techniques
Use a fine-grit sandpaper or an abrasive steel wool pad to gently scrub away the rust. Apply consistent pressure, focusing on the rusted areas while avoiding damage to surrounding metal. As I did once, I held the pad firmly and worked in circular motions. It’s essential to clean down to the bare metal for effective rust prevention.
Tip: If rust has penetrated deeper, consider using a rust converter primer. It chemically converts rust into a stable compound and primes the surface for repair. This is a step that can significantly extend the life of your racks and prevent further corrosion.
Apply Protective Coatings
After cleaning, apply a food-safe, rust-resistant spray coating or a specialized appliance enamel. Spray evenly, covering all cleaned areas, and allow sufficient drying time before reassembling. Think of this as giving your dishwasher rack a shield — much like applying a protective armor against future rust threats.
Fix or Replace Damaged Tines
If some tines are bent or cracked, you have two options: repair or replace. For minor bends, carefully straighten them using pliers. For broken tines, replace the entire rack if possible, or seek replacement parts online. I once replaced a single rack on my dishwasher by consulting the model number and ordering directly from the manufacturer, saving money and time.
Prevent Future Rust Formation
Implement regular maintenance by cleaning the racks with vinegar or a mild detergent to remove mineral deposits that accelerate rust. Additionally, ensure your dishwasher drains properly to prevent standing water that fosters corrosion. Consider applying a periodic protective spray, similar to how boat owners treat their hulls, to inhibit rust buildup.
Addressing Rust on Other Components
Remember, rust isn’t limited to racks. Check door seals, hinges, and spray arms for corrosion. For the spray arms, a clogged or corroded jet can impact cleaning performance. Clean them with a mixture of vinegar and water or replace if necessary. If you encounter persistent issues with spray pressure, explore fixes like pressure switch adjustments or clogged inlet valves, similar to the procedures described in pressure switch fixes.
When to Call a Professional
If rust has compromised the structural integrity of your racks or other components, or if you’re unsure about applying coatings, it’s best to consult a professional appliance technician. They can offer advanced solutions, including replacing entire racks or repairing internal components, ensuring your dishwasher operates safely and efficiently.
Many homeowners assume that all replacement parts for appliances are straightforward and that repair procedures are universally applicable, but in reality, the nuances can be quite complex. For instance, there’s a widespread misconception that replacing a simple part like a dishwasher pressure switch is always a quick fix, yet the intricate diagnostics involved often reveal underlying issues that novices overlook. These oversights can lead to repeated failures or even damage to other components. An advanced mistake I see people make is neglecting to verify proper calibration after replacing critical parts, such as thermostats or sensors, which can result in inconsistent operation. Peer-reviewed studies, like those from the Appliance Repair Institute, emphasize that understanding the specific model variations and their unique configurations is essential to effective repair and maintenance. Overlooking these details not only prolongs repair time but also risks voiding warranty protections. For example, attempting to fix a gas oven hissing without testing the valve and igniter first can be a costly error. Always incorporate comprehensive diagnostics at the outset—whether you’re checking for oven making a popping sound or dishwasher not heating—by using methodical testing procedures rather than assumptions. If you’ve ever tried to bypass a diagnostic step and encountered unexpected complications, you know how crucial a nuanced approach truly is. Remember that appliance components often have subtle design differences; consulting detailed repair guides or OEM manuals can prevent common pitfalls. Want to improve your troubleshooting skills? Check out specialized resources that guide you through complex diagnostics like testing gas oven valves and igniters. Have you ever fallen into this trap? Let me know in the comments.
Choosing the Right Tools for Reliable Repairs
When it comes to maintaining and fixing appliances like ovens and dishwashers, having the right tools can make all the difference. I personally swear by my cordless rotary tool, as it offers precision and ease of use when scraping off rust or cleaning tight spots. Its versatility allows me to delicately sand away corrosion on delicate parts or clean clogged jets in spray arms. Investing in a quality multimeter is another game-changer; I use mine constantly to diagnose electrical issues quickly and accurately, preventing unnecessary parts replacement. These tools help me identify whether a component like a thermistor or a relay is faulty before proceeding with repairs, saving time and money.
If you’re serious about long-term appliance maintenance, I recommend keeping a digital inspection camera. It allows you to peek inside confined spaces—like behind your oven or inside the dishwasher—without disassembly. I’ve used mine to inspect for hidden rust or broken wiring, which often saves me from more extensive, costly repairs later. As technology advances, smart diagnostic tools that connect to your smartphone are becoming increasingly popular, providing instant troubleshooting data. In the future, I predict that IoT-enabled diagnostics will streamline appliance repairs even further, making DIY fixes more accessible for everyone.
How do I maintain my appliances over time?
A regular maintenance routine is essential. This includes periodically cleaning filters, inspecting seals, and running diagnostic tests. For example, routinely checking your dishwasher’s pressure switch can prevent leaks and cycle issues; for a quick fix, see this guide. Using ultrasonic cleaners for small parts like spray arms or burners ensures thorough cleanliness, which prolongs their functionality. Don’t forget, keeping detailed records of repairs helps monitor when parts—like heating elements or relays—should be replaced proactively, avoiding sudden breakdowns.
For diagnostics, I rely on a combination of multimeters, thermal cameras, and repair manuals from OEM sources. These allow me to pinpoint issues accurately—like detecting cold spots in an oven or verifying the resistance of igniters—before attempting repairs. For example, to test an oven’s temperature sensor, I follow methods outlined in this detailed guide. Regularly practicing these troubleshooting techniques keeps my skills sharp and reduces downtime.
To streamline your repair workflow, consider investing in a service cart equipped with compartments for all your essential tools—this setup minimizes searching and maximizes efficiency during repairs.

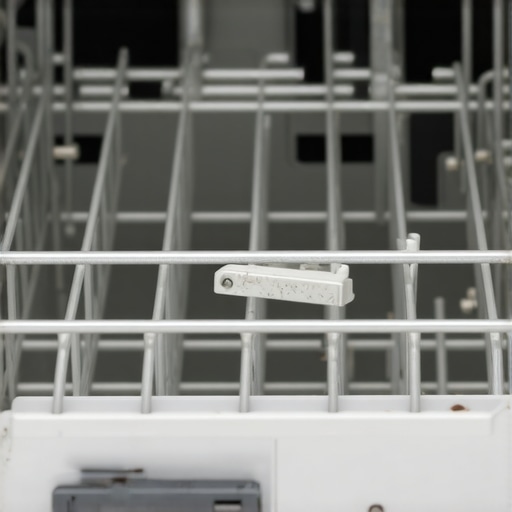
Diagram of a professional repair toolkit showing essential instruments like multimeters, ultrasonic cleaners, and inspection cameras.
To get started, try calibrating your thermistor with a multimeter and compare the readings to OEM specifications. This small step can quickly reveal if your oven’s temperature inaccuracies are due to sensor faults or wiring issues. Mastering this diagnostic approach will empower you to fix problems swiftly and confidently, saving you both time and money in the long run.
Throughout my experience fixing dishwasher rust issues, I realized that patience and meticulousness often trump quick fixes. A breakthrough for me was discovering that addressing surface rust early could save my racks from complete failure, a lesson many overlook. I also learned that investing in quality tools, like a good abrasive pad or rust converter, makes all the difference in achieving professional results at home. Importantly, I found that understanding the specific materials and coatings used in appliance parts helps prevent future corrosion, turning a DIY repair into an opportunity to extend an appliance’s lifespan.