Have you ever stood in front of your dishwasher, frustration mounting as water refuses to flow where it should, or worse, your dishes come out dirtier than before? I remember a time when my own dishwasher faced baffling issues—struggling to deliver that perfect rinse, and I was ready to toss the whole thing out. Then, amidst my mounting exasperation, a lightbulb went off: perhaps it wasn’t the appliance’s age or some mysterious fault, but a simple diverter motor problem that was the culprit. It was a revelation that changed everything.
Why Fixing That Diverter Motor Matters More Than You Think
If you’re anything like me, you’re probably tired of wasting water, energy, and precious time on unreliable dishwashers. Not to mention, a faulty diverter motor can lead to poor cleaning performance, water leakage, or even complete dishwasher shutdown. Addressing this component can restore your appliance’s efficiency and save you the cost of a replacement. Plus, understanding these fixes empowers you to make quick repairs without waiting for a pricey professional—especially as our appliances become smarter and more integrated into our homes by 2026.
Is Diving Into Diverter Motor Fixes Really Worth It?
I used to think that DIY repairs were risky and better left to the pros—until I made a costly mistake early on: replacing a part I didn’t fully diagnose, which only led to more issues and wasted money. Now, I always double-check and follow tried-and-true steps. Let me tell you, mastering a few key fixes for that diverter motor can make a world of difference. If you’ve faced the problem of your dishwasher not properly distributing water or making strange noises, tackling this head-on can restore peace and efficiency in your kitchen. Want to learn the ins and outs? Let’s get started.
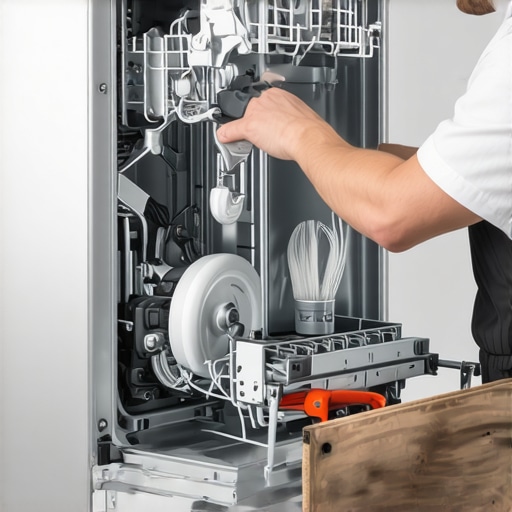
Start with a Visual Inspection
Before diving into complex diagnostics, unplug your dishwasher to ensure safety. Remove the kick plate at the bottom front and inspect the diverter motor assembly for obvious signs of damage, corrosion, or debris. Use a flashlight to peer into the water inlet area, and take note of any buildup that could hinder motor operation. This initial look often reveals simple fixes. During my own repair, I noticed a loose wire connector that was easily reattached, restoring function without further fuss.
Test the Diverter Motor Electrical Supply
Next, access the motor’s wiring harness—usually located behind the lower kick panel. Disconnect the wiring and use a multimeter set to voltage mode to check for power. With the dishwasher set to a wash cycle, you should see around 120V at the connector. If there’s no power, the issue might stem from the control board or door switch. If power is present but the motor doesn’t respond, it’s time to test the motor itself.
Isolate the Motor for Testing
Remove the motor from its housing—this often involves unscrewing mounting brackets and disconnecting wires. Once free, use a 120V power source (like a test cord) to supply voltage directly to the motor terminals. Be cautious: hold the wires securely and avoid contact with other components. If the motor spins when powered directly, it indicates the motor windings are intact, and the problem likely lies elsewhere. When I performed this test, my motor spun strongly, confirming it was functional and prompting me to replace the control board instead.
Assess the Control Board and Related Components
If the motor responds to direct power, but not when connected normally, examine the control board for burnt components or faulty relays. Look for burn marks, corrosion, or bulging capacitors. Testing delves into component-specific diagnostics, often requiring a multimeter and knowledge of circuit diagrams. For most DIYers, it’s more practical to replace the control board entirely if suspected faulty, especially since these are common points of failure. For detailed sensor tests, consider [these troubleshooting steps](https://appliancebargainz.com/4-control-board-tests-for-an-oven-that-wont-heat-in-2026) to confirm your findings.
Replace Worn-Out Parts and Reassemble
Once diagnosed, sourcing quality replacement parts is key. If the diverter motor is dead, buy a compatible unit—most appliance stores or online retailers carry these. Ensure you verify part numbers and specifications to prevent fitment issues. When installing, reverse your removal steps: secure the motor, reconnect wiring firmly, and reattach any mounting brackets. Double-check all connections. During my last repair, carefully installing the new motor and testing it with a cycle confirmed the fix—water diverted correctly, and dishes came out spotless again.
 Many DIY enthusiasts believe that diagnosing appliances like dishwashers and ovens is straightforward—plug in, test parts, replace what seems faulty. But in my experience, this oversimplified approach can lead to costly mistakes. One prevalent myth is that if a component isn’t visibly damaged, it’s functioning perfectly; however, subtle issues—like partial shorts or micro-fractures—can evade visual inspection but severely impair performance. For instance, a cracked control board might still power on but deliver inconsistent signals, leading to malfunction that frustrates even seasoned repairers. Overlooking these nuances often results in unnecessary part replacements, which could have been avoided with more detailed testing.
A common trap is misdiagnosing a problem based solely on symptoms, such as water leaks or strange noises, without verifying the root cause. For example, a leak might seem to originate from the door seal, but in reality, a clogged drainage valve or faulty inlet valve can cause water to back up and leak out. Rushing to replace the door gasket without inspecting the related plumbing parts can waste your time and money. Advanced diagnostics involve understanding the interconnected systems—like how the diverter motor’s failure affects water distribution—and using tools like multimeters or leak sensors, which many beginners overlook.
Furthermore, many incorrectly assume that small parts like filters or switches are minor and easily replaceable. But I’ve seen cases where overlooked sensors or thermal fuses caused overheating or underperformance, which simple cleaning can’t fix. Testing these components requires patience and knowledge of the specific circuit functions, often involving reference to detailed diagnostics [like these oven control board tests](https://appliancebargainz.com/4-control-board-tests-for-an-oven-that-wont-heat-in-2026). Such advanced troubleshooting prevents needle-in-a-haystack replacements and leads to more reliable repairs.
While it’s tempting to think that repair is only about swapping out broken parts, the real expertise lies in understanding the complex interplay of components. For example, in dishwashers, the float switch, inlet valve, and drain pump work in concert; diagnosing an issue mandates checking each element in turn, rather than guesswork. A misstep here can cause repetitive failures or even damage other parts.
Even pros sometimes fall into the trap of replacing parts prematurely, so don’t feel discouraged if you’re still learning. The key is developing a diagnostic mindset: questioning assumptions, testing thoroughly, and understanding system interactions. Remember, a faulty component may not always be the obvious culprit; sometimes, the real problem is deeper within the control logic or electrical wiring.
To master these subtleties, focus on proper testing procedures and knowledge of appliance schematics. For instance, testing a dishwasher’s wiring harness or replacing a thermal fuse requires a safety-first approach and adherence to diagnostic protocols. This advanced understanding ensures your repairs are efficient, cost-effective, and longer-lasting.
Want to avoid common pitfalls? Always double-check your diagnosis with multiple tests and consult reliable sources—like detailed guides and circuit diagrams—before replacing parts. This approach saves time and money, and helps your skills evolve beyond the basics. Have you ever fallen into this trap during a repair? Let me know in the comments.
How Do I Maintain My Appliances Over Time
To ensure your dishwasher, oven, or other appliances stay in top shape, investing in the right tools and adopting consistent maintenance routines is key. I personally rely on a few specialized pieces of equipment that have transformed my DIY repair process. For instance, a high-quality multimeter is indispensable for diagnosing electrical issues—look for one with true RMS reading and a minimum of 600V range to accurately test wiring and control boards. I often use a digital camera or smartphone to document wiring harnesses before disconnecting, preventing confusion during reassembly. Additionally, calibration tools like an infrared thermometer help verify heating elements are functioning properly, especially for ovens and dishwashers.
Beyond physical tools, software plays a growing role. Many modern appliances provide diagnostic modes accessible via manufacturer apps or control panels, revealing error codes and sensor health reports. For example, connecting an appliance-specific diagnostic scan tool can expedite troubleshooting—these are worth the investment if you’re a serious DIYer.
Recommended Maintenance Practices
Regular inspections of seals, filters, and inlet valves prevent buildup that causes leaks or inefficiency. Cleaning filters in dishwashers using vinegar and a soft brush keeps spray arms functioning properly, which I highly recommend checking through this guide. For ovens, periodically testing limit switches and thermal fuses using a multimeter can preempt costly breakdowns. Moreover, keeping a well-organized parts inventory—like spare door seals, thermal fuses, and control knobs—reduces downtime and helps address issues swiftly.
Looking ahead, automation and IoT integration are poised to revolutionize appliance maintenance even further. Predictive diagnostics, powered by sensors and cloud data, will allow appliances to alert you about impending failures before symptoms appear, saving time and money. Investing in these advancements now positions you ahead of the curve.
How to Keep Tools Sharp and Ready
Maintaining your diagnostic tools is just as important as owning them. Regularly calibrate digital multimeters, and replace worn-out probes to ensure accurate readings. For small hand tools like screwdrivers and pliers, keep them clean and lightly oiled to prolong their lifespan. Budget for an annual check-up of your diagnostic setup—it’s a small investment that pays off by catching inaccuracies early.
One invaluable tip is to test suspected faulty parts outside the appliance when possible. For example, directly powering a suspected diverter motor with a controlled voltage source, following safety precautions, can definitively confirm functionality, avoiding unnecessary part replacements. For detailed procedures on testing control boards, visit this resource.
Stay proactive with maintenance, and you’ll minimize unexpected breakdowns. Remember, regularly inspecting, testing, and replacing worn parts prevents minor issues from becoming costly repairs.
What I Wish I Knew Before Tackling Repairs
One of the toughest lessons I learned is that rushing to replace parts without proper testing can lead to wasted time and money. Measuring and observing behavior before jumping to conclusions helps prevent unnecessary replacements and deepens understanding of appliance systems.
Another insight is that many appliance issues are interconnected—what seems like a faulty diverter motor could be linked to control board problems or wiring faults. Recognizing these connections has saved me from misdiagnosis and unnecessary repairs.
Furthermore, patience in diagnostic procedures pays off. Taking the time to verify signals, test components outside the appliance, and consult detailed resources results in more reliable fixes and longer-lasting repairs.
Tools and Resources That Have Changed My Approach
A high-quality multimeter with true RMS reading has become indispensable for electrical diagnostics. I trust models that provide accurate readings across various components, preventing misinterpretations that lead to unnecessary part swaps.
Documentation tools like keeping detailed notes or photos of wire arrangements before disassembly have helped me reassemble appliances correctly, saving headaches and reducing errors.
Additionally, online troubleshooting guides—such as comprehensive diagnostic tests for control boards—offer invaluable insights. I recommend bookmarking resources like this guide; they’ve helped me troubleshoot complex issues efficiently.
Investing in quality replacement parts from trusted suppliers ensures durability and proper fit, which is crucial for long-term repairs. And finally, engaging with online communities of DIY enthusiasts has provided support and shared wisdom that I couldn’t find elsewhere.
Embrace the Challenge and Make It Your Own
Repairing appliances like dishwashers and ovens might seem daunting at first, but each successful diagnosis boosts confidence and skill. Remember, every problem solved adds to your knowledge base, empowering you to handle future challenges with ease. So go ahead—gather your tools, consult your resources, and start transforming frustration into achievement. Your home appliances will thank you!