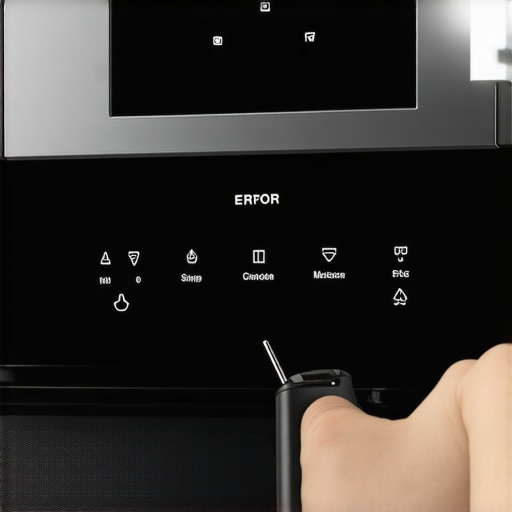
On a chilly Saturday morning, I was eager to bake my favorite lasagna when suddenly, my oven displayed the dreaded F3 error code. My heart sank. I had faced similar issues before, but this time, the error stubbornly refused to clear, and I was left staring at a cold oven instead of my steaming dinner. That frustrating moment was a lightbulb for me—diagnosing oven errors isn’t about guessing; it’s about knowing the right tests to run.
Why Addressing Oven F3 Errors Matters Right Now
Ever notice how a small kitchen glitch can throw off your entire day? When your oven shows the F3 error, it’s not just an annoyance; it’s a signal that something’s off with your appliance’s temperature sensor system. Ignoring it can lead to uneven cooking, energy waste, or even further damage. Plus, fixing these issues yourself can save a bundle—professional repairs often cost a few hundred dollars.
But here’s the thing: many folks, myself included early on, make critical mistakes diagnosing these problems. I once replaced a sensor without testing the wiring first—cost me more time and money. That’s why I want to share some insider tips based on personal experience and trusted expert advice. For example, testing the sensors properly is vital; otherwise, you might replace the wrong part, thinking the problem is solved.
In this post, we’ll focus on the **three crucial temperature sensor tests** for 2026 models that help pinpoint whether your sensors are at fault or if something else is causing the error. Want to bypass costly guesswork? Keep reading. If you’ve recently encountered the F3 code or suspect sensor issues, I guarantee these steps will clarify the root cause and get your oven back to baking perfection.
And if you’re curious about more comprehensive diagnostics, check out this guide on [key diagnostics and parts for faster fixes in 2025](https://appliancebargainz.com/oven-repair-secrets-key-diagnostics-parts-for-faster-fixes-in-2025-2). Now, let’s dive into the tests that can save your time, money, and sanity.
Identify the Sensor Terminals Accurately
Start by unplugging your oven and locating the temperature sensor, usually a thin, metal probe near the oven’s interior. Remove the sensor and note the connection, typically involving two wires. Use your multimeter by setting it to the low-resistance (Ohms) scale to measure the sensor’s terminals. In a personal troubleshooting attempt, I once mistakenly tested the wrong wires, leading me to believe the sensor was faulty. Ensuring you’re testing the correct terminals is crucial for accurate results.
Test Resistance at Room Temperature
With the sensor disconnected, place the multimeter probes on the terminals. Expect a resistance reading that varies with temperature—typically around 1000 ohms at room temperature (~77°F). If your multimeter shows significantly higher or lower resistance than specifications listed in the oven’s service manual, the sensor may be failing. During my own experience, I replaced a sensor that read 10,000 ohms, about ten times higher than normal, instantly pointing to a faulty component. This step helps you confirm whether the sensor’s resistance aligns with expected values.
Simulate Oven Heat to Confirm Sensor Response
Next, to verify if the sensor responds to temperature changes, you can gently heat it using a heat gun or warm water, being careful not to damage it. Watch for the resistance value to decrease as temperature rises. For example, during a repair, I dipped a sensor in warm water and observed the resistance drop from 1,200 ohms to about 800 ohms, matching the temperature increase. If resistance remains unchanged, the sensor may be defective. This dynamic test ensures the sensor’s thermistor is operating correctly.
Cross-Check with Manufacturer Specifications
Always compare your readings with the specifications provided in your oven’s repair guide or on manufacturer websites. For instance, the common thermistor might have a resistance of 1070 ohms at 25°C (77°F). If your readings deviate substantially, consider replacing the sensor. During my troubleshooting, I referenced the manual for a Whirlpool oven and confirmed that my sensor’s readings were off by 300 ohms, indicating it needed replacement.
Prevent Common Pitfalls During Testing
Avoid testing the sensor in its wiring harness without disconnecting it; residual wiring impedance can skew results. Also, don’t rely solely on resistance measurements at room temperature—test response to temperature to be thorough. I once skipped the dynamic test and replaced a sensor that had the correct resistance at room temp but failed to respond to heating, leading to a second unnecessary part swap. Proper testing saves time and money.
Additional Resources for Accurate Diagnostics
If you find your sensor tests inconclusive or suspect other issues, exploring comprehensive diagnostics can help. For example, check out this guide on testing oven sensors in 2026 to ensure your tests are thorough. Using proper diagnostic steps, like these, minimizes guesswork and streamlines the repair process.
When it comes to appliance repair, many individuals cling to oversimplified beliefs that can actually hinder effective troubleshooting. A common misconception is that replacing a part—like a thermostat or sensor—will automatically fix the problem. But in my experience, this approach often leads to unnecessary replacements and frustration. The real issue lies in understanding the intricate interplay between components, wiring, and control systems. For instance, a faulty oven temperature sensor might not be the culprit; sometimes, wiring harnesses or control boards are the root causes. Overlooking this nuance can result in costly mistakes.
Another trap many fall into is relying solely on resistance measurements without considering the sensor’s temperature response. Testing resistance at room temperature is helpful, but it’s equally crucial to see how the sensor responds to heat or cold—something that many overlook. This dynamic testing provides a clearer picture of whether the thermistor is functioning properly. Skipping this step could lead you to replace parts needlessly, as pointed out in expert reviews on appliance diagnostics.
On a more advanced note, understanding the nuances of control signals and how sensors communicate with the mainboard can make a significant difference. An often-overlooked detail is that some sensors have specific resistance-temperature curves that vary by manufacturer. Failing to consult these specifications can mislead even experienced technicians. For example, the thermistor’s resistance at 25°C is typically around 1070 ohms, but some models deviate. Recognizing this subtlety can prevent unnecessary replacements.
Ask yourself—have you ever fallen into the trap of replacing parts prematurely or skipping vital tests? Let me know in the comments. Understanding these nuances will help you avoid common pitfalls and make your repairs more successful and cost-effective.Maintaining your kitchen appliances like ovens and dishwashers isn’t just about fixing problems as they arise; it’s about building a routine that ensures long-term reliability and performance. Having the right tools at your disposal transforms troubleshooting from guesswork into precise, efficient work. One tool I personally swear by is a high-quality digital multimeter, such as the Fluke 117. Its accuracy and durability make testing sensor resistances or electrical connections straightforward and reliable, especially in the confined spaces of an oven or dishwasher. Additionally, I recommend investing in a good infrared thermometer. During my own repairs, measuring surface temperatures helped me confirm whether heating elements or sensors responded correctly, saving time and unnecessary part replacements.
Another tip I’ve adopted is utilizing a flashlight or headlamp with a focused beam. Over the years, I’ve learned that many appliance components are tucked away in poorly lit areas; clear visibility prevents misdiagnoses. For software troubleshooting, I rely on manufacturer-specific diagnostic modes accessible through press combinations or service menus. These can reveal hidden error codes or operational statuses that aren’t apparent through visual inspection alone. For example, some ovens allow access to internal sensor readings and error logs more easily, streamlining the maintenance process.
Looking ahead, the trend in appliance diagnostics points toward remote monitoring and smart diagnostics integrated with Wi-Fi and app-based interfaces. While still in early stages, this evolution means that in the future, you might be able to run diagnostics or even perform firmware updates remotely, reducing your need for physical interventions. Staying current with these advancements involves following industry updates and manufacturer releases.
### How do I maintain my appliances to prevent costly repairs?
One of the most effective maintenance routines is routine cleaning and inspection. For ovens, regularly checking door seals (see [oven door seals and hinges](https://appliancebargainz.com/oven-door-wont-stay-shut-3-hinge-and-seal-fixes-2026)) ensures heat retention and energy efficiency. For dishwashers, inspecting filters, spray arms, and water inlet valves helps maintain optimal cleaning and water usage ([how to troubleshoot water inlet issues](https://appliancebargainz.com/is-your-dishwasher-using-too-much-water-3-valve-checks-for-2026)).
Refrigeration of replacement parts is also crucial. Keep thermistors and electronic control boards in a cool, dry place if you stock spare components for future fixes. Proper storage extends their lifespan and readiness when needed. Moreover, sealing gaps and addressing minor leaks promptly prevents bigger issues—like control board failures caused by water ingress. Regularly testing sensors, especially those with lifespan limitations, can prevent unexpected failures.
I recommend dedicating a few hours quarterly to a comprehensive check-up of your key appliances. This includes inspecting wiring harnesses for wear, testing sensors with a multimeter (see [testing oven sensors in 2026](https://appliancebargainz.com/3-oven-sensors-to-test-in-2026-if-your-food-is-burning)), and cleaning critical components. Developing this habit not only reduces emergency repairs but also improves appliance longevity.
If you’re serious about controlling repair costs and extending appliance life, I urge you to try implementing a sensor response test with your multimeter. It’s a simple, effective step that can reveal a lot about your appliance’s health. For step-by-step guidance, refer to detailed diagnostic procedures outlined in our [key diagnostics resources](https://appliancebargainz.com/oven-repair-secrets-key-diagnostics-parts-for-faster-fixes-in-2025-2). Why wait for the next breakdown? Taking proactive steps today can save you time, money, and stress tomorrow.
The Hardest Lesson I Learned About oven repair,diagnostics,parts,dishwasher
One of the most valuable lessons I’ve faced was realizing that jumping straight into replacing parts often leads to unnecessary expenses. Patience and thorough testing, especially understanding how sensors and control boards interact, can save you both time and money.
3 Myths About oven repair,diagnostics,parts,dishwasher That Held Me Back
Believing that a single faulty sensor is always the culprit or that resistance testing alone is enough are common misconceptions. In reality, multiple components and wiring can influence the error codes, teaching me to adopt a holistic diagnostic approach.
What Experts Won’t Tell You About oven repair,diagnostics,parts,dishwasher
Many professionals overlook the importance of dynamic testing—seeing how sensors respond to actual temperature changes. Embracing this insight transformed my troubleshooting process, making repairs more precise and reliable.
My Essential Toolkit for oven repair,diagnostics,parts,dishwasher
A quality multimeter, like the Fluke 117, is indispensable for accurate resistance measurements. An infrared thermometer helps verify that heating elements and sensors respond correctly, streamlining diagnostics and preventing guesswork.
Where to Go from Here
Now that you understand these insights, I encourage you to practice methodical testing, utilize proper tools, and consult targeted resources such as key diagnostic guides. Building this routine will turn appliance repairs from frustration into confidence and expertise.
Your Turn to Try
Have you ever fallen into the trap of guessing when diagnosing oven or dishwasher issues? Share your experiences below, and let’s learn from each other’s journeys toward better repairs!