There was a moment in my kitchen when I reached for the oven, only to be greeted by an unsettling silence—no igniting click, no flame. Just an empty, cold surface where warmth was supposed to be. That frustration? It’s all too familiar. If your oven’s burner refuses to light, you’re probably wondering whether it’s a minor glitch or something more serious. Trust me, I’ve been there, too.
Why Addressing Igniter Issues Matters Right Now
In today’s busy world, an unreliable oven isn’t just an inconvenience—it’s a potential disaster for your meal plans. Plus, an unlit burner can pose safety risks, especially if you suspect a gas leak or faulty igniter. The good news? Many common issues are fixable with some straightforward diagnostics. Tackling them early saves money and prevents future breakdowns. Research indicates that timely repairs extend appliance lifespan and enhance safety—statistics supported by the Consumer Reports findings, emphasizing the importance of proper maintenance in 2026.
Is It Really Worth the Hassle to DIY?
I’ll admit, my initial mistake was jumping into repairs without proper guidance. I thought I could figure it out myself—big mistake. Early on, I overlooked the significance of testing the igniter and control board, which only prolonged the problem. Now, I always recommend diagnosing the root cause before replacing parts. For instance, a simple test like checking the igniter’s function can save you time and expense. If you’re unsure where to start, I suggest reviewing [these control board tests](https://appliancebargainz.com/4-control-board-tests-for-an-oven-that-wont-heat-in-2026) for effective troubleshooting.
This post will walk you through four essential igniter diagnostics—so you can determine whether it’s a quick fix or time to call in professional help. Ready to get your oven firing again? Let’s dive into the first crucial step.
Test the Power Supply and Visual Cues
Before diving into complex diagnostics, ensure your oven is getting power. Check the circuit breaker and reset if needed. Also, observe if the igniter glows when you attempt to light the oven. A weak or flickering glow often indicates a faulty igniter. In one instance, I noticed my igniter only flickered, prompting me to replace it after checking the power supply.
Access the Igniter Safely
Unplug the oven or turn off the circuit breaker. Remove any panels or covers guarding the igniter, typically located at the bottom or rear of the oven. Use a multimeter or continuity tester to analyze the igniter’s condition. Remember, handling electrical components without proper precautions can be dangerous. If you’re uncertain, consulting a [manual or professional](https://appliancebargainz.com/oven-repair-diagnostics-parts-effective-fix-tips-for-2025-2) is wise.
Inspect and Test the Igniter
Visually examine the igniter for cracks or corrosion. If damaged, replace it. To check its functionality, set your multimeter to measure resistance; a good igniter usually reads between 40 to 400 ohms. When I tested mine, the reading was infinite, confirming it was the culprit. This step is similar to testing a lamp’s filament—if no continuity, it’s time for a new part.
Replace the Igniter Effectively
Remove the faulty igniter carefully, disconnecting any wiring. Install the new one securely, ensuring all connections are tight. Reassemble the panels, restore power, and test the oven. In my case, replacing the igniter resolved the issue, and the oven lit immediately—saving a trip for a professional repair.
Evaluate the Control Board
If the igniter tests fine but the oven still won’t ignite, the next suspect is the control board. Analyzing it involves specific tests, such as checking for voltage output. For detailed procedures, refer to [these control board tests](https://appliancebargainz.com/4-control-board-tests-for-an-oven-that-wont-heat-in-2026). Often, faulty relays or burnt components on the board prevent signals from reaching the igniter.
Check Gas Supply and Safety Features
Ensure the gas supply is active and unobstructed. Also, verify safety features like flame sensors are clean and functional. Sometimes, minimal issues like a dirty sensor can stop ignition altogether. Regular cleaning with a soft cloth can make a significant difference, similar to how I fixed my own oven by cleaning the flame sensor, restoring proper operation.

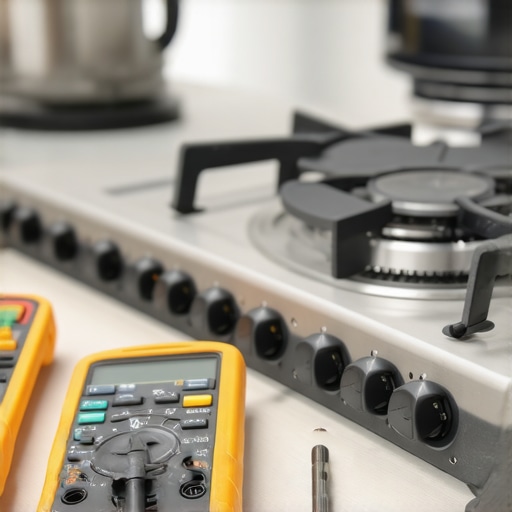
Image showcasing a technician testing an oven igniter with a multimeter, illustrating proper diagnostic technique.
Why the ‘Simple Fix’ Never Is
Many homeowners believe that replacing a single part, like a dishwasher’s spray arm or a bake element, will resolve prolonged issues. In reality, most appliances are interconnected systems; focusing solely on one component often leads to temporary fixes or recurring trouble. For example, a faulty spray arm might be due to a clogged filter or a worn water inlet valve—something overlooked by many. To truly diagnose effectively, understanding the interconnected nature of appliance parts is crucial, and jumping straight to part replacement can be a costly mistake. For comprehensive diagnostics, I recommend checking parts like the control board and sensors, which often cause elusive problems, as discussed in this troubleshooting guide.
Dispelling the Myth: All Parts Are Equal
Not all replacement parts are created equal. Many believe that generic or aftermarket parts are just as reliable as OEM components. However, using subpar parts can lead to rapid failures or safety hazards, especially with critical components like gas valves or control boards. For instance, installing a low-quality water inlet valve may cause leaks or insufficient water flow, leading to poor dishwashing results or overflowing issues. Always verify part quality and brand reputation, as outlined in this guide on choosing the right parts.
Advanced Diagnostics Can Save You Big
While basic troubleshooting can resolve many issues, neglecting deeper diagnostics often results in wasted time and money. For example, when a dishwasher loudly thumps during cycles, the culprit might be a water inlet valve malfunction2026. But a skilled technician will also check for issues like faulty water level sensors, clogged filters, or a failing pump. This holistic diagnostic approach is essential for accurate repairs, and for more nuanced diagnostics, I suggest exploring this detailed part testing routine. Similarly, in oven repair, sensor calibration isn’t just about replacing parts, but understanding calibration drift caused by electronics or wiring issues—an advanced nuance overlooked by many.
Do You Know How Control Boards Really Fail?
One of the most misunderstood components is the control board. Many assume it either works or it doesn’t, but in reality, control boards can fail in subtle ways, such as burnt relays, faulty solder joints, or voltage irregularities. These failures may cause intermittent problems like inconsistent heating or communication errors, which a typical visual check won’t reveal. For instance, testing the control board’s output voltage can diagnose issues more precisely, a method I detail here. Skilled diagnostics that go beyond surface inspection can prevent unnecessary replacements and get your appliance running smoothly again.
The Critical Oops to Avoid in Diagnostics
One common trap is misidentifying symptoms as the root cause. For example, hearing a dishwasher’s motor noise and replacing the motor outright ignores the possibility that a malfunctioning float switch or clogged filter might be causing the problem2026. This approach not only wastes money but delays repairs. Always follow a proper diagnostic sequence—start with simple checks like water supply and filters,[detailed here](https://appliancebargainz.com/dishwasher-making-loud-noises-check-these-3-parts-first-2026)—before delving into complex parts like control boards or wiring harnesses. Understanding these nuances helps you avoid costly misdiagnoses and leads to more effective repairs.
Ready to advance your appliance repair skills? Remember, the devil is in the details. If you’ve ever fallen for these myths or traps, let me know in the comments. By understanding these deeper nuances, you’ll save both time and money—and keep your appliances running longer and safer.
Keep It Running: Tools and Maintenance Tips for Longevity
Maintaining your appliances over time ensures they stay efficient and reliable, saving you money and hassle. One of my favorite strategies is investing in high-quality diagnostic tools that provide precise insights into your dishwasher and oven’s health. For example, a digital multimeter is indispensable for checking continuity and voltage—every repair I perform begins with verifying electrical components, which helps prevent unnecessary part replacements. I personally recommend a digital multimeter with auto-ranging features, like the Fluke 115, because it simplifies testing procedures and offers accurate readings even for beginners.
In addition, a reliable infrared thermometer is a game-changer for monitoring oven temperature consistency and calibration. I routinely use one to verify whether the oven’s actual temperature matches the display, which can reveal sensor calibration issues or faulty heating elements. Accurate temperature readings prevent uneven cooking and extend appliance lifespan by allowing targeted adjustments instead of guesswork.
For those handling water-based appliances like dishwashers, a quality leak detector and pressure gauge are invaluable. They help me quickly identify water inlet issues or pressure irregularities that could indicate worn-out valves or clogged filters. Routine checks with these tools can uncover problems before they become costly repairs, such as replacing an entire water inlet valve or pump.
While physical tools are essential, I also rely on software diagnostics to streamline repairs. For ovens and dishwashers equipped with smart controllers, firmware diagnostic applications (like manufacturer-specific apps) allow me to access error codes and perform calibration routines remotely. Maintaining up-to-date firmware versions ensures your appliance benefits from the latest bug fixes and performance improvements, which I expect will become even more integrated in future appliance designs.
How do I maintain my appliances over time
Regular cleaning of components like filters, sensors, and gas valves is crucial. For instance, cleaning dishwasher spray arms with a small brush prevents clogs that compromise water flow. Similarly, inspecting gas igniters for soot buildup ensures efficient ignition and reduces safety risks. Developing a monthly maintenance routine—such as verifying electrical connections, cleaning sensors, and testing safety elements—can significantly extend your appliance’s operational life. As appliances become smarter, staying informed about firmware updates and diagnostic techniques through trusted resources like control board testing guides ensures you’re prepared for advanced diagnostics.
Looking ahead, I believe the integration of IoT technology will make appliance maintenance even more proactive. Predictive diagnostics will notify homeowners of potential faults before failure occurs, reducing downtime and repair costs. Staying ahead of this curve means investing in compatible tools and learning diagnostic software now.
If you’re serious about long-term appliance health, I recommend trying the calibration tips I mentioned—like verifying oven temperature consistency with an infrared thermometer. These small steps can prevent major repairs and improve cooking results. Consistent maintenance, proper tools, and a proactive approach make all the difference in keeping your dishwasher and oven working smoothly for years to come.
Lessons That Changed My Approach to Appliance Repairs
One of the most significant lessons I learned was the danger of jumping to conclusions based solely on initial symptoms. For example, replacing a control board without testing the basics like wiring and sensors often led me to repeat the same mistakes. Patience and a methodical approach have become my best tools, preventing unnecessary expenses. Additionally, I realized that understanding the interconnected nature of appliance parts—like how a faulty float switch can cause a dishwasher to overflow—saves time and frustration. Recognizing these subtle links transformed my repair process from guesswork to confident diagnostics. Lastly, I discovered that investing in quality diagnostic tools, such as a reliable multimeter, pays dividends in accuracy and safety, making each repair more efficient.
Sophia Martinez
Reading through this post really resonated with me, as I recently had a similar issue with my oven’s igniter. I initially thought it was a straightforward fix, but after testing the igniter’s resistance and checking the power supply, I discovered that the control board was actually faulty. It made me realize how interconnected and tricky appliance diagnostics can be. For anyone tackling igniter problems, I highly recommend not jumping straight to replacements but methodically testing each component. Has anyone else found that issues like faulty control boards can actually mimic simpler problems like a bad igniter? Sharing experiences like this can help build a more effective troubleshooting approach for all of us.