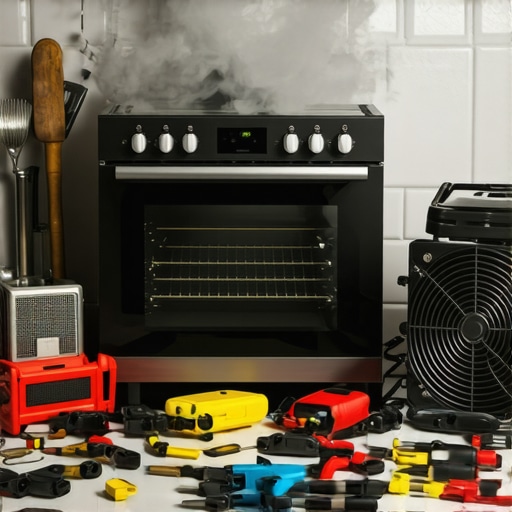
It was late one evening when I opened my oven to check on the lasagna, only to be greeted by a plume of smoke curling up like ghostly tendrils. My heart sank; I’ve been there, caught off guard by a smoking oven that suddenly turned what should’ve been a dinner into a mini emergency. That frustrating moment of realizing something’s wrong, and feeling utterly helpless, is more common than you might think.
But here’s the thing: I learned that most oven smoking issues stem from a handful of things that can be fixed with some simple parts replacements—no need for a costly service call every time. Today, I promise to demystify the *why* behind this smoky scenario and guide you through the four key parts you’ll want to consider replacing in 2026.
How to Stop the Smoke and Save Your Kitchen
Imagine this: your oven suddenly smokes, filling your entire kitchen with an acrid smell. It’s alarming, and the first instinct is to panic. Believe me, I’ve been there. Early on, I made the mistake of ignoring the warning signs or attempting quick fixes without understanding the root cause. That’s a recipe for disaster—or a ruined appliance.
But over time, I discovered that most smoking problems are linked to specific components that fail or degrade with age. Recognizing these can save you money and extend the life of your oven. The good news? Many of these parts are straightforward to test and replace, even if you’re not a seasoned fix-it enthusiast.
In this guide, I’ll walk you through the four parts to watch for in 2026—because appliances just keep getting smarter, but they still need a little TLC now and then. And if you’re worried about messing up, don’t worry—I’ll share some tips to avoid common pitfalls.
Before we dive into the fixes, let me address a question I hear all the time: *Is replacing parts worth it?* Absolutely, especially when you consider that many smoke-related issues are caused by small, inexpensive parts rather than the entire oven. It’s a cost-effective way to keep your kitchen safe and functional.
By understanding these key components, you can confidently troubleshoot and fix your oven, turning that smoke-emitting mess into a household hero. Ready to get started? Let’s explore the first part that might be causing your oven to puff black clouds.
Identify the Culprit Thanks to Visual Clues
When your oven starts spewing smoke, the first step is visual inspection. Check if there’s any spilled food, grease, or debris on the oven walls or heating elements. These remnants can ignite and cause smoke. I vividly remember a time I neglected to clean the drip tray, which eventually sparked smoke during a bake. Clearing out such buildup not only stops smoke but also prevents fire hazards.
Test the Heating Elements for Damage
Burned or warped heating elements often emit smoke. To test them, unplug the oven and remove the back panel to access the elements. Use a multimeter set to the ohms scale; if it shows no continuity, the element is faulty. Replace it with a compatible part; for guidance, see this troubleshooting guide. Remember, a damaged element is like a burnt wire in a circuit—it creates sparks and smoke.
Inspect the Oven’s Gasket and Seals
Leaky or cracked door gaskets allow smoke to escape and can cause persistent smoke issues. Examine the gasket around your oven door for tears or fraying. Use a flashlight to check for gaps when the door is closed. Replacing worn gaskets is straightforward; just detach the old one, clean the surface, and adhere the new seal. This fix is akin to replacing weatherstripping on a door to keep drafts out—simple, effective, and budget-friendly.
Examine the Igniter or Spark Module
If your oven is gas-powered, a faulty igniter may cause incomplete combustion, leading to smoke. To test the igniter, disconnect the power, locate it, and observe if it glows when the oven is turned on. If it stays cold, it’s time for a replacement—check this page for detailed procedures. Restoring a healthy spark ensures proper ignition and eliminates smoke caused by unburned gas. Remember, safety is paramount—never attempt repairs without cutting power first.
Check and Replace the Thermostat or Sensor
Over time, temperature sensors can fail, causing the oven to overheat and smoke. Use a multimeter to test resistance values matching your oven model’s specifications, often available in the manual or sensor testing guide. If defective, replace the sensor; this is akin to replacing a faulty thermostat in a home heating system—crucial for safety and performance. Proper functioning sensors maintain stable temperatures, preventing overheating and smoke.
Confirm Proper Ventilation and Clean Vents
Finally, ensure your oven’s ventilation system isn’t blocked. Over time, greasy buildup can clog vents and fans, trapping smoke and smell inside. Remove and clean any accessible vent covers and fans, following your model’s cleaning instructions. Routine maintenance like this is similar to cleaning air filters—enhancing performance and safety. For more detailed maintenance tips, see this repair guide.
When it comes to appliance repair, many homeowners rely on misconceptions that can lead to costly mistakes. One prevalent myth is that replacing a single faulty part will always fix the entire problem. In reality, appliances are complex systems, and addressing one component without considering associated parts or underlying issues might only be a temporary fix. For example, replacing a burned-out heating element in your oven without inspecting the thermostat or control board may result in recurring failures. Advanced diagnostics and understanding how parts interact are crucial for a lasting repair. Additionally, some assume that DIY repairs are always safer and cheaper than professional service, but overlooking safety protocols can lead to injuries or further damage. A common oversight is neglecting to turn off power sources before attempting repairs; always disconnect power before inspecting or replacing parts. Moreover, many believe that all parts are universal or interchangeable across brands, but incompatible components can cause more problems or void warranties. Consulting manufacturer resources or expert guides ensures you select the correct replacement. Beware of the trap of rushing repairs based on symptoms alone—smoke, for instance, can be caused by multiple issues, from faulty wiring to debris buildup, and identifying the true culprit requires thorough testing. For more advanced diagnostics, consider examining the control board or sensors, as failures here often mimic simpler problems. A detailed troubleshooting approach can prevent unnecessary replacements and extend your appliance’s lifespan. Remember, effective repair combines knowledge, precision, and patience. If you’re interested in a comprehensive understanding of diagnosing and fixing appliances, check out our guide on fast fix strategies for oven repairs. Have you ever fallen into this trap? Let me know in the comments.
Tools I Recommend for Reliable Repairs
Having the right tools makes all the difference when diagnosing and fixing kitchen appliances. I personally swear by a high-quality digital multimeter like the Fluke 117, because it provides precise readings and is durable enough for frequent use. When testing components such as heating elements or sensors, accuracy is crucial, and a reliable multimeter prevents guesswork. A cordless rotary tool, like the Dremel 4300 with multiple attachments, is invaluable for cleaning corroded contacts or shaping parts during repairs—saving time and effort. For locating specific parts or troubleshooting schematics, I rely on a well-organized digital storage system, such as Evernote, combined with service manuals and repair guides in PDF format, making information quick to access during emergencies.
Embracing Smart Diagnostics and Software Tools
Beyond physical tools, software solutions are transforming appliance troubleshooting. I use diagnostic apps like Appliance Diagnostic Pro, which helps interpret error codes from various brands, reducing the trial-and-error phase. These apps can often connect via Bluetooth to your appliance or interpret troubleshooting data based on input symptoms, streamlining the repair process. As appliance technology advances, integrating these smart diagnostics ensures my methods stay current and efficient. I predict that in the near future, more repair workflows will incorporate machine learning algorithms that suggest fixes based on historical data, further simplifying diagnostics.
How do I maintain my tools over time?
Proper maintenance of your repair tools is vital for longevity and accuracy. Regularly calibrate your multimeter according to the manufacturer’s instructions, typically every year or after extensive use, to ensure readings remain reliable. Keep precision tools like screwdrivers, pliers, and cutters clean and lubricated—dirt and rust compromise their performance and safety. Store tools in a dedicated case or toolbox, and avoid exposing them to moisture or extreme temperatures. I also recommend creating a maintenance schedule where you inspect and replace worn-out items proactively. This approach prevents unexpected equipment failure and keeps your repair process smooth. For example, regularly testing and replacing worn soldering tips in your soldering iron can save hours of frustration during complex circuit diagnostics. By implementing disciplined care routines, you’re investing in your repair success and minimizing downtime.
Where is appliance repair heading in the coming years?
As appliances become increasingly connected with IoT capabilities, diagnostic processes will become more automated. Future tools will likely feature wireless sensors embedded within components, continuously monitoring their health and alerting you when maintenance is needed. Additionally, AI-driven diagnostics will analyze data patterns to predict failures before symptoms manifest—saving your time and reducing repair costs. Staying ahead of these developments means investing in adaptable tools today, such as updating your diagnostic software and familiarizing yourself with smart appliance manuals. Remember, embracing these trends requires keeping your existing equipment in top shape—regular calibration and cleaning are the foundation for integrating advanced tech seamlessly.
Ready to give your toolbox a boost? Try calibrating your multimeter using a known reference or test source to ensure accurate readings. This simple step can make a big difference in troubleshooting precision. Keep your tools sharp, clean, and up-to-date, and you’ll be empowered to tackle appliance issues confidently and efficiently.
What I Wish I Knew When I Started Fixing Ovens
One of the biggest surprises I encountered in oven repair was realizing that smoke almost always has a root cause—ignoring warning signs or rushing into parts replacements often leads to recurring problems. I learned that proper diagnosis and understanding the specific component failures save time and money. My lightbulb moment was discovering that degraded gaskets or faulty sensors can be silent culprits that cause smoky mishaps, and addressing them directly makes a real difference.
Tools That Transformed My Repair Approach
Over the years, investing in a quality multimeter like the Fluke 117 and a versatile rotary tool changed the game for me. These tools allowed me to accurately diagnose issues like damaged heating elements or unresponsive sensors. Complementing hardware with apps like Appliance Diagnostic Pro helps interpret error codes and streamline troubleshooting. Trusting these specific tools has made me more confident and efficient when fixing oven smoke issues, and I recommend them to anyone serious about effective appliance repair.
Keep the Fire Alive: Your Next Steps
You’ve got the knowledge now—it’s time to take action and start troubleshooting your oven’s smoky episodes with confidence. Remember, the key to successful repairs is patience and methodical testing. Whether it’s replacing a worn gasket or testing the igniter, each step brings you closer to a safe, smoke-free kitchen. Don’t shy away from trying small repairs yourself; every effort improves your skills and understanding of your appliances. Dive into repair guides, keep your tools sharp, and embrace the learning journey ahead. Your oven is more resilient than you think, and equipped with the right knowledge, you can make it last for years to come.
Emily Carter
Reading this post really hit home for me. I’ve experienced that sudden, alarming smoke from my oven during a holiday dinner, and it was stressful trying to figure out what went wrong. Over time, I’ve learned that many issues stem from simple parts like the gasket or the heating element. I particularly agree with the emphasis on visual inspections and testing components to diagnose the problem thoroughly rather than rushing into replacements. I remember once replacing the gasket thinking it would fix everything, only to discover later that a faulty temperature sensor was the real culprit. Has anyone found that cleaning the oven’s vents and fans made a noticeable difference in smoke issues? I’ve noticed that buildup can really trap smoke and worsen the problem, so I always make sure those are clean as part of my maintenance routine.
Jonathan Lee
I totally relate to the surprise of seeing smoke when trying to cook a simple meal! This post does a great job breaking down what can be complex issues into manageable parts. I’ve had similar experiences with my ovens, especially with the heating elements and the door gaskets. What struck me is how often overlooked ventilation plays a role. Buildup of grease and grime inside vents can trap smoke, making minor problems worse over time. I recently had to clean the vent fan in my stove, and I was surprised at how much calmer and fresher the air smelled afterward. Has anyone else noticed a big difference after cleaning their vents or fans? It seems like such a small step but could prevent a lot of smoke-related headaches, especially with older appliances. Also, I appreciate the emphasis on safety. Turning off power before any repair is so essential but often skipped by DIYers eager to fix stuff quickly. How have you all managed troubleshooting when you’re unsure what’s causing the smoke? Any tips on diagnosing hidden issues before replacing parts?