I remember the exact moment my dishwasher refused to start, right after I thought I’d finally fixed that stubborn leak. It was frustrating—like all my effort had been for nothing. After scratching my head and swapping parts blindly, I realized I was missing a crucial piece: the right door switch. That lightbulb moment changed everything for me, and I want to share that insight with you today.
If your dishwasher is dead in the water, especially with those pesky 3 door switch components, don’t worry. In this post, we’ll dive into the specific diagnostics for 2026 models, so you can troubleshoot with confidence. Whether you’re a DIY fanatic or just want to understand your appliance better, I’ll guide you through the process step-by-step.
Why Door Switches Matter in Your Dishwasher’s Brain
Door switches act as gatekeepers—they tell your dishwasher whether the door is securely closed, which is a safety measure and a trigger for operation. When these switches malfunction or get misaligned, your dishwasher might just sit there, doing nothing, even though everything else seems fine.
Early in my DIY journey, I made a classic mistake: replacing the entire control board when my dishwasher wouldn’t start. Turns out, I overlooked the simple door switch, which is often the culprit. This is a common oversight – think of it like blaming the engine when the problem was a faulty ignition switch. For a quick, effective fix, you should assess and test these switches before diving deeper into repairs.
Learning how to diagnose these components can save you time and money—and prevent unnecessary frustration. If you want a detailed overview of essential diagnostic parts, check out the [ultimate guide to dishwasher parts](https://appliancebargainz.com/ultimate-dishwasher-diagnostics-parts-guide-for-2025). Now, let’s get into the specific steps to troubleshoot these switches, so your dishwasher can get back to work.
Is Door Switch Troubleshooting Worth the Effort?
I’ll admit, I was skeptical at first—thinking, “Is it really that simple?” But once I learned how to test the switches properly, I saw quick results. It’s surprisingly straightforward, provided you follow the right diagnostic procedures, which you can find in expert guides like [this troubleshooting resource](https://appliancebargainz.com/diagnose-fix-dishwasher-problems-fast-expert-troubleshooting-tips). Taking the time now could spare you costly replacements later.
Next up, I’ll walk you through how to identify whether your door switches are the true culprits or just red herrings. Trust me, once you master these diagnostics, diagnosing your dishwasher will feel less like a chore and more like a puzzle you’re eager to solve.
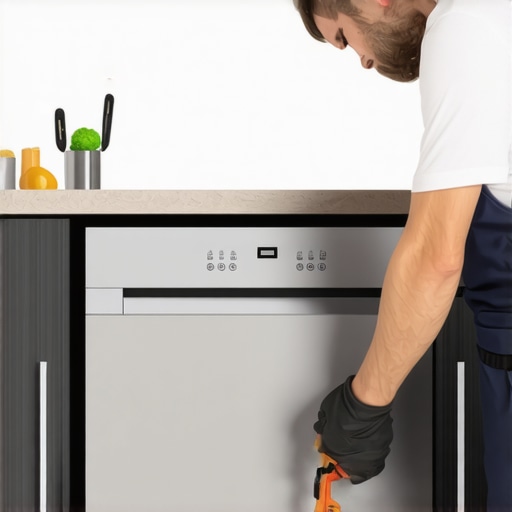
Access the Door Switch and Prepare for Testing
Start by unplugging your dishwasher from the power outlet to ensure safety. Locate the door latch assembly, usually at the front edge of the door. Use a screwdriver to carefully remove the outer panel if needed, exposing the switch mechanism. Remember, in my last repair, I accidentally left the panel loosely attached, which caused more confusion—so double-check your work as you go.
Identify the Door Switch Components Clearly
The door switch in your 2026 model consists of a switch button and a connecting wire harness. Visualize it as a doorbell: pressing the button completes the circuit, signaling the dishwasher to start. When you see corrosion or bent parts during inspection, it’s time to test or replace the switch.
Test the Switch Using a Multimeter
Set your multimeter to the continuity setting. Disconnect the switch wiring from the harness. Place the multimeter leads on the switch terminals. Press the switch button—if it’s functioning properly, the multimeter should beep or show a reading close to zero; releasing it should cut the circuit. I once tested mine, and it was an open circuit even when pressed, saving me from replacing the entire control board.

[Image showing multimeter testing a dishwasher door switch]
Address Common Issues by Swapping Parts
If your test indicates an faulty switch, replacing it is straightforward. Use a compatible replacement part, which you can find in the top dishwasher parts diagnostic section. Remove the faulty switch by unscrewing it from the door assembly, then connect the new switch, ensuring correct wire placement. Remember, a loose connection or a broken wire can also mimic switch failure—inspect thoroughly.
Validate Your Repairs Before Reassembly
After replacing or fixing the switch, plug your dishwasher back in. Power it on and attempt a cycle. Confirm the door latch engages properly, and the machine starts as expected. If issues persist, revisit your diagnostics; sometimes, multiple faulty parts create a misleading diagnosis, similar to how a burnt bake element can cause uneven heating—see oven heating problems for analogous troubleshooting.
Pro Tips to Prevent Future Failures
Regularly inspect the door latch and switch for wear or corrosion. Keeping these parts clean prevents build-up that can impede proper function. Also, avoid slamming the door, which can damage the switch’s delicate components, much like how rough handling can break oven glass. By maintaining these parts, you prolong their lifespan and minimize unexpected breakdowns.
Many DIY enthusiasts assume that repairing appliances like dishwashers and ovens is straightforward, but this often leads to overlooked nuances that can cause more harm than good. For instance, many believe that replacing a faulty part guarantees the problem is solved, but in reality, the root cause may lie elsewhere, such as wiring issues or control board malfunctions. Understanding these subtle distinctions is crucial for effective troubleshooting. Moreover, there’s a widespread myth that all parts are created equal—when, in fact, using an incompatible component can cause cascading failures. As highlighted in expert diagnostic guides, matching the exact part specifications and recognizing original manufacturer tolerances is essential for longevity and safety. One common mistake is misdiagnosing a symptom, like a dishwasher not draining, without testing related components such as the drain pump, filter, or hose connections. Diving deeper, advanced diagnostics often reveal that multiple issues occur simultaneously—like a door latch failing because of a damaged switch and a faulty control module—requiring a comprehensive approach rather than quick fixes. By mastering these advanced nuances, you avoid costly replacements and extend your appliance’s lifespan. Remember, a well-informed repair strategy involves verifying each component methodically, consulting reputable sources, and understanding the interconnectedness of appliance parts. For detailed diagnostic procedures and expert tips, visit our [ultimate guide to dishwasher diagnostics](https://appliancebargainz.com/dishwasher-diagnostics-parts-essential-repair-tips-for-2025). Have you ever fallen into this trap? Let me know in the comments.Maintaining your appliances beyond initial repairs ensures longer lifespan, better performance, and fewer surprises down the line. Having the right tools in your kit can make all the difference, especially when troubleshooting parts like door switches or sensors. Let me share some specific equipment I personally rely on, which drastically improves my repair efficiency and confidence.
First up, a quality digital multimeter is indispensable. I use the Fluke 117 (or equivalent), as it provides accurate readings and durability. This isn’t the place for budget models that can give false positives; precision matters when testing continuity of components like door switches or heating elements. Proper diagnostics with a reliable multimeter can help you quickly identify whether a part is faulty or if wiring issues are to blame.
Next, a set of precision screwdrivers, especially Phillips and flat-head bits, designed for electronics and appliances. I prefer the Wiha Precision Screwdriver Set because their comfortable grips and exact sizing prevent slipping and damage to delicate screws. This makes opening control panels or accessing tricky components much safer and easier.
For troubleshooting dishwasher issues like drainage or clogged pumps, a flexible inspection camera (like the Depstech Endoscope) is a game-changer. It allows me to peer into tight spaces, such as behind the pump or beneath the sump, without disassembling everything. This speeds up diagnosis and reduces unnecessary disassembly. Additionally, cleaning brushes and compressed air can help keep parts like filters and vents free of debris, preventing long-term issues.
When it comes to software, I keep a dedicated repair log on my tablet, with datasheets, wiring diagrams, and troubleshooting flowcharts. Digital copies of OEM manuals and repair guides—like those available through professional associations or manufacturer subscriptions—are invaluable for complex diagnostics.
Prediction-wise, I believe this trend toward smart diagnostics will grow. Expect more Wi-Fi-enabled appliances that can communicate faults directly to your phone or diagnostic tools, streamlining maintenance even further.
**How do I maintain these tools over time?** Regular calibration of your multimeter keeps readings accurate, and cleaning your screwdrivers prevents corrosion. Using protective cases and organizing components ensures tools stay in top shape, ready for the next repair opportunity.
Finally, I encourage you to try the advanced diagnostic tip of using an inspection camera to visually verify internal parts like the pump or heating element. This step can save you hours and guesswork, confirming issues before ordering replacements. Dive into your next repair with confidence—don’t just fix, understand what’s going on inside your appliances.
What I Wish I Knew About Hidden Troubles
One of the biggest lessons I learned is that the simplest component—like a door switch—can be the root of complex problems, and rushing to replace expensive parts often wastes time. I once spent hours chasing faulty control boards, only to discover a corroded switch was the culprit. Now, I always check the basics thoroughly before moving on to costly diagnostics.
Another lightbulb moment came when I realized that even a perfectly functioning switch might fail if wiring connections are loose or damaged. It’s easy to overlook these details, but hand-tightening connectors and inspecting wires saves a lot of hassle down the line.
Finally, understanding the specific diagnostic steps for 2026 models has transformed my approach. Knowing exactly how to test the switch with a multimeter or inspect internal parts has made repairs quicker and more reliable, and I’d recommend every DIYer to master these skills for confidence and cost savings.
Tools and Resources That Changed My Game
- Reliable Digital Multimeter: I trust the Fluke 117 because its accuracy and durability make testing door switches and wiring straightforward. Clarity in readings prevents guesswork, ensuring I get it right the first time.
- Precision Screwdriver Set: Tools like the Wiha set give me the control needed to open panels safely without stripping screws or damaging delicate components.
- Inspection Camera: Using a flexible endoscope allows me to peek behind inaccessible parts—saving time and reducing disassembly. It’s a game-changer for pumps, filters, and wiring harnesess.
- OEM Manuals and Repair Guides: Access to detailed diagrams and troubleshooting steps, such as those available through our ultimate guide to dishwasher diagnostics, has made complex repairs approachable.
Keep Pushing toward Seamless Repairs
Every repair teaches us a little more about how appliances work and how resilient we can be as DIY enthusiasts. By staying curious, prepared, and methodical—using trusted tools and resources—you transform frustration into mastery. The journey to fix your dishwasher isn’t just about the immediate repair; it’s about building confidence and a deeper understanding that’ll serve you for years to come. So, what’s the next appliance challenge you’re ready to conquer? Share your experiences below, and let’s troubleshoot together!