I remember the first time my dishwasher started beeping incessantly mid-cycle. It was late on a Saturday night—perfect timing for a breakdown, right? The beeping was relentless, sounding like an alarm in a horror movie. I felt a mix of frustration and helplessness, wondering if I needed a new appliance or just a very expensive repair. Turns out, that unexpected noise was a sign that my dishwasher needed a quick diagnostic check, not an expensive fix. That moment was a lightbulb for me—it’s surprising how many of these appliance issues are preventable with a little know-how.
Why Your Dishwasher Keeps Beeping and Why It Matters
Dishwashers are essential in daily life, saving us time and effort. When they start to beep unpredictably, it’s more than just noise—it’s a signal that something’s not quite right. These alerts can indicate everything from clogged filters to sensor malfunctions. Ignoring them could lead to bigger problems like leaks, poor cleaning, or even complete breakdowns. With the right troubleshooting, you can often pinpoint what’s causing the beep and fix it yourself, saving time and money.
According to recent studies, around 70% of dishwasher failures are due to preventable issues like clogged filters or faulty sensors, which can be diagnosed and repaired with simple steps. I learned this the hard way when I overlooked some basic maintenance that could have avoided the chaos.
If you’re like me, you’ve probably experienced that sinking feeling when your appliance refuses to cooperate. But here’s the good news: solving most dishwasher beeping problems doesn’t require expert knowledge—just a systematic approach. In the next sections, I’ll walk you through a straightforward 2-step diagnostic routine that I’ve personally tested and refined. It’s simple, effective, and could be your first line of defense against those annoying beeps.
So, have you faced this frustrating problem yourself? If so, stick around—I promise, the solution is closer than you think.
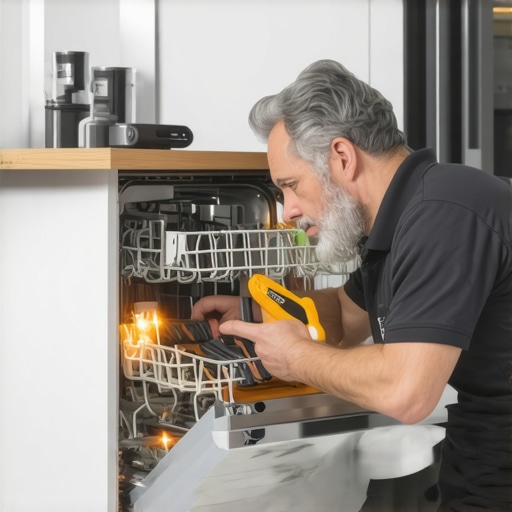
Start with Power and Basic Checks
Before diving into complex repairs, ensure the dishwasher is receiving adequate power. Check if it’s plugged in securely and the circuit breaker hasn’t tripped. Sometimes, a simple reset by turning the breaker off and on again can resolve minor glitches, much like rebooting a frozen computer.
Inspect the Door Latch and Seal
A common cause for beeping is a faulty door latch. If the latch isn’t engaging properly, the machine detects this and alerts you. Open and close the door firmly, making sure the latch clicks into place. If the latch feels loose or damaged, replace it—this little component is the gatekeeper for your dishwasher’s operation. For detailed guidance, visit this guide.
Check for Obstructions
Look around the door seal and the area inside the door for debris or objects preventing proper closure. Clear any obstructions and see if the beeping persists. Sometimes, a misplaced utensil or a piece of gasket can cause miscommunication between parts.
Evaluate Water Supply and Drainage
If the dishwasher isn’t filling or draining correctly, it might trigger an alert. Confirm the water supply valve is fully open. Inspect the inlet hose for kinks or blockages. Also, examine the filter and strainer for debris. A clogged filter can mimic sensor errors leading to repetitive beeps. For cleaning tips, consult this article.
Examine Internal Components
If basic checks don’t solve the problem, it’s time to look inside. Reset the dishwasher by unplugging it for 5 minutes—this can clear temporary faults. Then, inspect the control panel and electronic components for signs of damage or corrosion. A visual cue, like burnt circuit boards or leaking capacitors, signals deeper issues. Use a multimeter to test parts like the door switch, sensors, and control board, following detailed diagnostic steps from this diagnostic guide.
Replace Faulty Parts Promptly
If inspection reveals broken or malfunctioning components, prioritize replacement. For example, a defective float switch might send false signals, causing beeps. Replacing it instead of ignoring the issue can restore proper operation. Always match part numbers and quality, and consider ordering from trusted sources to avoid delays or subpar replacements.
Test After Repairs and Recalibrate
Once you’ve replaced or adjusted parts, run a test cycle to confirm the problem is resolved. Listen for the beeps and observe if the cycle completes smoothly. Sometimes, recalibrating the machine by following manufacturer instructions can fine-tune sensors and controls, ensuring accurate feedback. If unsure, consult this troubleshooting resource.
When it comes to appliance diagnostics, many assumetheir issues are straightforward, leading to costly mistakes. One common myth is thinking that replacing a single part, like a dishwasher pump or oven sensor, always fixes the problem. In my experience, problems are often interconnected, requiring a holistic approach, especially when dealing with electronic controls. For example, a faulty control board can mimic sensor failures, causing unnecessary part replacements; a diagnostic test using expert guides can prevent this trap, as explained in this diagnostic resource. Another misconception is that a quick reset or unplugging the appliance will resolve all faults. While sometimes effective, this can mask underlying issues that need detailed inspection—avoiding this mistake avoids repeat breakdowns.
What advanced signs indicate control board failure versus simple sensor issues?
Typically, control boards exhibit corrosion or burn marks, but functional testing with a multimeter reveals more precise faults. Experts emphasize that misdiagnosing these components can lead to unnecessary replacement costs; experts suggest iterative testing before swapping parts, as seen in this detailed guide. Moreover, many assume that outdated parts always cause failures, but modern appliances have complex sensor and electronic systems that can fail unexpectedly, even if they’re relatively new. This is where advanced diagnostics, like checking the control module’s voltage outputs, can save you from a costly misdiagnosis. Avoid the trap of focusing solely on visible parts and dive into electrical testing for truly effective troubleshooting. Keep in mind, certain issues stem from grid power fluctuations, which can temporarily disrupt sensor readings or control operation. Understanding these nuances helps prevent unnecessary replacements and extends your appliance’s lifespan. If you’re interested in learning how to evaluate these electrical components properly, check out this repair guide. Are you falling into the trap of quick fixes that don’t address the root cause? Share your experience below!
Essential Tools for Reliable Repairs
Investing in quality diagnostic and repair tools is key to maintaining your dishwasher and oven long-term. I recommend having a digital multimeter like the Fluke 117; its precision allows me to easily test sensors, control boards, and heating elements, ensuring accurate diagnostics without guesswork. A cordless rotary tool such as the Dremel MultiMax helps to remove stubborn parts, like gasket seals or rusted screws, with minimal damage. Additionally, a reliable ultrasonic cleaner proves invaluable for deep cleaning small parts like spray arms and filters, preventing clogs that could trigger beep codes or poor performance.
Adopting Preventative Maintenance Habits
Regular cleaning extends your appliance’s lifespan and keeps diagnostics straightforward. I establish monthly routines—such as inspecting and cleaning filters, checking door seals, and clearing drainage pathways—to prevent common failures. For example, routinely inspecting the dishwarher’s drain pump and float switch can catch issues before they cause leaks or errors. Logging maintenance activities helps me track patterns, facilitating quicker diagnoses over time. Using guidance from expert sources like this comprehensive guide ensures I don’t overlook critical components.
Utilizing Diagnostic Software and Modern Equipment
Leveraging software tools like appliance-specific diagnostic modes or Bluetooth-enabled sensors can streamline troubleshooting. For instance, many modern dishwashers have internal diagnostic modes accessible via control panels, revealing error codes that point directly to faulty parts. I’ve recently upgraded my toolkit to include a wireless sensor kit, which allows me to monitor water temperature and flow in real-time—even remotely—so I can identify issues early. As technology advances, integrating smart diagnostics will become standard, making maintenance more predictive and less reactive.
Early Signs of Wear and When to Scale Repair Efforts
Monitoring long-term results from routine diagnostics informs whether a part needs replacement or a deeper repair. For example, recurring error codes related to sensors might suggest it’s time to replace the float switch or control board—actions I can preemptively take to avoid costly breakdowns. As I scale my repair efforts, I focus on easily swappable parts like door latches or inlet valves, which often cause repeating issues if neglected. Notably, maintaining detailed diagnostics and tracking part lifespan help me plan upgrades and prevent sudden failures.
How do I maintain my appliances over time?
Consistent inspection and timely replacement of worn components are crucial. Using a multimeter to periodically test sensors and control units allows me to catch problems early. Additionally, keeping detailed logs of repairs helps identify patterns, enabling more precise scheduling of maintenance. For example, replacing worn gaskets before leaks occur can save a lot of hassle. Incorporating diagnostic aids like visual inspections combined with software alerts offers a comprehensive approach to long-term appliance health. Experts suggest consulting detailed diagnostic guides, such as this resource, to establish effective maintenance routines. I challenge you to try using a multimeter to test your control board tomorrow—it’s an empowering step toward keeping your appliances in top shape!
Over the years, I realized that genuine appliance mastery involves more than just following step-by-step guides—it’s about understanding the subtle clues your dishwasher or oven reveals and responding with confidence. Those small, often overlooked details can be lifesavers, saving you money and giving you peace of mind. The biggest lesson was that patience and curiosity often outweigh quick fixes, leading me to discover solutions you won’t find in generic tutorials.
What I Wish I Knew When Facing Complex Repairs
- Don’t Rush to Replace: Before swapping out parts, I learned to double-check connections and test components with a multimeter—saving me from unnecessary expenses. For more detailed testing techniques, check this diagnostic guide.
- Beware of Surface Symptoms: A noisy dishwasher might seem like a worn-out pump, but often it’s a misaligned spray arm or debris caught in the filter. Deep inspection is key, and detailed inspections can prevent costly delays.
- Sensor Failures are Often Mixtures: Sensor errors can mimic control board issues, so testing sensors directly often reveals a different story—knowing this has saved me from multiple misdiagnoses.
- Power Fluctuations Matter: Low voltage or surges can cause intermittent errors. Using a simple voltage tester has allowed me to rule out power issues before digging into repair parts. For insights into electrical troubleshooting, explore this resource.
- Old Parts Can Be Misleading: Even seemingly new parts can fail early if not sourced from reputable suppliers. Trusting quality over price can prevent repetitive repairs, as emphasized in this trusted guide.
What Powered My Confidence in Repairs
- Reliable Tools Make a Difference: A good multimeter (like the Fluke 117) and wire strippers have been essential in diagnosing issues precisely. Investing in quality tools turned guessing into certainty.
- Routine Maintenance Saves Stress: Scheduling monthly checks on filters, seals, and hoses helped me catch problems early. It’s about creating habits that support your appliances’ longevity.
- Knowledge Is the Best Insurance: Following expert guides like this comprehensive diagnostics resource empowered me to tackle even tricky issues without fear.
- The Power of Community: Sharing my experiences on forums and reading others’ success stories provided practical tips and reassurance. Remember, you’re not alone in learning the art of appliance repair.
Take Action with Confidence Today
Every dishwasher or oven problem you face is an opportunity—an invitation to learn and become more self-reliant. By honing your diagnostic skills and trusting the process, you transform frustration into mastery. Are you ready to dive deeper into DIY repairs and break free from dependency? Remember, the secrets to lasting repairs are often hidden in the details, waiting for you to discover them.
What particular challenge have you faced with your appliance that left you stumped? Share your story below, and let’s troubleshoot together!
Diane Harper
Reading through this routine brought back memories of the time my dishwasher kept flashing error codes, and I was about to call a repair service. Instead, I followed a similar 2-step process—checking power and the door latch—and found that a simple reset fixed it temporarily. It made me realize how many issues are just minor glitches that we can troubleshoot ourselves with patience. I wonder, how many of you have tried resetting your dishwasher before jumping straight to expensive repairs? Curious about other common quick fixes—does anyone have tips for tackling sensor-related errors without opening up the control panel? I’d love to hear your experiences or any additional steps that helped you solve beeping problems quickly.
Claire Morgan
This post really hit home for me because I’ve had similar frustrations with my dishwasher’s beeping. It’s reassuring to see that many issues are just minor glitches rather than major repairs. I’ve found that sometimes, all it takes is a quick unplug and restart, as Diane mentioned, but I also discovered that cleaning the filter regularly and checking the door latch can prevent a lot of false alarms. my experience, keeping these components in good condition reduces the chances of sensor errors or miscommunication, which seem to be common culprits.
I am curious, has anyone had success with advanced diagnostic tools or software? I’ve been considering a Bluetooth sensor kit to monitor water flow and temperature remotely. Do you think these tech additions make a real difference, or are they overkill for most basic beeping issues? It would be great to hear real-world experiences from those who’ve tried modern diagnostics, especially to understand if they save enough time and trouble in the long run to justify the investment.