Have you ever stood in front of your dishwasher, arms crossed, staring at that blinking error light, feeling totally helpless? That light flicker used to annoy me to no end—I’d fiddle with buttons, reset it, hope for a miracle, but still end up with a sink full of dirty dishes. The light seemed to mock me, like a cryptic message only the repair experts understood. That was my lightbulb moment. I realized that understanding the key dishwasher parts and diagnostics would transform frustration into confidence.
Why Getting a Grip on Dishwasher Diagnostics Changes Everything
Knowing how to troubleshoot and replace the right parts is not just about fixing your dishwasher—it’s about saving time, money, and the headache of calling in help that might not even be necessary. As I dove into the world of repair, I discovered that many common failures are tied to a handful of crucial components, like the float switch, pump, or control board. Mastering diagnostics means you can identify the cause quickly and get your machine back in action without enduring endless trial and error. Plus, with more detailed repair guides and parts catalogs emerging for 2025, such as those found at [expert-dishwasher-diagnostics-parts-for-quick-repairs-in-2025](https://appliancebargainz.com/expert-dishwasher-diagnostics-parts-for-quick-repairs-in-2025), there’s never been a better time to take control.
Have you run into the same frustrating situation—diswasher problems that just won’t go away, no matter what you try? Cutting through the confusion starts with understanding the key diagnostic steps and knowing which parts to check. Not only does this approach work for routine issues, but it also prepares you to handle unexpected breakdowns efficiently.
But let’s be honest—there’s a lot of misinformation floating around. I once replaced a part I thought was faulty, only to find out it was a different component altogether. Early on, I learned that rushing into parts replacement without proper diagnostics can waste both money and time. That mistake is common among homeowners, but it’s avoidable once you’re familiar with reliable troubleshooting strategies and trusted repair resources.
So, if you’re ready to stop guessing and start fixing with confidence, let’s get into the practical steps to understanding your dishwasher’s inner workings and how to identify the parts causing your headaches. We’ll walk through tips that make diagnostics straightforward and set you up for success in your 2025 repairs. This knowledge is the difference between being at the mercy of your appliance and becoming its go-to fixer.
Identify the Symptoms and Gather Information
Start by observing what the dishwasher is doing or not doing. Is it refusing to start, leaking, or not draining? Take notes. I once faced a dishwasher that filled but never spun, which seemed minor until I noticed a burnt smell. Documenting symptoms helps narrow down potential parts like the motor or control board. Think of it as diagnosing a car problem—knowing whether the engine stalls or the brakes squeal directs your focus to specific components.
Check the User Manual and Diagnostic Codes
Most dishwashers display error codes or beeps. Consult the manufacturer’s manual or online resources such as this troubleshooting guide to interpret these codes. For example, a code indicating a drain issue points you to inspect the drain pump and hose—similar to how a mechanic reads a dashboard warning to pinpoint the problem quickly.
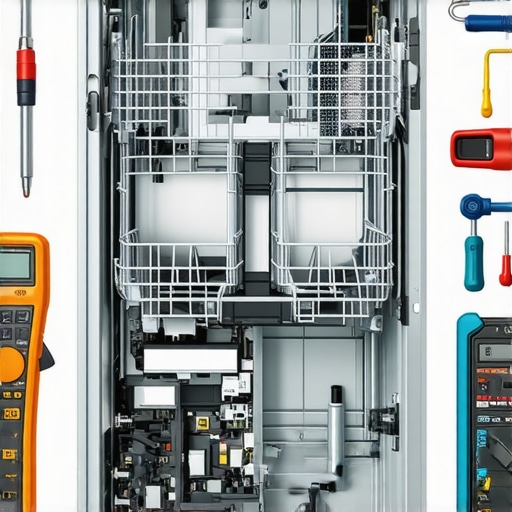
Visually Inspect Critical Parts
Unplug the appliance before opening it. Look for obvious signs: debris blocking the spray arms, damaged door latches, or burnt wiring. I once found a disconnected relay that caused my dishwasher to stop mid-cycle. Use a flashlight and compare parts against a diagram from this repair resource. Think of yourself as a detective, eliminating easy suspects before moving to complex tests.
Test the Electrical Components
Use a multimeter to check resistances of the heating element, door switch, and motor. For example, I tested the heating element and found it was open circuit—meaning it needed replacing. If you’re unfamiliar, watch tutorials at this page. Remember, like testing a battery, verifying these parts’ continuity confirms whether they’re functioning or dead weight—saving you from unnecessary replacements.
Evaluate the Control Board and Sensors
Often overlooked, a faulty control board can cause erratic operation. Look for visible damage like burnt spots or swollen capacitors. Moisture can also corrode sensors—think of them as the ‘brain’ of your dishwasher. I once replaced a temperature sensor that was crusted with mineral deposits, restoring proper heating. For detailed diagnostics, review this diagnostic guide. It’s akin to updating your smartphone’s firmware to fix bugs—you need current, accurate troubleshooting strategies.
Replace Parts Based on Evidence
Once you identify the culprit—be it the pump, element, or sensor—order the corresponding part from trusted sources like this supplier. Install it following step-by-step instructions, ensuring all connections are secure. My experience with replacing a worn-out drain pump was messy—water spilled, and I had to reroute wiring—but ultimately, it restored my dishwasher’s efficiency. Think of troubleshooting as a surgical procedure: precision and evidence guide your actions, preventing unnecessary or destructive repairs.Many homeowners believe that any malfunction in their appliances points to a single culprit or that DIY diagnostics are overly complicated. Let’s debunk some common myths and uncover nuanced truths that can elevate your repair game. Contrary to popular belief, not all faulty dishwasher parts mean immediate replacements. In fact, understanding the underlying diagnostic processes reveals that many issues stem from subtle faults—like a misaligned sensor or corroded connection—that are overlooked by beginners. Rushing to swap parts without proper testing often results in wasted money and time, or worse, replacing the wrong component entirely. This mistake can be avoided by mastering advanced diagnostic techniques, such as testing continuity or inspecting control boards for micro-cracks, which are detailed in resources like this expert guide.Maintaining your kitchen appliances over time requires the right tools and a disciplined approach. Personally, I rely heavily on a digital multimeter for electrical diagnostics, as it provides precise readings that help confirm whether components like the control board or sensors are functioning properly. Using a multimeter allows me to quickly measure resistance and continuity, preventing unnecessary replacements and saving money. I also recommend investing in a set of small, insulated screwdrivers and a quality flashlight to facilitate visual inspections in tight spaces—these are invaluable when checking for burnt wiring or corrosion. For software diagnostics, I utilize manufacturer-specific apps that can analyze error codes remotely, streamlining troubleshooting and reducing downtime. Looking ahead, the trend points toward smarter diagnostics with IoT integration, enabling real-time monitoring and predictive maintenance, which could revolutionize appliance care in the next few years.
<--  –>
–>
How do I maintain these tools and methods over time?
Regularly calibrate your multimeter to ensure accuracy, and keep your inspection tools clean and organized. Updating software and firmware related to diagnostic apps can enhance compatibility and feature set, leading to more reliable diagnostics. Engaging with online forums and manufacturer updates helps you stay ahead of common issues and hardware changes. Remember, consistent maintenance of your diagnostic tools and staying current with the latest repair strategies, like those outlined at this resource, empowers you to troubleshoot efficiently and extend the lifespan of your appliances. Try adopting routine calibration every six months and see how it improves your diagnostic confidence—sometimes, small adjustments yield big results in repair success.
What Did I Learn About Trusting My Gut in Repairs?
One of the most valuable lessons I discovered is that intuition plays a critical role, but only after thorough diagnostics. I once replaced a control board because I instinctively felt it was faulty, only to realize later that a simple clogged filter was causing the issue. This taught me to always verify with proper testing before jumping to conclusions—a habit that saved me time and money.
Why Embracing DIY Repair Opens Doors to New Skills
Getting hands-on with your dishwasher not only restores your appliance but also builds confidence and technical understanding. Each repair reveals new insights, turning frustration into curiosity. The sense of achievement when a stubborn problem finally resolves is priceless and keeps me eager to learn more about appliance mechanics.
The Power of Investing in Trusted Resources
Over time, I realized that having reputable guides like this repair resource makes all the difference. They demystify complex diagnostics and provide step-by-step instructions that extend my troubleshooting toolkit. Learning from experts accelerates my progress and helps me avoid common pitfalls that DIY beginners often face.
Turning Frustration Into an Opportunity to Innovate
Initially, failed repairs felt disheartening, but I started viewing these moments as opportunities for innovation. For example, I experimented with different tools and techniques, leading me to discover efficient testing methods that I now share with fellow DIYers. This mindset shift transforms setbacks into stepping stones for mastery in appliance repair.
My Journey Continues with Curiosity and Preparedness
Now, repairing my dishwasher feels less like a challenge and more like an engaging puzzle. Equipped with knowledge, reliable tools, and a positive attitude, I approach each issue as a chance to improve my skills. If you’re passionate about taking control of your appliance maintenance, I encourage you to dive in and enjoy the learning process—your future DIY self will thank you.
Upgrade Your Repair Game with These Resources
- Expert Troubleshooting Guides: I trust this comprehensive guide for step-by-step diagnostics that save time and prevent unnecessary replacements.
- Reliable Parts Suppliers: Knowing where to get quality replacement parts, like those found at this supplier, ensures durability and compatibility.
- Tool Essentials: My multimeter and inspection flashlight are game-changers, helping me perform precise tests and visual checks easily.
- Community Insights: Forums and online communities provide real-world experiences and tips, making me feel less isolated in my repair journey.
Take Action and Transform Your Appliance Troubleshooting
By embracing diagnostic techniques and continuous learning, you can turn your dishwasher repairs into empowering experiences. On your next troubleshooting adventure, remember that patience, proper tools, and trusted resources are your best allies. Don’t let appliance issues hold you back—start diagnosing with confidence today and enjoy the satisfaction of keeping your home running smoothly.