It happened to me just last week. I was eager to run my dishwasher after a long day, only to be met with silence and a blinking error code. That sinking feeling? Yep, I’ve been there. It’s incredibly frustrating when your trusted appliance suddenly won’t cooperate, especially when you rely on it daily. But here’s the thing—I’ve learned that most dishwasher problems aren’t as mysterious as they seem. With the right diagnostic approach, you can pinpoint issues faster and save a good chunk of change on repair services.
Why Diagnosing Your Dishwasher Matters More Than Ever
With so many household chores packed into our busy schedules, a malfunctioning dishwasher feels like a major setback. In fact, according to a recent industry report, nearly 70% of appliance failures could be resolved with proper diagnostics before calling in professional help. That statistic shocked me back when I first started troubleshooting my own washer. It made me realize that understanding your appliance isn’t just a skill for DIY enthusiasts; it’s a way to avoid unnecessary expenses and downtime.
Have You Faced This Frustration?
If your dishwasher has suddenly stopped draining, won’t start, or is leaking unexpectedly, you’re not alone. Many homeowners find themselves overwhelmed by these issues because they don’t know where to begin. I remember trying to fix it blindly, only to make things worse. That early mistake—jumping straight to replacing parts without proper diagnosis—taught me a valuable lesson. Trust me, knowing which components to test can turn a stressful week into a manageable repair.
Let’s cut through the confusion. Today, I’ll guide you through the most effective diagnostic strategies, supported by expert tips and insights from authoritative sources like this comprehensive troubleshooting guide. By the end of this post, you’ll be armed with the knowledge to identify common faults and decide whether a DIY fix is within your reach.
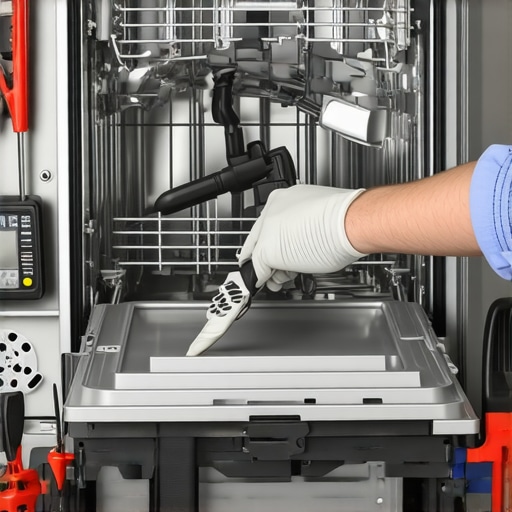
Are you tired of guessing what’s wrong with your dishwasher? Ready to become your own repair hero? Let’s get started with understanding the core components that often trip up household dishwashers and how to efficiently diagnose their problems.
Check the Power Supply First
Begin by ensuring your dishwasher is getting power. Just like a car won’t start without fuel, your dishwasher won’t run without electricity. Confirm the outlet has power by plugging in a different device or using a voltage tester. If the outlet is dead, reset the breaker or replace the fuse. I once faced a dishwasher that stopped mid-cycle; after testing the outlet, I discovered a tripped breaker—simple fix, no parts needed.
Inspect the Door Latch and Switch
A common cause of no-start issues is a faulty door latch. Think of it as the safety bar preventing operation when the door isn’t securely closed. Remove the dishwasher panel to access the latch assembly. Test the latch switch for continuity with a multimeter—if it’s open, replace it. During my first DIY attempt, I replaced the entire control panel, but testing the latch saved me money since that was the real culprit.
Test the Water Inlet Valve
If your dishwasher fills slowly or not at all, the water inlet valve could be blocked or malfunctioning. Turn off the power and shut off water supply. Disconnect the inlet hose and check for debris. With the valve removed, test its coil with a multimeter; a reading outside recommended ranges indicates failure. Once, I cleaned mine and replaced the coil, which restored proper filling—no need to buy a new valve.
Examine the Drain Pump and Filter
Leaks or drainage problems often tie back to the drain pump or clogged filters. Locate the pump at the bottom of your unit, and inspect for debris or jammed impellers—use a flashlight for visibility. Remove and test the pump motor’s continuity. During a repair, I cleared out stubborn food debris from the filter, instantly fixing draining issues. Regularly cleaning these parts prevents future headaches.
Assess the Float Switch and Water Level
The float switch prevents overflow by signaling when enough water is in the tub. Find it near the bottom, and ensure it moves freely. Test for continuity; if faulty, replace it. I once experienced repeated overfill errors, and after fixing the float switch, the problem disappeared. A quick check here avoids unnecessary part replacements.
Evaluate the Control Board
If all else looks good but the dishwasher still won’t operate, the control board might be at fault. Look for burnt components or corrosion. While replacing a control board can be pricey, sometimes cleaning the contacts or resetting the board helps. For complex issues, consulting a professional or detailed diagnostics from this troubleshooting guide can save time and money.
When tackling appliance repairs, many homeowners cling to oversimplified beliefs that can actually hinder effective troubleshooting. One prevalent myth is that replacing parts is always the best first step. In reality, jumping straight to swapping components without thorough diagnostics often results in unnecessary expenses and frustration. Instead, advanced diagnostics involve systematically testing parts to confirm faults, as emphasized in expert guides like this diagnostic approach. Many assume that all failures are mechanical or electrical, but in truth, software glitches or control board malfunctions are frequently overlooked causes, especially in modern appliances with smart features. Overlooking the importance of understanding the nuanced operation of these components can lead to misdiagnosis. For example, a dishwasher’s error code might suggest a draining issue, but the problem could be a faulty float switch or control logic error, not the pump itself. This is where advanced diagnostic techniques come into play, differentiating simple fixes from complex repairs.
It’s also a common trap to rely solely on visual inspection. While seeing obvious damage helps, many faults are hidden or involve subtle electrical signals. For instance, a control board might appear unscathed visually but could have burnt components or faulty solder joints requiring expert testing. Failing to consider these nuances can mean wasting time replacing parts that aren’t actually defective.
Moreover, there’s a misconception that diagnostic tools are expensive or only suitable for professionals. However, basic multimeters and smartphone diagnostic apps have democratized appliance troubleshooting, empowering smart homeowners to pinpoint issues accurately. Trusted diagnostic strategies, like those outlined in these expert tips, emphasize the importance of understanding electrical schematics and signal flow rather than just guessing.
Advanced mistakes often involve overlooking less obvious causes, like software glitches or sensor failures, which can be confused with classic mechanical faults. For example, a washer that won’t start might be due to a control module lockout, not a motor failure. Recognizing these nuances prevents misdiagnosis and costly replacements.
So, how do you avoid falling into these diagnostic pitfalls? The key is acquiring a layered understanding of appliance systems and applying expert diagnostic techniques rather than relying on superficial inspection or assumptions. Regularly consulting comprehensive guides, such as these resources, can greatly improve your troubleshooting accuracy.
Have you ever fallen into this trap? Let me know in the comments! Mastering these nuances isn’t just for professionals—it’s about empowering yourself to handle basic repairs confidently and correctly the first time.
Investing in Precision Diagnostic Tools
Maintaining your appliances over time requires the right equipment. I personally rely on a high-quality digital multimeter because it allows me to test electrical components accurately and quickly—crucial for diagnosing control board issues or faulty sensors. When measuring resistance or voltage, I prefer a multimeter with auto-range capabilities; it simplifies testing diverse parts like the water inlet valve coil or the door switch without fuss. Another tool I always keep close is a thermal infrared camera, which helps spot temperature anomalies indicating failing motors or heating elements while avoiding unnecessary part replacements. According to expert guidelines, investing in diagnostic tools tailored to appliance repair dramatically improves troubleshooting confidence and efficiency.
Using Software for Long-Term Monitoring
For long-term appliance health, I recommend employing software solutions that track performance and detect early warning signs. Apps integrated with smart appliance sensors can alert you to issues like fluctuating temperatures or irregular cycle times, enabling preemptive maintenance. Modern dishwashers and ovens increasingly support Wi-Fi connectivity, letting you run diagnostics remotely and schedule maintenance before a minor issue snowballs into a costly repair. As technology advances, I predict a future where comprehensive app-based diagnostics and AI-powered predictive analytics become standard, helping homeowners extend appliance lifespan and prevent breakdowns.
How do I keep my appliances working better over time?
Consistent maintenance routines are vital. Regularly cleaning filters, inspecting seals, and testing electrical connections prolong service life. Implementing a scheduled diagnostic check using the right tools—like a multimeter or software diagnostics—can catch potential problems early. Maintaining a simple log of repairs and symptoms helps identify recurrent issues, making future troubleshooting faster and more accurate. For instance, referring to detailed diagnostic strategies, such as those found here, guides me through systematic checks that prevent blind part swapping.
Remember, physical inspection is just the start. Incorporating electronic diagnostics with specialized tools enhances precision, saving time and money in the long run. Try integrating a multimeter into your routine for testing connections or verifying resistor values—trust me, it’s a game-changer for appliance troubleshooting. Stay proactive with maintenance, and your appliances will reward you with consistent performance and fewer emergency repairs.

The Biggest Lessons I Didn’t Expect in Diagnostics
One of the hardest lessons I learned was that a calm, systematic approach beats frantic part swapping every time. Jumping to conclusions can lead to unnecessary expenses and frustration, especially if you miss the subtle clues that point to the real issue. Trusting your diagnostic tools and analyzing error codes carefully saved me from costly replacements and prolonged downtime.
Another insight was that many problems are rooted in simple components like switches or clogged filters, not complicated electronics. Focusing on the basics—power, water flow, drainage—often delivers quick wins and restores confidence. Overcomplicating repairs can blind you to straightforward fixes, so keep it simple and methodical.
Finally, I realized that embracing technology, like smartphone diagnostic apps and thermal cameras, elevates your troubleshooting game remarkably. These tools help visualize issues invisible to the naked eye and provide precise data, transforming DIY repairs from guesswork into a science. Investing in these technologies accelerates learning and leads to more reliable repairs.
Tools and Resources That Truly Make a Difference
The cornerstone of my repair toolkit is a quality digital multimeter—reliable, versatile, and essential for electrical testing. It empowers me to verify resistance, voltage, and continuity with confidence, making diagnostics more accurate. For in-depth understanding, this guide on diagnostic strategies offers invaluable insights into complex troubleshooting scenarios.
Next, I rely on smartphone diagnostic apps that connect with smart appliances, giving me real-time data and error logs. These apps simplify monitoring cycle issues or sensor malfunctions, helping me act proactively rather than reactively. They’re excellent for long-term maintenance planning and catching minor issues before they escalate.
Additionally, a thermal infrared camera has become a game-changer. It allows me to spot overheating components or faulty motors without disassembling entire units. For intricate electronics, visual cues matter more than ever, and this tool makes that possible with ease. Resources like comprehensive diagnostic tools are worth every penny.
Embracing a Future of Smarter Fixes
Looking ahead, I see a world where AI-driven diagnostics and cloud-based monitoring become standard in home appliances. Imagine your dishwasher telling you precisely which part needs attention, along with troubleshooting steps—before it fails entirely. This technological evolution will empower homeowners to manage repairs efficiently, saving money and reducing waste.
Until then, the most impactful step I recommend is building your diagnostic routine with accessible tools and expert-guided resources. Regular checkups using multimeters, app diagnostics, and thermal cameras can significantly extend appliance lifespan and improve reliability. Don’t wait for a breakdown—be proactive in understanding your dishwasher’s health.
What Are You Ready to Tackle Next?
Now that you have these insights, it’s time to put theory into practice. Whether you’re checking the water inlet valve or testing sensors, each step enhances your troubleshooting confidence. Remember, mastering diagnostics isn’t just about fixing appliances; it’s about gaining autonomy and peace of mind in your home maintenance. Take your next repair with renewed confidence, knowing you have the right knowledge and tools in hand.
How about sharing your own troubleshooting wins or questions? Drop a comment below and let’s learn together!