It hit me one quiet Saturday morning—my dishwasher had decided to give up just as I desperately needed it to handle a mountain of dirty dishes from the week. That frustrating moment, when the cycle didn’t start, and I realized I was stuck with a sink full of chaos. Ever been there? If so, you know that unfamiliar sinking feeling—am I looking at a simple glitch or a sign of something more serious?
Getting to the Bottom of Dishwasher Woes
Troubleshooting your dishwasher might seem intimidating at first, but trust me, understanding the common issues and their solutions can save you both time and money. Over the years, I’ve learned that many problems stem from faulty parts or overlooked diagnostic steps. There’s a persistence in these kitchen appliances—if you know where to look, you can often fix them yourself, avoiding costly replacements. My promise today is to walk you through the critical diagnostic strategies and parts you need to identify early signs of failure, so your dishwasher works smoothly again.
Is Fixing Your Dishwasher Worth the Effort
Let’s face it—after a certain point, it’s tempting to just replace a malfunctioning dishwasher. But are we really saving money? Studies show that repairing smaller issues can extend appliance life by years, often at a fraction of replacement costs. Early mistakes, like ignoring minor leaks or neglecting to clean filters, can escalate into major costly repairs. I once ignored a small water leak, and it eventually caused water damage and a hefty repair bill. So, I learned the hard way that proper diagnostics and part replacement are vital. Want to learn how to spot these issues early? Dive into our comprehensive [dishwasher troubleshooting guide](https://appliancebargainz.com/ultimate-dishwasher-troubleshooting-parts-guide-for-quick-repairs-2025) to become your own repair hero.
Now, let’s explore what actually causes these breakdowns and how you can prevent them from turning into disasters—starting with the essentials for quick diagnostics and repairs.
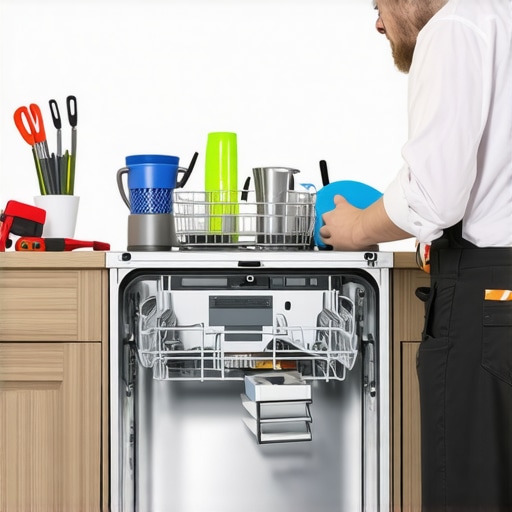
Start with Visual Inspection to Spot Obvious Problems
Before diving into complex tests, perform a thorough visual check. Look for leaks, corrosion, burnt wires, or loose parts. I once found a disconnected hose under my dishwasher, which caused poor drainage. Reattaching it restored function immediately. Use a flashlight to peer into tight spaces, and check that the door latch operates correctly. Small issues like these can be the root cause and are quick fixes. For a detailed list of critical parts to inspect, visit our top diagnostics guide.
Listen for Unusual Noises During Operation
Start a cycle and pay close attention to sounds. Grinding, banging, or screeching often indicate worn out bearings, damaged impellers, or failed motors. For example, I once heard a loud screeching noise, which turned out to be a faulty wash pump. By identifying such sounds early, you can target specific parts for testing or replacement. Using a smartphone to record these noises helps when consulting repair resources or parts suppliers. Recognize these signals early to prevent further damage and costly repairs.
Test the Door Latch and Lock Mechanism
The door latch is crucial for proper operation. If it doesn’t latch securely, the dishwasher might not start. Remove the outer panel to access the latch assembly; then, manually operate it to confirm smooth movement. Use a multimeter to test the latch switch for continuity—if it’s defective, replacement is straightforward. An unreliable latch is often mistaken for electrical issues, but diagnosing it with a multimeter provides clarity. Learn more about diagnostic procedures at this comprehensive guide.
Check the Water Inlet Valve and Hoses
The water inlet valve permits water flow into the dishwasher. If no water enters or it’s inconsistent, the valve could be clogged or electrically faulty. Turn off the power, disconnect the hoses, and inspect for kinks or blockages. Use a multimeter to test the valve’s coil for continuity. If defective, replacing the valve restores normal operation. Remember, a faulty inlet valve mimics problems with the water supply line, so be thorough. During my last repair, replacing a corroded inlet valve fixed a persistent filling issue in under 30 minutes. Ensure your hoses are in good condition, and check filters for debris regularly, as outlined in our troubleshooting guide.
Assess the Drain Pump and Filter System
Drainage problems are common. Remove the filter and clean out any food debris or mineral build-up. Test the drain pump motor by disconnecting it and applying 120V power—be cautious and use insulated tools. If the pump doesn’t run, it’s likely faulty. Alternatively, listen for a humming noise when the pump operates; silence may indicate an electrical issue or a seized motor. Replacing a drain pump is often a matter of unscrewing a few bolts and disconnecting wiring, as detailed in our diagnostics guide. Regular maintenance of filters and pumps prevents clogs and prolongs lifespan.
Evaluate the Control Panel and Electronic Components
If all mechanical parts check out but still no success, the issue might be with the electronic control board or display. Use a multimeter to check power supply to the control board. Look for burnt or damaged circuits visually. When replacing electronics, ensure compatibility and follow static safety precautions. In my experience, a failed control board often presents with unresponsive buttons or error codes. For precise diagnostic steps, review our expert troubleshooting article. Performing these tests methodically can identify faults reliably, saving time and avoiding unnecessary replacements.While most DIY enthusiasts focus on the obvious signs of failure, such as leaks or error codes, there are subtler nuances that can make or break your repair success. One common myth is that replacing a faulty part always solves the problem; however, in my experience, *misdiagnosing the root cause* even after replacing a component can lead to repeated failures. For example, swapping out a drain pump without checking the control board’s signals might result in the same drainage issue reappearing due to an electrical fault elsewhere. Understanding these advanced diagnostic traps and nuances ensures your repairs are both effective and lasting.
What makes electronic control boards a hidden culprit in dishwasher and oven issues?
Electronic control boards are often mistaken for simple ‘on/off’ switches, but they are complex circuits susceptible to voltage fluctuations, corrosion, and solder joint failures. A subtle sign like inconsistent operation or intermittent glitches might point to microcontroller failures rather than mechanical parts. Many overlook these electronics because testing requires multimeter experience and knowledge of circuit diagrams—skills that surpass basic troubleshooting. According to appliance repair experts, addressing control board issues proactively can prevent unnecessary part replacements and lost time. To develop a nuanced approach, consult comprehensive guides like these detailed diagnostics resources.
Another nuance is the importance of understanding the specific design differences among brands and models. For instance, some dishwashers have integrated filters that require unique cleaning routines, while others trap debris in accessible trays. Neglecting these subtleties often results in recurring problems, even after seemingly successful repairs. It’s a mistake to assume that a fix applicable to one brand will work universally—always refer to model-specific repair guides for precision. Dive into our ultimate troubleshooting guide for insights tailored to your appliance’s make and model.
Moreover, many repair failures stem from overlooking operator habits. For example, overloading the dishwasher or neglecting regular filter cleaning can lead to premature component wear, which is mistaken for part failure. Preventive maintenance and correct usage extend the lifespan significantly. Recognize these unseen factors to avoid unnecessary repairs and expenses.
Your repair journey benefits from an awareness of these nuances—like controlling for electrical variances and understanding model-specific quirks—that often go unnoticed by DIYers. So, next time you troubleshoot, consider: Are you addressing the *real* cause or just the surface symptom? If you’re eager to master these advanced diagnostics, explore our dedicated guide to dishwasher diagnostics or our oven repair strategies. Have you ever fallen into this trap? Let me know in the comments.
How do I maintain my appliances over time? Mastering proper maintenance is key to extending their lifespan and ensuring reliable performance. Regularly inspecting hoses, filters, and electrical connections minimizes unexpected breakdowns. For example, checking the water inlet valve for leaks or blockages prevents filling issues in dishwashers. Keeping software and control panels updated, especially in newer ovens with electronic controls, can prevent glitches. Investing in diagnostic tools—like a digital multimeter and specialized appliancescope—empowers you to identify faults early. These tools help confirm electrical continuity or detect voltage irregularities, saving time and expense. Looking forward, the trend is moving towards smart diagnostics integrated into appliances, offering remote troubleshooting via mobile apps, which I believe will revolutionize maintenance routines. To stay ahead, I recommend regularly consulting comprehensive diagnostic guides and maintaining your tools in good condition.
Another crucial aspect is establishing a routine for cleaning and inspecting components. Use a soft brush or compressed air to clear debris from filters and vents. Applying a multimeter to test electrical components like control boards or relays is a reliable method to determine their health—this step is detailed in our diagnostics guide. I personally prefer digital multimeters because of their precision and ease of use when diagnosing complex electronics. When troubleshooting a faulty oven control panel, for example, testing the PCB’s voltage outputs can pinpoint issues before replacing entire modules.
Beyond tools, developing a methodical approach accelerates repairs. Documenting symptoms, testing step-by-step, and referencing repair guides ensures you’re addressing root causes. Make a habit of performing visual inspections before testing electrical parts; often, a loose connection or a burned relay is the culprit. Regular maintenance not only saves money but also enhances safety by preventing electrical fires or water leaks. Before embarking on complicated repairs, I always review model-specific guides—like ours for dishwashers and ovens—to ensure compatibility and avoid mistakes.
In conclusion, embracing advanced diagnostics and routine maintenance equips you to keep your appliances functioning efficiently. Try setting up a dedicated diagnostic station with a multimeter, a small toolkit, and a repair manual—it’s a game-changer. This proactive approach not only prevents major failures but also boosts your confidence in handling repairs independently.
Lessons Only Repair Enthusiasts Discover
One of the most unexpected lessons I learned was how often seemingly minor issues like a clogged filter or a loose wire turn into major repairs when ignored. Recognizing these nuances early saved me thousands in replaced parts and frustration. Additionally, I realized that mastering diagnostic tools, like a multimeter, isn’t just for pros—it’s an empowering step for DIYers who want to trust their instincts.
Another insight is that electronic control boards, once thought to be complex mysterious parts, follow predictable patterns when you understand how to test their circuits properly. Lastly, patience and methodical troubleshooting are invaluable; rushing often leads to misdiagnosis and unnecessary expenses.
Tools and Guides That Changed My Approach
I rely heavily on resources like the ultimate troubleshooting guide for comprehensive diagnostics, which has demystified complex repairs. For physical tools, my trusted digital multimeter allows me to test electrical components with confidence, while an appliance-specific repair manual ensures I’m following the right procedures tailored to my model.
Additionally, I’ve found that online forums and community-based tutorials offer invaluable real-world tips that often surpass generic advice. These sources provide nuanced insights, helping me avoid common pitfalls and adapt solutions to unique situations.
Your Next Repair Adventure Starts Now
Embracing these insights and tools transforms appliance repair from a daunting task into an achievable, even enjoyable, challenge. The more you learn, the more confident you’ll become in maintaining and fixing your appliances, saving money and extending their lifespan. Remember, every small fix is a step toward mastery. Dive into the resources, practice patience, and don’t hesitate to experiment—your appliances will thank you!
What’s the most surprising issue you’ve successfully diagnosed and fixed on your own? Share your story below and inspire others on their repair journey!