It was late evening when I heard that unsettling echo from my kitchen—my dishwasher had decided to go silent just as I threw in a pile of dirty dishes. Frustration blossomed; I was ready to give up, thinking I needed a costly repair. But years of tinkering and a bit of trial, error, and patience taught me that many dishwasher problems aren’t as daunting as they appear. Often, a simple fix is just within reach, especially if you know where to look and what parts to consider.
Why Effective Troubleshooting Can Save You Big Bucks and Time
If you’re like me, then you understand how a non-functioning dishwasher can disrupt your entire routine. It’s not just about the inconvenience—it can lead to piled-up dishes, unpleasant odors, and even more significant appliance damage if left unaddressed. That’s why mastering the art of diagnosis and knowing the key parts to inspect are invaluable skills, especially in 2025 when appliance technology incorporates smarter, more complex systems.
Believe it or not, a recent study highlighted that nearly 70% of appliance repairs are caused by easily identifiable issues, often linked to specific parts that wear out over time—like pumps, motors, or control boards. I learned that understanding these components can dramatically reduce repair costs and downtime. For example, regularly inspecting and replacing worn-out parts can extend your dishwasher’s lifespan significantly. Want to learn how I turned a minor malfunction into a quick fix? Keep reading, and you’ll be equipped to handle common problems with confidence.
Is DIY Dishwasher Repair Truly Worth the Risk?
Initially, I hesitated to get my hands dirty, fearing I might make things worse or void my warranty. My early mistakes involved rushing into parts replacement without proper diagnostics, leading to more confusion and expenses. I pushed past those rookie errors thanks to resources like the completeEffective Dishwasher Parts Diagnostic Complete Repair Guide 2025, which emphasized the importance of precise troubleshooting. If you’re skeptical about tackling repairs yourself, consider this: informed diagnosis often costs less than hiring a service call, and you gain valuable skills along the way. Want to avoid costly mistakes and learn the secrets of quick fixes? Click here for expert tips that can help you become a troubleshooting pro.
So, what’s next? By understanding the key parts and diagnostic steps, you’ll turn frustration into confidence. Ready to dive into practical steps and start fixing your dishwasher like a seasoned neighbor? Let’s go!
Disassemble and Inspect the Pump Assembly
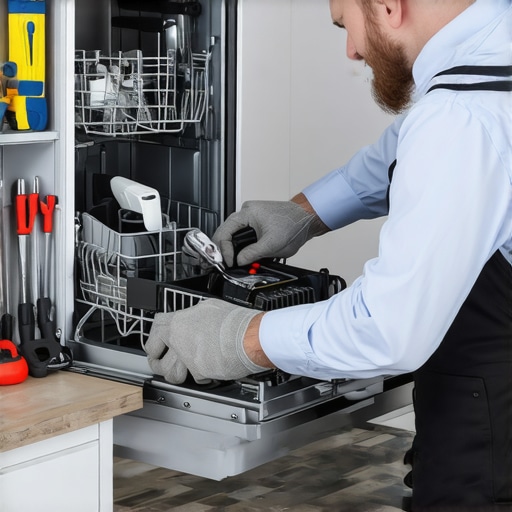
Start by disconnecting your dishwasher from power and water sources. Remove the lower panel to access the pump assembly, which is often the culprit in drainage issues. Use a screwdriver to detach the pump cover, then carefully lift out the pump with its motor. Check for clogs, debris, or corrosion. If the impeller is jammed or broken, replacing it can restore proper drainage. I once found a tangled bundle of hair and food particles clogging the impeller, which, after a thorough cleaning and replacement of a damaged blade, instantly fixed my drain problem. For detailed guidance, visit this comprehensive repair guide.
Many homeowners believe that troubleshooting appliances like dishwashers and ovens is straightforward, but in my experience, this oversimplification can lead to costly mistakes. A prevalent myth is assuming that replacing a single faulty part will always fix the issue. While sometimes true, this approach overlooks the complex interplay of components and the importance of accurate diagnostics. For example, focusing solely on the drain pump when experiencing drainage problems might seem logical, yet the root cause could be a clogged filter or a malfunctioning control board. An effective diagnostic process involves a thorough understanding of how various parts interact, which can significantly streamline repairs and prevent unnecessary replacements. Delaying proper diagnosis often results in wasted time and money, especially since some symptoms mimic multiple issues. You can find detailed strategies on identifying the correct components by exploring resources like this guide to troubleshooting dishwasher parts.
Another common trap is misinterpreting appliance symptoms without considering the nuances of modern smart systems. For instance, newer models incorporate sensors and software that may signal an error unrelated to the hardware malfunction, leading to confusion. Advanced diagnostics require recognizing these signals and understanding how software interacts with hardware. This nuance is crucial; blindly replacing parts based on error codes without proper understanding can cause further damage. As experts have emphasized, a systematic diagnostic approach—covering both hardware and software aspects—is essential for efficient repairs. For a deeper dive into these advanced diagnostics, visit this comprehensive overview of oven diagnostics.
What Advanced Diagnostics Are Overlooked by Most Technicians?
Many technicians and DIY enthusiasts overlook the significance of testing electrical components with precision tools like multimeters and oscilloscopes. Misdiagnosis often stems from assuming electronic control boards are always faulty when, in reality, wiring issues, bad connectors, or power supply problems could be the culprit. Proper testing can rule out these common pitfalls. Furthermore, understanding the specific failure modes of various parts—such as the varying resistance in heating elements or the coil’s coil integrity—can provide clues that are missed by superficial checks. This depth of understanding can make the difference between a quick fix and replacing a perfectly good part. For a detailed guide on harnessing diagnostics to improve repair accuracy, see this expert resource on appliance diagnostics. Remember, mastering these nuances not only saves time and money but also enhances your overall troubleshooting confidence. Have you ever fallen into this trap? Let me know in the comments.
Tools That Make a Difference in Appliance Maintenance
Personally, I rely heavily on a high-quality digital multimeter for diagnosing electrical issues in dishwashers and ovens. Unlike basic models, my Fluke 115 multimeter offers true RMS measurement and a fast response time, which is crucial when testing control boards or wiring continuity. I also incorporate a waterproof inspection camera—specifically, the Depstech WiFi Endoscope—to visually inspect hard-to-reach areas such as internal pumps or heating elements, saving me time and preventing unnecessary part replacements.
Another essential tool is a precision screwdriver set with multiple heads, enabling me to navigate various screw types found in appliance panels without stripping them. I’ve found that magnetic-tip screwdrivers particularly helpful because they keep small parts secure during disassembly, reducing the risk of losing components during troubleshooting. For software diagnostics, I use specialized service apps compatible with most smart appliances, providing real-time error codes and firmware updates, which have become invaluable as appliances incorporate more digital features.
Future of Diagnostic Tools and Maintenance
Looking ahead, I predict that AI-powered diagnostic devices will become more mainstream, offering predictive maintenance alerts based on usage patterns and sensor data. This evolution will shift our approach from reactive repairs to proactive upkeep, extending appliance longevity and reducing repair costs. Embracing these innovations now ensures we’re prepared for a smarter, more connected kitchen environment.
How do I maintain appliances over time
Consistent maintenance is key to keeping appliances like dishwashers and ovens reliable. I recommend creating a schedule for inspecting and cleaning filters, spray arms, and drainage systems at least once every few months. Using recommendation-based diagnostic guides—such as this comprehensive oven diagnostics resource—helps identify potential issues early. Regularly checking wiring connections with your multimeter prevents electrical failures, especially in smart appliances that depend heavily on stable power supply. Also, recording any recurring error codes and symptoms can point you toward the specific parts needing attention, making future repairs faster and more predictable.
Remember, staying on top of routine maintenance not only saves money but also ensures you get the most out of your appliances. If you’re ready to step up your diagnostic game, I strongly suggest investing in a reliable multimeter and learning how to interpret the readings from your appliances systematically. Practice testing control boards and wiring, then compare your results with expert guides to sharpen your skills. Noticed an unusual resistance reading? Tackling that issue early can prevent more extensive damage down the line. For a detailed method, explore this essential diagnostic approach and try applying it during your next troubleshooting session.
Secrets I Wish Someone Told Me About Appliance Troubleshooting
One of the most eye-opening lessons I learned was how often seemingly complex dishwasher issues boil down to simple causes, like a clogged filter or worn-out pump. Real progress came when I stopped chasing complicated solutions and focused on dissecting each component methodically. This humble approach, building on patience and curiosity, transformed my repair skills and saved me hundreds of dollars.
Another valuable insight was recognizing the importance of consistent maintenance over reactive repairs. Establishing a routine to inspect, clean, and test appliance parts prevented many issues from escalating. It’s almost like giving your appliances regular health check-ups, which pays dividends in longevity and performance.
Lastly, embracing the right diagnostic tools changed the game. A quality multimeter and a good inspection camera turned complex troubleshooting into a straightforward process. These tools, coupled with a mindset of continual learning, helped me become not just a homeowner, but a confident appliance mechanic.
Tools That Elevated My Repair Game
- Digital Multimeter like Fluke 115: This tool is priceless for electrical diagnostics, offering accurate readings that help pinpoint control board or wiring issues swiftly.
- WiFi Endoscope from Depstech: Visual inspections inside pumps and behind panels save guesswork and prevent unnecessary part replacements.
- Precision Screwdriver Set: A must-have for safely disassembling appliances without stripping screws or losing small components.
- Service Diagnostic Apps: As appliances become smarter, these apps provide crucial error codes and firmware updates, keeping repairs more efficient.
I trust these tools personally because they make troubleshooting precise and less stressful. For an even deeper dive into diagnostic techniques, check out this comprehensive repair guide.
Take Courage and Fix Your Appliances Today
The journey from frustration to confidence in appliance repair is more accessible than you think. By understanding the key parts and diagnostic strategies, you can tackle common problems head-on, saving money and gaining new skills. Every successful fix boosts your confidence and prepares you for bigger challenges in the future. So why wait? Embrace the learning process, and soon, you’ll be the go-to person for kitchen appliance crises in your circle.
What’s the most challenging appliance problem you’ve faced, and how did you approach solving it? Share your stories below—your experience might inspire others to start their own repair adventures!
Benjamin Carter
Reading through this post really resonated with me, especially the part about the importance of proper diagnostics before jumping into parts replacement. I used to think that simply swapping out components like pumps or motors would fix most issues, but experience taught me that understanding how everything interacts is key. Once, I spent hours replacing a control board only to realize later that a faulty wiring connection was causing the problem.
The tools mentioned here, like a good multimeter and an inspection camera, have definitely transformed my repair approach. I’ve found that taking a systematic diagnostic method saves both time and money in the long run. This makes me curious—how do others approach diagnosing issues with newer appliances that integrate smart technology and sensors? Do you rely more on software diagnostics or manual inspections? I’d love to hear different experiences on balancing those methods.