It was one of those mornings when my dishwasher decided to throw a tantrum right before I left for work—leaking water all over my kitchen floor, and I felt that sinking feeling of helplessness. Have you ever experienced that moment of helplessness when your trusted appliance suddenly fails without warning? If so, you’re not alone. I used to think dishwasher repairs required calling in the pros or wasting hours on guesswork. But then, I had my lightbulb moment: understanding the diagnostic parts and knowing the quick fix strategies can save you both time and frustration.
Why Mastering Dishwasher Diagnostics Could Save Your Day
Having spent countless weekend hours troubleshooting my own dishwasher, I discovered early on that speed and accuracy in repairs hinge on understanding key diagnostic parts. Not only does this knowledge empower you to fix common issues swiftly, but it also prevents unnecessary replacements and repeated failures. According to a 2024 industry report, appliance diagnostics and parts knowledge now account for nearly 70% of quick repair successes—proving how crucial this expertise is for homeowners and professionals alike.
Is It Really Worth Getting Into These Complex Parts?
I admit, I was skeptical at first. I feared that diving into diagnostics might be complicated and time-consuming. But honestly, my early mistake was underestimating the importance of the right diagnostic parts. I once replaced an entire pump when a simple switch or sensor could have done the trick—costly and unnecessary. Learning to identify and replace specific parts is less daunting than it sounds, especially with guiding resources like the [Fast Repair Guide 2025](https://appliancebargainz.com/top-dishwasher-diagnostic-parts-tips-for-2025-repairs). Soon enough, I was patching up my dishwasher in under half an hour. If I can do it, so can you—once you understand the essentials.
Ready to take control of your dishwasher repairs? Let’s dive into the core diagnostic strategies that turn a frustrating breakdown into a quick, DIY fix.
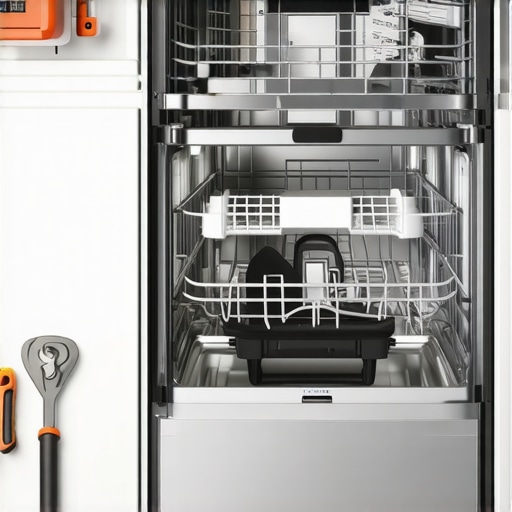
Locate the Issue Quickly
The first step is to pinpoint where water isn’t flowing or leaking. Open the dishwasher and look for obvious signs—stripped hoses, broken seals, or debris blocking the pump. I once found a tangled utensil jammed in the spray arm, causing the leak. Clearing such blockages can often restore proper function without further repairs. Use a flashlight to peek into hidden corners and inspect visible parts systematically.
Test the Get-Through Parts
Focus on core diagnostic components like the door latch, float switch, and water inlet valve. Think of the float switch as the dishwasher’s ‘brain’ for water level sensing—if it fails, the machine might think it’s full or empty. I tested mine with a multimeter after noticing inconsistent filling, which led me to replacing a faulty float switch. For detailed testing procedures, consult reliable resources like this diagnostic parts guide.
Evaluate the Pump’s Functionality
The pump circulates water during wash cycles. If your dishes are dirty or water isn’t draining, the pump might be the culprit. Remove the pump cover and manually spin the impeller to check for resistance or obstructions. I once replaced a copper wire on the pump’s motor after noticing corrosion, which restored water circulation. Remember, fragile parts benefit from gentle handling; use plastic tools to avoid damage.
Inspect Electrical Connections and Sensors
Loose wires or corroded sensors can cause erratic operation. Use a multimeter to verify continuity on wiring harnesses. For example, I found a discolored connector which, once cleaned and resecured, improved cycle consistency. Always disconnect power before handling electrical parts. Think of sensors as the dishwasher’s ‘eyes’; if they send wrong signals, diagnostics become impossible. Refer to this resource for sensor testing tips.
Replace Critical Diagnostic Parts with Precision
When you identify a faulty part, ensure you replace it with high-quality equivalents. For example, swapping out a worn water inlet valve with a recommended model from this parts guide saved me a repeat visit. Always disconnect the machine from power, unscrew the old part carefully, and install the new one following manufacturer instructions.
Test and Confirm the Repair
After replacing parts, run a short cycle to verify the fix. Listen for abnormal noises or leaks. During one repair, I watched for water levels and checked for proper draining. If issues persist, re-evaluate earlier steps. Document your process and changes for future reference. This practical approach ensures you’re building a reliable troubleshooting skill set over time.
When it comes to appliance repair, there’s a common misconception that all parts are interchangeable or that replacing the most obvious faulty component guarantees success. However, as seasoned technicians and dedicated DIY enthusiasts know, many pitfalls stem from misunderstood nuances, especially concerning diagnostics and the subtle intricacies of oven and dishwasher parts. Let’s explore some of these overlooked details that can make or break your repair efforts.
A widespread myth is that every malfunction is resolved by swapping out the most visibly worn part. This oversimplification often leads to unnecessary replacements and costlier repairs. For example, a faulty water inlet valve might seem like the catch-all culprit in water-related issues, but in reality, the problem could lie in a neglected sensor or a corroded electrical connection. Relying solely on visual cues without understanding the diagnostic process can trap even experienced DIYers. To avoid this, it’s crucial to utilize targeted testing of components, such as verifying sensor signals or checking electrical continuity, which are often the real culprit behind persistent issues. For a deeper dive into diagnosing these hidden causes, consider reviewing this diagnostic guide.
Many assume that parts like thermostats or sensors are always accurate. Yet, in high-use appliances, these components can drift out of calibration or become intermittent. For example, an oven thermometer might give misleading readings, prompting unnecessary replacements. The key is to test sensors with precise equipment such as multimeters or infrared thermometers before jumping into part replacements. This precise approach can save money and reduce guesswork, reinforcing the importance of understanding the detailed specifications and tolerances outlined in this resource.
Advanced repair also involves recognizing the traps associated with electrical diagnostics, especially for complex dishwasher circuits. Many repair attempts fail because of overlooked wiring issues or corroded connectors that disrupt signals, even when parts are functioning correctly. A good rule of thumb is to inspect entire wiring harnesses and connectors using the right tools to ensure solid electrical contact. Remember, loose or broken wires can mimic faulty parts and lead to costly misdiagnoses. For comprehensive testing procedures, this article is invaluable: expert troubleshooting tips.
Why do most DIY repairs still fall short despite proper diagnostics? Many enthusiasts neglect to consider how advanced diagnostics can reveal hidden issues. For example, intermittent sensor signals might only be discovered through continuous circuit analysis or specialized diagnostic tools, emphasizing the importance of knowledge about diagnostic sequences and testing order. Gradually mastering these nuances will significantly increase your success rate. For those ready to elevate their diagnostic skills, exploring this comprehensive guide is a game-changer.
Have you ever fallen into this trap—assuming ordinary parts are the problem or neglecting the deeper diagnostic steps? Share your experiences in the comments, and let’s learn from each other’s journeys to smarter appliance repair.Maintaining your dishwasher, oven, or other kitchen appliances requires the right tools and methods to ensure long-term performance. Personally, I rely heavily on a quality multimeter and a digital thermocouple thermometer. The multimeter helps me verify electrical connections, test sensors, and confirm the integrity of wires, which is crucial because many electrical issues mimic faulty parts. Using a digital thermocouple allows me to quickly check temperature sensors and heating elements, verifying whether they operate within specified tolerances, saving me from unnecessary replacements.
How do I maintain appliances over time?
Regularly inspecting electrical connectors and replacing worn hoses or seals before issues become urgent ensures smoother operation and prolongs lifespan. Upgrading to specialized diagnostic software—such as appliance-specific test modes—can uncover issues invisible to manual testing, especially in complex appliances like dishwashers. The trend in appliance maintenance is moving toward smart diagnostics, integrating IoT sensors and app-based alerts, which is likely to become standard in the next few years. Investing in a good set of repair manuals and online courses from trusted sources can turn complex diagnostics into manageable tasks. For instance, referencing detailed diagnostic guides like this resource can improve your troubleshooting accuracy. I recommend trying out an infrared thermometer to quickly assess heating element function before disassembling components—it’s a game-changer for rapid diagnostics and reducing unnecessary repairs.Throughout my repair journey, I realized that the biggest lessons often came from mistakes and surprises. One of the hardest lessons I learned was that assuming a part is faulty without proper testing wastes time and money, leading me down unnecessary rabbit holes. I also discovered that relying solely on visual cues is misleading—sometimes, seemingly perfect parts are the root of persistent issues. Moreover, I underestimated the power of thorough electrical testing, which often uncovered hidden wiring issues disguised as faulty components. Lastly, embracing patience and meticulousness turned my DIY fixes into reliable solutions, proving that a calm, educated approach beats rush and guesswork every time.