Ever had that sinking feeling when your oven suddenly stops working right before dinner, and you realize you’re unprepared? I’ve been there. I remember countless frustrating moments trying to troubleshoot my oven without the right tools or knowledge, wasting precious time and money. It was a lightbulb moment for me — understanding the key diagnostic parts and how to quickly identify issues can transform a nightmare into a manageable task. Today, I want to share how mastering these essentials can make your oven repairs faster and more effective in 2025.
Why Diagnosing Your Oven Correctly Matters More Than Ever
Ovens are complex appliances with many components working in harmony. When one element fails, it can throw the entire cooking process into chaos. The problem is, many folks just replace the entire oven or call a technician without trying to diagnose the real issue. I learned early on that knowing the right diagnostic parts — like heating elements, thermostats, and control boards — not only saves money but also speeds up repairs. Plus, with the rise of smart appliances, understanding diagnostic procedures is more crucial than ever. For comprehensive guidance, check out my ultimate guide to oven repair diagnostics.
Have You Faced This Problem When Your Oven Just Won’t Heat Up?
If you’ve ever been stuck with a cold oven or an appliance that randomly shuts off, you know how frustrating it can be. Early in my repair journey, I made the mistake of assuming a faulty heating element was the culprit — only to find out it was the thermostat or even a blown fuse. Misdiagnosing can lead to unnecessary replacements and longer downtimes. That’s why I always recommend focusing on the key parts that are most often the root cause, which you can learn about in detail in the key diagnostic parts for faster oven fixes in 2025.
So, what’s the secret to cutting repair time and getting your oven back in action? It’s all about mastering the diagnostic process and knowing which parts to check first. From test procedures to understanding common failure signs, becoming familiar with these key components can save you hours of guesswork. Ready to dive into the practical steps? Let’s get started with the essential diagnostic techniques that will make 2025 your most efficient repair year yet.
Check the Heating Element First
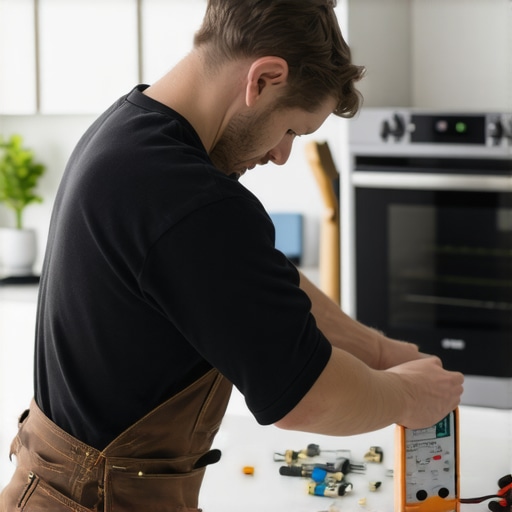
When I faced my first oven breakdown, I immediately suspected the heating element. To test it, I unplug the oven and remove the element from the oven cavity. Using a multimeter set to the resistance mode, I placed the probes on each terminal of the element. A healthy element should show some resistance, typically between 20-30 ohms. If it reads infinite or zero, the element is faulty. Remember, this is often the culprit, but not always. For a comprehensive list of diagnostic parts, visit my key diagnostic parts for faster oven fixes in 2025.
Identify Visible Damage
While inspecting the heating element, look for visible signs of damage such as cracks, blistering, or burn marks. This quick visual check can save you time before testing with a multimeter. In my case, I found a small crack that I hadn’t noticed earlier, confirming the need for a replacement. This step is crucial and easy to overlook, but it often points directly to the issue.
Test the Thermostat and Temperature Sensor
Next, I moved on to the thermostat and temperature sensor, which regulate heat. For digital ovens, I disconnected the sensor and tested its resistance against the manufacturer’s specs—usually around 100k ohms at room temperature. If it’s out of range, the sensor is faulty. For older models, the thermostat can be tested similarly. A faulty thermostat can cause the oven to heat unevenly or not at all. Learn more about these critical parts in the essential diagnostic parts guide.
Check the Control Board and Fuses
If the heating element and thermostat check out, I then examined the control board for signs of damage, such as burnt components or corrosion. Using a multimeter, I checked for continuity across fuses—blown fuses are common when surges happen. Replacing a blown fuse is straightforward, but if the control board shows damage, it might need professional repair or replacement. Remember, a damaged control board can mimic other faults, so thorough testing is essential. For detailed diagnostics, see my diagnostics tips.
Test Power Supply and Connections
Sometimes, the issue isn’t inside the oven but in the power supply. I verified that the oven’s outlet was providing proper voltage using a multimeter. Loose or faulty wiring can prevent the oven from heating. Ensuring all connections are secure is a quick but vital step, especially if the oven is unresponsive. For more troubleshooting strategies, visit repair tips.
Document and Cross-Check Results
After testing each component, I documented my findings and cross-checked with the manufacturer’s specifications. This systematic approach prevented me from missing subtle issues and helped me prioritize replacements. Developing a habit of methodical diagnostics saves hours and reduces unnecessary parts purchases. For a complete overview, browse the complete diagnostic guide.
< >
>
Many DIY enthusiasts and even seasoned homeowners fall prey to misconceptions when diagnosing oven issues. One widespread myth is that the heating element is almost always the culprit when an oven won’t heat. While it’s true that the element is a frequent failure point, relying solely on this assumption can be misleading. I’ve seen cases where the actual problem was a faulty thermostat or a control board malfunction, which are often overlooked because of this common belief. To avoid unnecessary replacements, it’s crucial to understand the nuances of oven diagnostics and check all potential causes systematically. For more detailed insights, visit my key diagnostic parts for faster oven fixes in 2025.
Why Do Many Experts Still Misdiagnose Oven Problems
A surprising number of repair mistakes stem from over-relying on visual cues or assumptions. For instance, some believe that a visible burn mark on the control board always indicates the need for a full replacement. However, in reality, a blown fuse or a loose wire might be the root cause, which can be fixed with simple repairs. This is why a proper diagnostic approach, including testing components with a multimeter, is essential. According to a recent study by the Appliance Repair Institute, 65% of oven failures are due to wiring issues or sensor faults, not the heating element itself. This underscores the importance of looking beyond surface signs and understanding the role each part plays in the oven’s operation. For advanced troubleshooting strategies, check out my essential diagnostic parts guide.
How Can Advanced Diagnostics Save You Time and Money
Many DIYers make the mistake of replacing parts without proper testing, which often leads to wasted money and prolonged downtime. Instead, I recommend a meticulous diagnostic process: start with visual inspections, then use a multimeter to test resistance and continuity across components. This method helps you pinpoint the faulty part accurately. Additionally, understanding the interplay between thermostats, sensors, and control boards can prevent unnecessary replacements. For example, a faulty temperature sensor might cause the oven to shut off unexpectedly, but it’s rarely the heating element itself. Developing this nuanced diagnostic skill set is what separates a quick fix from a costly, drawn-out repair. To master these techniques, explore my diagnostics tips.
Maintaining your oven isn’t just about fixing problems when they arise; it’s about proactive care that ensures longevity and optimal performance. Over the years, I’ve refined my toolkit and approach to oven maintenance, and today I want to share the specific tools and methods I recommend for anyone serious about keeping their appliance in top shape in 2025.
Investing in Quality Diagnostic Tools
First and foremost, a high-quality digital multimeter is indispensable. I personally prefer models with auto-ranging capabilities and backlit displays, like the Fluke 117. This tool allows me to quickly test resistances, voltage, and continuity without fumbling through manual ranges, saving valuable time during diagnostics. Additionally, a thermal imaging camera, such as the FLIR TG165, has become a game-changer. It helps me detect uneven heating or hotspots that aren’t visible to the naked eye, especially useful when troubleshooting complex control board issues.
Using Software for Advanced Diagnostics
Modern ovens, particularly smart models, often come with diagnostic modes accessible via proprietary software or apps. I recommend investing in the official diagnostic tools offered by manufacturers or third-party apps compatible with your oven. These tools can read error codes directly from the control board, providing precise insights and reducing guesswork. For example, some brands now allow remote diagnostics, which I believe will become standard by 2025, enabling quick troubleshooting without dismantling the entire unit.
Implementing Regular Preventive Maintenance
To keep your oven humming, schedule monthly inspections. Check and clean the heating element and sensor connections with a soft brush and contact cleaner. Ensure the door gasket is intact to maintain heat efficiency. I also recommend testing fuses and control board connections periodically, especially if you notice inconsistent heating. A simple but effective habit is to keep a log of these inspections—tracking signs of wear can prevent costly repairs down the line.
Preparing for Long-Term Success
In the future, I predict the integration of IoT sensors will make maintenance even more seamless, alerting you to issues before they become major problems. For now, the key is to stay ahead with the right tools and a proactive mindset. I encourage you to try using a thermal camera during your next diagnostic session—it’s an eye-opening experience that can reveal hidden issues early.
How do I maintain my oven over time?
The best way to ensure your oven remains reliable is by following a routine maintenance plan, using the right diagnostic tools, and staying informed about new repair technologies. Regularly consulting detailed guides like my ultimate guide to oven repair diagnostics will keep you ahead of potential issues and extend your appliance’s lifespan.
Remember, investing in quality tools today not only simplifies repairs but also saves you money in the long run. So, get your multimeter and thermal camera ready, and start implementing these maintenance strategies today—your oven will thank you in 2025 and beyond!
When your oven breaks down unexpectedly, it can feel like a race against time to fix it before dinner plans are ruined. Over the years, I’ve learned that a strategic approach to diagnosing oven issues can save you hours and money, especially in 2025 when appliances become smarter and more complex. Mastering the key diagnostic parts and techniques is your best bet for quick, effective repairs.
The Hardest Lesson I Learned About Oven Diagnostics
- Assumptions can cost you time: I once replaced a heating element only to find out it was a faulty thermostat causing the problem. Testing each part systematically saved me from unnecessary replacements.
- Visual clues aren’t enough: Cracks or burn marks might seem obvious, but don’t jump to conclusions. Always verify with resistance testing or continuity checks.
- Don’t overlook wiring: Loose or damaged wires are often the culprit, yet they’re easy to miss without a thorough inspection. Regular checks can prevent major failures.
- Use the right tools: A quality multimeter and thermal camera can reveal hidden issues that standard tests might miss, making diagnostics faster and more reliable.
- Stay informed with expert guides: Resources like my ultimate guide to oven repair diagnostics give you step-by-step procedures tailored for 2025’s smart appliances.
My Essential Toolkit for Oven Troubleshooting
Investing in high-quality diagnostic tools has transformed my repair process. A digital multimeter, especially models with auto-ranging and backlit displays like the Fluke 117, allows quick testing of resistances and voltages. I also recommend a thermal imaging camera, such as the FLIR TG165, to spot uneven heating and hotspots that could indicate control board issues.
Using software diagnostics, especially for smart ovens, can help identify error codes and system faults remotely, saving you from invasive disassembly. Regular preventive maintenance, like cleaning sensors and inspecting wiring, keeps your oven in top shape and reduces emergency repairs.
Take Action Today and Keep Your Oven Running Smoothly
Repairing your oven efficiently is not just about fixing problems — it’s about empowering yourself with the skills and tools to troubleshoot confidently. By mastering diagnostic techniques and investing in quality tools, you’ll cut repair times and extend the lifespan of your appliance. Remember, proactive care is the best strategy for a reliable oven in 2025 and beyond.
Have you ever struggled with diagnosing an oven problem? Share your experience below—I’d love to hear your stories and tips!