It was late one evening when I first noticed it—my oven door handle felt looser than usual. As I reached for that familiar grip, I was met with a unsettling wobble that I hadn’t paid much attention to before. At first, I dismissed it as minor, but over the next few days, the handle’s movement grew more pronounced, and I started to worry about safety and the risk of further damage. Turns out, a wobbly handle isn’t just an annoyance; it can compromise the safety features of your oven and lead to costly repairs if left unchecked.
Understanding Why Handles Wobble and Why It Matters
Many homeowners experience this issue but brush it off, thinking it’s a simple tightening job. In reality, a loose oven handle can be caused by several factors—wear and tear, loose screws, or even underlying structural problems with the door itself. But why does it matter so much?
A handle that’s wobbly might seem harmless at first glance, but it can affect your oven’s door seal, leading to heat escaping and energy loss. More importantly, it poses a safety hazard; a handle that unexpectedly detaches during use could cause burns or injuries. According to appliance safety experts, addressing loose components promptly is crucial to maintaining the integrity of your appliance.
Early in my DIY journey, I made the mistake of ignoring a wobbly handle, thinking I could delay fixing it. Big mistake. It eventually worsened, requiring a more complicated repair. That taught me a valuable lesson: taking simple maintenance seriously can save you time and money—and keep your household safe.
Do you notice your oven handle wobbling and wonder if it’s worth fixing? Well, today, I’ll walk you through the practical steps to tighten that handle safely and effectively, so you can keep your oven functioning properly and avoid future headaches.
Will Fixing Your Wobbly Handle Actually Make a Difference?
Many skeptics worry that tightening the handle might be complicated or that it won’t last long. But trust me, a proper fix can restore stability and confidence in your appliance. Plus, addressing this minor issue can prevent more serious problems down the line, like cracked doors or broken hinges. If you’re feeling unsure, I recommend reviewing detailed diagnostics before attempting a fix—there’s a helpful guide on diagnosing oven faults [here](https://appliancebargainz.com/oven-diagnostics-pinpointing-faults-before-calling-a-repair-expert). Ready to get started? Let’s jump into the steps you need to take.
Locate and Gather Your Tools
Before starting, assemble essential tools: a Phillips screwdriver, a small adjustable wrench, and a clean cloth. I learned this the hard way when I tried to tighten the handle with a butter knife—it didn’t work and only caused frustration. Having the right tools streamlines the process and prevents damage to delicate parts.
Remove the Oven Handle Carefully
Identify the screws securing the handle; they are usually hidden behind decorative caps or covers. Use the screwdriver to gently remove these caps, then unscrew the handle itself. Think of this like unscrewing a stubborn jar lid—you need steady, gentle pressure to avoid stripping screws or damaging the surface. During my first attempt, I rushed and cracked the handle’s plastic trim, so take your time.
Tip:
If screws are stuck, apply a little penetrating oil or heat the screw slightly with a hairdryer—these tricks can loosen stubborn fasteners. For detailed guidance, check out this diagnostics guide.
Inspect and Tighten the Screws
Once the handle is removed, examine the screws and mounting points. Sometimes, the issue isn’t just loose screws but stripped threads or worn-out holes. Use an adjustable wrench to tighten the screws—think of it as giving your handle a firm handshake that lasts. When I fixed my handle, I noticed the screws had slightly loosened over time, which I remedied by tightening them snugly without overtightening, to prevent cracking.
Replace or Repair Damaged Components
If the handle or screws are damaged, consider replacing parts. For instance, a cracked handle might need a new one, which can often be found online or through manufacturer replacements. I once found a discontinued handle online and carefully drilled new holes to fit it. Remember, trying to force a damaged part can lead to more significant damage or safety hazards.
Image Illustration
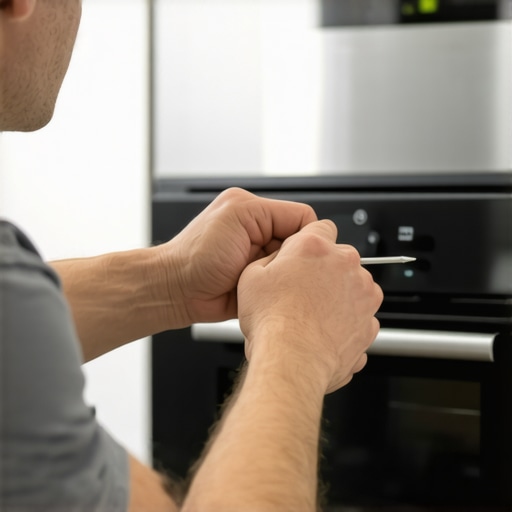
This image shows the handle removal process, illustrating screw locations and proper tools. Clear visuals prevent mistakes and make repairs smoother.
Reattach and Test the Handle
After tightening or replacing screws, reassemble the handle in reverse order. Ensure all screws are snug but not overtightened—over-tightening can cause cracking or stripping. Once reattached, open and close the oven door several times to check for wobbling or looseness. During my fix, I discovered that tightening one screw slightly improved stability, but a secondary loose screw was causing residual wobble—checking each screw individually is crucial.
Prevent Future Loosening with Routine Checks
Incorporate a quick weekly inspection to ensure screws remain tight. A towel or cloth can prevent potential damage by making handling smoother. Regular maintenance like this extends the lifespan of your appliance and keeps it safe to use. Remember, addressing even minor issues promptly, like a loose handle, can save you from costly repairs down the line. For more complex issues with your oven, visit this troubleshooting guide.
Many DIY enthusiasts and homeowners believe that diagnosis of appliance issues is straightforward—simply identify the symptom, replace the suspected part, and done. However, this oversimplification often leads to wasted time, money, and sometimes worsened problems. One common misconception is that the presence of an error code or symptom directly points to the faulty component, but in reality, appliances are complex systems where symptoms can be symptoms of secondary issues or even false alarms. This nuance is crucial for effective repairs.
A frequent trap is relying solely on generic diagnostic steps rather than understanding the specific behaviors and internal interactions of your appliance. For example, a dishwasher filling with water but not advancing to wash cycle might prompt a quick replacement of the water inlet valve. But in some cases, the issue could be a faulty float switch or a clogged spray nozzle, which masks as a solenoid problem. Misdiagnosing in such cases results in unnecessary part replacements and increased costs.
Let’s also shed light on an advanced myth: that aftermarket parts are always inferior to OEM (Original Equipment Manufacturer) components. While OEM parts are designed to fit perfectly and meet strict standards, many high-quality aftermarket parts match or even surpass OEM performance, often at a lower price. As noted in a detailed comparison of oven heating elements, choosing between OEM and aftermarket can hinge on durability expectations and budget constraints, not just brand loyalty. Consulting sources like this guide can help you navigate these choices effectively.
One of the sneakiest pitfalls is overlooking the importance of comprehensive testing with the right tools. A multimeter is invaluable for verifying electrical components, but many forget to test the entire circuit path or don’t understand how to interpret readings properly. For instance, testing the resistance of a heating element is only part of the process; confirming the continuity of wiring harnesses and switches ensures full diagnosis. Misinterpreting these results can lead to misdirected repairs. Experts advise always confirming a component’s failure with multiple tests and cross-referencing symptoms before ordering parts.
To deepen your understanding, consider this question: How do you differentiate between a failing control board and a faulty sensor when both can produce similar error codes or symptoms? Advanced diagnostics often require comprehensive testing protocols, such as checking for voltage irregularities, component heating, or signal timing. These steps go beyond basic troubleshooting and lean into a level of expertise that can significantly increase repair success rates. For more on this, visit this detailed diagnostics article.
In conclusion, mastering appliance repair diagnostics means recognizing the complexity beneath simple symptoms and avoiding common pitfalls such as superficial testing or assumptions about parts quality. Approaching repairs with an analytical mindset can save time, money, and frustration. Have you ever fallen into this trap? Let me know in the comments. For further guidance or professional support, don’t hesitate to reach out through this contact page.Maintaining your appliances in top condition requires more than just occasional fixes; it demands the right tools, consistent habits, and a proactive approach. **Investing in quality diagnostic tools** ensures you identify issues accurately and prevent unnecessary replacements. For example, a reliable digital multimeter, like the Fluke 117, allows precise testing of electrical components such as heating elements or control boards, helping you distinguish between faulty parts and simple wiring issues. Regular use of such tools can help detect subtle problems early, extending the lifespan of your dishwasher or oven.
Beyond electronic testers, **specialized repair kits** can save you time and money. For dishwasher repair, having a set of replacement rollers and sprayer nozzles on hand means you can quickly restore performance without waiting for parts delivery. Additionally, **cleaning tools** like silicone-based sprays for spray nozzles prevent mineral buildup, maintaining optimal spray patterns. Routine maintenance, such as checking door seals and cleaning filters, supports long-term efficiency.
Looking forward, I predict a trend toward **smart diagnostic apps and IoT integration** that can scan your appliances and suggest fixes remotely. While we’re still in early adoption phases, embracing these innovations now can position you ahead of potential breakdowns.
To keep appliances running smoothly, integrate diagnostic routines into your regular maintenance schedule. For instance, testing your dishwasher’s float switch with a multimeter once every few months can catch leaks before water damage occurs.
**How do I maintain appliance parts and diagnostics over time?** Establish a custom maintenance calendar that includes checking electrical connections, cleaning components, and calibrating sensors. Utilizing a combination of reliable tools and consistent routines is key.
Finally, for DIY enthusiasts, I recommend mastering troubleshooting with detailed guides like [this comprehensive diagnostic overview](https://appliancebargainz.com/dishwasher-parts-a-comprehensive-guide-to-diy-diagnostics). Taking the time to learn and practice these skills not only prevents costly repairs but also boosts confidence in handling unexpected issues. Try testing your dishwasher’s thermal fuse with a multimeter this weekend—that simple step can save you from costly service calls. Remember, proactive maintenance today ensures your appliances serve you reliably for years to come.
The Hardest Lesson I Learned About diagnostics,dishwasher,oven repair,parts
The biggest eye-opener was realizing that most appliance issues are not isolated faults but a cascade of interconnected problems. I once replaced a heating element, assuming it was the root, only to find later that the control board was faulty all along—saving me time and money by digging deeper first.
Another revelation was the importance of patience. Rushing through diagnostics often leads to unnecessary part replacements. Taking the time to test circuits thoroughly yielded better results and longer-lasting repairs.
Finally, I discovered that understanding the specific model quirks can make or break a repair. Not all parts fit or function the same way, and a little extra research beforehand avoids costly mistakes downstream.
My Essential Toolkit for diagnostics,dishwasher,oven repair,parts
I swear by a few tools: a reliable digital multimeter like the Fluke 117, which provides precise readings that distinguish between a failed sensor and wiring issues. A set of small screwdrivers tailored for appliance screws makes dismantling straightforward. I also keep a flashlight handy for inspecting hard-to-see areas, along with a set of replacement parts sourced from trusted suppliers, ensuring compatibility and quality.
For ongoing learning, I consult trusted sources such as this diagnostics guide and specific model repair manuals. These references broaden my understanding and boost my confidence with each repair.
Keep Repairing, Keep Growing
Your journey into appliance diagnostics and repair is just beginning. The more you learn and experiment, the more confident you’ll become in tackling tricky issues. Don’t hesitate to explore new tools, consult comprehensive guides, and embrace the satisfaction of fixing things yourself. Remember, every challenge is an opportunity to learn something new about diagnostics,dishwasher,oven repair,parts. What’s the most surprising issue you’ve fixed recently? Share your stories below, and let’s grow together in this repair adventure!