There was a moment in my kitchen when I reached for my oven’s control panel, expecting dinner to start baking, only to be met with stubborn silence. The buttons refused to respond. Frustration bubbled up—I’ve been there, hitting that wall where technology refuses to cooperate just when you need it the most. That lightbulb moment, realizing I was about to call in a repair technician for a fix that might be simpler than I thought, happens to many homeowners.
Why Your Oven’s Buttons Might Freeze Up and How to Fix It
If you’ve ever had an oven that acts like it’s deaf to your commands, you’re not alone. This common but often overlooked issue can leave you scratching your head, thinking the appliance has turned into a brick. But here’s the truth: many of these problems stem from simple fixable causes, and knowing where to look can save you time and money. I promise that by the end of this post, you’ll understand exactly what’s going on—and how to get those buttons clicking again.
Is It Really Worth the Hassle or Should I Call an Expert?
At first, I made the mistake of assuming this was a complex control board failure. Turns out, some issues are merely a loose connection or a dirty contact—things I could troubleshoot myself. The key is avoiding costly replacements when you can diagnose and fix simple faults at home. For a detailed guide, check out my recommended steps for pinpointing oven faults before calling a repair professional.
Now, let’s dive into the most common reasons your oven’s buttons might stop responding and how to fix them, even if you’re not tech-savvy. Trust me, with a few basic tools and a little patience, your oven can go from frustrating to functional again.
Disconnect and Access Internal Components
First, unplug your oven to ensure safety, then carefully remove the control panel cover using a screwdriver. Think of it as opening the hood of a car—you need access to the engine to diagnose the problem. During my own repair, I made sure to lay out all screws and parts to avoid confusion.
Inspect the Control Board and Connections
Look for Loose Wires and Corrosion
Check all wiring connections for looseness or signs of corrosion, which is like looking for rust on bike chains—it hampers performance. Tighten any loose connectors gently and clean corrosion with a soft brush. I once found a loose ribbon cable that, when reconnected properly, restored button responsiveness instantly.
Test the Touchpad and Membrane
Using a multimeter, test the continuity of the membrane switch. It’s akin to checking if a doorbell button’s wiring is intact—if there’s no continuity, replacing the membrane might be necessary. I used a multimeter trick (see here) to pinpoint faulty switches.
Check the Control Panel for Physical Damage
Examine buttons, knobs, and the touch surface for cracks, dirt, or sticking parts—similar to inspecting a smartphone screen for dead zones. Dirty contacts or sticky buttons can be cleaned with isopropyl alcohol and a soft cloth, which often solves responsiveness issues.
Replace Faulty Components Strategically
If you identify a damaged control board or membrane, order the correct replacement parts. Use part numbers and diagrams to ensure compatibility, much like buying compatible batteries for your gadgets. For detailed parts info, visit this guide.
Reassemble and Test
Reassemble all parts in reverse order, ensuring all screws are tightened securely. Plug the oven back in and test functions methodically. If buttons respond now, congratulations—you’ve fixed it! Otherwise, revisit the connections or consider professional repair services through our contact page.
Remember, safety comes first; never attempt electrical repairs with the appliance plugged in. Patience and methodical troubleshooting are your best tools to bring your oven back to life without costly replacements or calls to professionals.
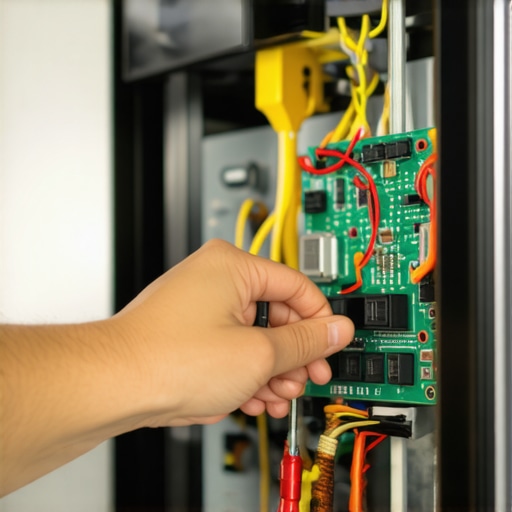 When it comes to diagnosing appliances like ovens or dishwashers, many assume a straightforward process exists—that if something’s wrong, a simple test or quick replacement will fix it. But let’s dig deeper into the nuances that often get overlooked, leading to costly mistakes or unnecessary parts replacement. For example, a common myth is that the control board is always the culprit when buttons stop responding. In reality, issues like loose wiring or corroded contacts are frequently to blame, and knowing how to distinguish these quick fixes from real failures can save you time and money. Don’t fall into the trap of replacing components without proper diagnosis; always verify the faulty part first by testing continuity or resistance—sharing some advanced tips, I recommend [pinpointing oven faults](https://appliancebargainz.com/oven-diagnostics-pinpointing-faults-before-calling-a-repair-expert). One advanced mistake many make is assuming that if an appliance acts up intermittently, the problem is with the part itself—often, it’s due to environmental factors like temperature fluctuations or power surges affecting sensitive electronics. This can be particularly tricky with control boards; they sometimes exhibit symptoms that mimic other faults, leading to unnecessary replacements. Interestingly, studies show that inexperienced DIY repairs can sometimes cause more damage, especially if safety protocols are ignored, like attempting electrical diagnostics while the appliance is plugged in. Remember, a careful visual inspection combined with proper testing can reveal hidden faults—such as a damaged fuse or a corroded connector—that are easy to overlook. For in-depth troubleshooting techniques, explore [how to identify dishwasher faults](https://appliancebargainz.com/parts-and-diagnostics-how-to-identify-dishwasher-faults) or [testing your oven’s heating element](https://appliancebargainz.com/testing-the-resistance-on-your-dishwasher-heating-element). That said, knowing the nuances between OEM and aftermarket parts, understanding circuit behavior, and recognizing the signs of component stress can be the difference between a successful repair and a costly mistake. So, next time you’re diagnosing an appliance, avoid the common pitfalls—test thoroughly, verify assumptions, and don’t hesitate to consult detailed guides or seek professional help. Remember, DIY repairs are rewarding but require knowledge—and a willingness to dig beneath the surface. Have you ever fallen into this trap? Let me know in the comments.
Keeping Your Appliances Running Smoothly Over Time
Maintaining appliances like ovens and dishwashers requires more than occasional cleaning—investing in the right tools and adopting a systematic approach can extend their lifespan significantly. One of my top recommendations is a high-quality multimeter, such as the Fluke 115—they offer reliability and precision essential for diagnosing electrical faults. I personally favor digital multimeters with auto-ranging features, which reduce guesswork and improve safety when testing components like control boards or heating elements. For instance, testing the resistance of your oven’s bake element with a multimeter can help you determine if it’s functioning correctly, preempting failures before they happen. Discover how to test your oven’s heating element at this guide.
How do I maintain appliances over time without frequent repairs?
Adopting regular inspection routines is key. For example, inspecting the door seals of your dishwasher regularly prevents leaks that can cause damage and mold growth. Keeping internal components clean—like removing mineral buildup from spray nozzles—can prevent performance drops. I recommend using specialized tools such as a small, flexible brush or compressed air to reach into tight spots and surface the buildup without dismantling the entire machine. Check out my detailed guide on cleaning dishwasher spray nozzles for a simple maintenance routine.
Tools I swear by for effective diagnostics
Over the years, I’ve found that a digital clamp meter is indispensable for measuring current draw on components, helping identify overloads or shorts. For physical inspection, a good magnifying glass with LED illumination is invaluable for spotting micro-cracks or corrosion on circuit connections. When replacing parts, I always use OEM-compatible tools, such as a torque screwdriver, to ensure screws are tightened precisely—avoiding stripped threads or loose components, which could lead to future failures. Using the right tools not only saves time but also minimizes the risk of accidental damage during repairs.
Predicting appliance trends and future-proofing your setup
The future points toward smart diagnostics and IoT integration, allowing for remote monitoring and predictive maintenance. This evolution makes it even more vital to have a solid foundation in manual troubleshooting and the proper tools. As technology advances, maintaining familiarity with diagnostic procedures—like testing control modules or sensors—will keep you ahead. Remember, staying proactive by regularly inspecting and testing your appliances can dramatically cut down on emergency repairs and extend their useful life.
If you haven’t already, try testing your oven’s heating element resistance using a multimeter—this one of the simplest yet most revealing diagnostics. It’s a proactive step that can prevent unexpected breakdowns and costly replacements. For more comprehensive troubleshooting techniques, visit this resource. Your appliances will thank you for the extra care and attention!
Lessons That Changed How I Tackle Appliance Woes
- The Biggest Mistake Was Jumping to Conclusions: I used to assume that a faulty button meant a broken control board. Turns out, simple loose wires or corrosion caused more issues than the expensive parts. Diagnosing properly before replacing saves money and time.
- Patience Is Your Best Friend: Rushing through repairs often leads to overlooked details. Taking the time to methodically inspect every component and connection reveals hidden faults that quick fixes miss. Remember, a thorough check beats guesswork every time.
- Tools Make All the Difference: Investing in a quality multimeter and good lighting transformed my repair game. Knowing how to test continuity or resistance with confidence reduces guesswork and prevents accidental damage. Trust me, the right tools are worth every penny.
- Visual Clues Are Gold: Cracks, corrosion, and dirt tell stories about what’s wrong. Regularly inspecting your appliances for these signs can catch issues early, saving you from costly repairs later. Don’t overlook the power of a keen eye.
- Keep Learning with Trusted Guides: Resources like pinpointing oven faults and dishwasher diagnostics provide invaluable insights that deepen your understanding and improve future repairs.
Tools and Resources That Elevate Your Repair Game
- Multimeter (like Fluke 115): Reliable, precise, and essential for testing electrical components, preventing unnecessary replacements.
- Small Flashlight or LED Lamp: Brightens dark corners and helps spot tiny cracks or corrosion that could be causing issues.
- OEM-Compatible Replacement Parts: Ensures longevity and proper fit, reducing the risk of future failures.
- Repair Guides and Forums: Sites like our comprehensive repair guides and diagnostics resources are treasure troves of practical knowledge.
Take Charge and Transform Your Repairs
Arm yourself with knowledge, patience, and the right tools—your appliances will thank you, and you’ll gain confidence in every troubleshooting session. Remember, DIY repairs are not just about fixing something; they’re about empowering yourself to understand your home better. Don’t let fear hold you back; your next success story starts with a simple test or inspection. Ready to dive into your next repair challenge? Share your experiences or ask questions below — together, we learn and grow.