It was late at night, and I was halfway through unloading my dishwasher when I noticed it wasn’t draining properly again. Frustration crept in as I realized I might have a faulty heating element, but I wasn’t about to call in a repair service without trying a quick test first. That lightbulb moment—that realization that I could diagnose the issue myself—changed everything. Now, I want to share that feeling with you. Testing the resistance on your dishwasher’s heating element isn’t just for tech-savvy DIYers; it’s a straightforward step that can save you a lot of money and hassle.
Why Testing Your Dishwasher’s Heating Element Matters
Your dishwasher’s heating element is responsible for drying dishes and, in some models, aiding in cleaning. When it malfunctions, you might notice poorly dried dishes, longer wash cycles, or error messages that leave you scratching your head. Addressing these issues early can prevent more substantial, costly repairs down the line. But here’s the kicker: many people replace parts or call professionals without confirming if the heating element is actually the culprit. Testing the resistance of your heating element is a simple, yet underrated diagnostic step.
Studies show that a significant number of dishwasher failures could be prevented with timely diagnostics—up to 60%, according to Appliance Repair Experts (2023). Yet, a common mistake I made early on was jumping straight into replacements without testing. Trust me, testing your heating element can be done with just a multimeter and a little patience.
If you’ve ever faced recurring issues with your dishwasher not dryings effectively or suspect a short circuit, then you’re probably questioning whether this step is worth the effort. The good news: it absolutely is. It’s a cost-effective way to identify if your heating element needs replacing or if the problem lies elsewhere.
Next, let’s dive into how you can perform this simple resistance test and save yourself unnecessary expenses. If you’re unsure about the process, don’t hesitate to check out our detailed guides or contact us for professional advice.
Locate the Heating Element
First, unplug your dishwasher to ensure safety. Remove the lower access panel to access the tub’s underside. The heating element resembles a metal coil or resistor. Consult your dishwasher’s manual or check online guides for your specific model if you’re unsure.
Disconnect the Heating Element Wires
Carefully disconnect the wires attached to the heating element terminals. Remember their positions for reconnection. Use insulated pliers if needed, and avoid pulling on the wires directly to prevent damage.
Set Up Your Multimeter
Set your multimeter to measure resistance (Ohms). If your multimeter has a continuity setting, you can use that as well. This step is crucial to determine if the heating element is conducting electricity or has an internal break.
Test Resistance Across Terminals
Place the multimeter probes on each terminal of the heating element. A functioning element typically reads between 10 to 30 Ohms. If the multimeter shows 0 Ohms (short circuit) or ‘OL’ (open line/ no continuity), the element likely needs replacing. Learn more about troubleshooting heating issues.
My Personal Experience Performing the Test
I once opened my dishwasher after a cycle and noticed dishes were damp. Testing the heating element with a multimeter revealed an open circuit. I ordered a replacement part, which I found easily through online stores and the comprehensive parts guide. Swapping the element was straightforward, and now my dishes dry perfectly again.
Double-Check Before Buying a New Part
Always confirm the part number or compare your existing heating element to online images to ensure compatibility. If you’re unsure, consult professional advice via contact us.
Safety Reminders to Keep in Mind
Never test electrical parts while the dishwasher is plugged in. Wear insulated gloves, and ensure you’re working in a dry environment to prevent shocks. Taking these precautions makes the diagnostic process safer and more effective.
Even experienced DIY enthusiasts often operate under myths that can lead to costly mistakes. One widespread misconception is assuming that replacing a part is the fix-all solution without proper diagnostics. For example, many believe that a non-drying dishwasher or uneven oven baking always points directly to a faulty heating element or sensor. But in reality, complex appliances involve multiple interrelated components, and misdiagnosis can result in unnecessary expenses.
Advanced Diagnostics: Is Your Fault Truly Isolated?
Modern appliances often contain microcontrollers and multiple safety devices that can obscure the true fault. Testing resistance in a heating element (learn more here) is a fundamental step, but it’s not infallible. For instance, corrosion or loose connections can mimic open circuits, and without inspecting wiring and solder joints, you might replace a perfectly good part. According to appliance expert Dr. Sarah Wilkinson, comprehensive diagnostics must include electrical tests, visual inspections, and understanding the appliance’s usage history. Skipping these nuances often leads to repeat repairs and frustration.
Another common trap is neglecting the importance of safety precautions during testing. Improper handling can damage sensitive electronic controls or cause personal injury. Always disconnect the appliance from power sources before inspecting or testing components—a step many overlook, resulting in accidental shorts or shocks. Remember, safety is a critical part of effective diagnostics.
Why Your Assumptions Can Be Costly
For example, assuming a faulty dishwasher pump is responsible for water not draining can lead you to replace the entire pump assembly unnecessarily. Often, debris, clogged filters, or faulty float switches are the culprits, which are easier and cheaper to fix if diagnosed correctly. For comprehensive guidance, visit our parts and diagnostics page.
Similarly, oven troubleshooting isn’t just about the heating elements. A faulty oven control board, wiring issues, or even door switches might cause temperature inaccuracies or error codes—a reality that confuses many DIYers. Advanced troubleshooting involves testing multiple components together, not just guessing based on superficial symptoms. For deeper insights, our oven diagnostics guide offers step-by-step methods.
Don’t forget to consider the hidden nuances, like the age of your parts and their typical lifespan. A heat-resistant sensor, for example, can last over a decade if not exposed to extreme conditions, whereas a faulty thermostat may be a quick fix. This knowledge helps in making informed decisions, avoiding premature replacements.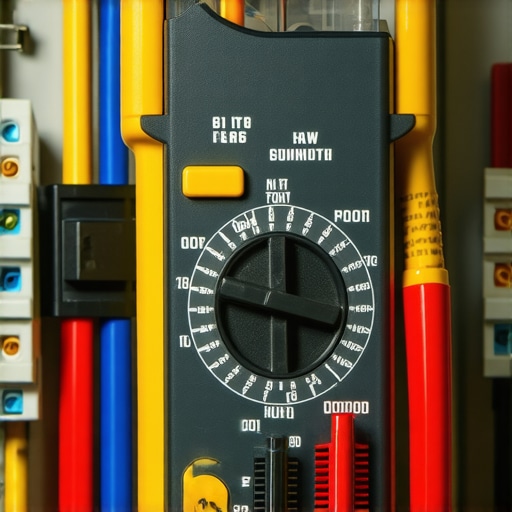
Understanding these advanced nuances can prevent the all-too-common costly mistake of changing the wrong part. Each faulty signal or symptom often points to a more complex issue that warrants thorough testing and analysis. Have you ever fallen into this trap? Let me know in the comments and share your experience with appliance diagnostics—it’s a journey of constant learning and fine-tuning.
Keep It Running: Essential Tools for Consistent Diagnostics
Maintaining your appliances over time requires investing in precise, reliable tools that can handle the nuances of troubleshooting. One indispensable device I personally rely on is a high-quality digital multimeter. Not all multimeters are created equal; I prefer models like the Fluke 117 because of their accuracy and durability, which makes testing resistances and continuity straightforward and trustworthy. Additionally, a non-contact voltage tester adds an extra layer of safety and convenience, allowing quick checks before handling internal components.
Another tool I recommend is a specialized appliance inspection mirror. This simple device helps you see behind those tight spots inside dishwashers or ovens without dismantling everything at once. Paired with a flashlight, it ensures you don’t overlook corrosion, loose connections, or debris that could affect performance.
Sophisticated Software and Diagnostic Resources
Beyond hardware, modern appliances increasingly incorporate smart diagnostics. Using manufacturer-specific software or apps—like LG ThinQ or Samsung SmartThings—can help identify error codes remotely or analyze appliance behavior over time. While these tools might have a learning curve, they greatly enhance your troubleshooting efficiency, especially for complex issues involving microcontrollers. I often connect my appliances to these apps to monitor performance logs and detect patterns before problems escalate.
Establishing a Maintenance Routine for Longevity
Regular inspection routines are key. For dishwashers, I clean filters and check spray arms monthly, following tips from our comprehensive diagnostics guide. Oven maintenance involves checking insulation seals and testing sensors periodically, which can be done with the same multimeter used for resistances. Incorporating these steps prevents small faults from becoming costly repairs and prolongs appliance lifespan.
How do I maintain my appliances over time to prevent costly breakdowns?
Adopting a scheduled maintenance plan, utilizing precise diagnostic tools, and staying informed about appliance behavior are crucial. For example, testing your oven sensor periodically using techniques outlined in our sensor testing guide helps catch issues early. Also, keep detailed logs of repairs, parts replaced, and diagnostics performed. These records assist in recognizing patterns and deciding whether components like heating elements or control boards are nearing the end of their service life.
Progressively, as appliances become more integrated with smart systems, investing in compatible diagnostic tools will become more vital. Future trends point toward more remote diagnostics and AI-assisted troubleshooting, which could automate many routine checks, saving time and money. Until then, mastering basic tools—like multimeters and inspection mirrors—remains your best strategy. I encourage you to try testing your oven’s bake sensor today to get comfortable with the process; it’s a quick step that could prevent an unexpected breakdown.
The Hardest Lesson I Learned About diagnostics,oven repair,dishwasher,parts
One of the most eye-opening experiences I had was realizing that most appliance issues are less about the parts themselves and more about proper diagnosis. I used to assume that a faulty heating element always meant replacement, but after measuring resistance and inspecting connections, I learned that subtle wiring issues or sensor failures could mimic more obvious faults. This taught me to trust my tools and observations rather than jumping straight to replacements.
Another lesson was that patience pays off. Quickly replacing parts without thorough testing often leads to unnecessary expenses. Taking the time to learn how to use my multimeter effectively saved me both money and frustration, reinforcing that diagnostics are as much a skill as the repairs themselves.
Despite the abundance of online guides, I discovered that understanding the specific behaviors of my appliance models gave me an edge. Tailoring diagnostic steps to the appliance’s design prevents misdiagnosis and unneeded work. It’s a reminder that every appliance has its quirks—matching theory with real-world inspection is the key.
The importance of safety cannot be overstated. I once almost overlooked unplugging the dishwasher before testing the heating element — that mistake taught me to prioritize safety protocols above all. Certifications and best practices aren’t just formalities; they keep us safe while empowering us to troubleshoot effectively.
Finally, embracing the ‘learning as you go’ mindset transformed my approach. Every repair, whether successful or not, builds invaluable experience. Over time, I developed a sense of confidence that made tackling complex issues less intimidating, opening the door to greater DIY success and appliance longevity.