Have you ever felt that sinking frustration when your cherished gas oven starts acting up, and you realize that something as small as a gasket might be the culprit? I remember the moment vividly—a sluggish, uneven heat and a strange smell emanating from my old oven, and I knew I had to dig deep to find what was wrong. It struck me then—tiny parts, like the gasket, can make a world of difference, yet they’re often overlooked until it’s too late.
Why Settling for the Wrong Gasket Can Cost You More
When it comes to maintaining an aging gas oven, the gasket plays a critical role in sealing the door properly and ensuring safe, efficient operation. A worn or incorrect gasket can lead to heat leaks, increased energy consumption, and even dangerous gas fumes escaping—hardly what you want in your kitchen sanctuary. The challenge? Finding an exact replacement that fits like a glove and performs reliably.
Is All Replacement Gasket Quality the Same?
This is where I slipped up early on. I once ordered what looked like a compatible gasket from a generic supplier, only to find it wouldn’t seal properly, and my oven’s performance suffered. Trust me, a poor-quality gasket is more trouble than it’s worth. Invest a bit more time to choose the right one, and it will save you headaches, money, and safety worries in the long run. To learn more about choosing durable parts, check out [this guide on oven repair essentials](https://appliancebargainz.com/oven-repair-essentials-troubleshooting-common-issues-with-parts).
Before we dive into how to identify and select the perfect gasket, I want to ask—have you faced the frustration of a faulty oven door seal? If so, you’re not alone, and help is just a few steps away. Understanding the importance of the gasket in your oven’s health is the first move toward fixing it right.
Now, let’s get into the nitty-gritty of how to find that elusive perfect match for your vintage gas oven, ensuring safety, efficiency, and peace of mind.
Identify the Exact Gasket Needed
Start by removing the faulty gasket from your oven door. Use a putty knife to gently pry it out, being careful not to scratch the door frame. Measure the length, width, and thickness with a flexible ruler or caliper. Take note of the gasket material—most are made of heat-resistant rubber or silicone. For example, I once replaced mine and realized that even a half-inch difference in thickness caused the door to not seal properly. Having precise measurements ensures you find a gasket that fits perfectly and maintains safety and efficiency.
Compare OEM and Aftermarket Options Carefully
OEM Gaskets for a Reliable Seal
Original Equipment Manufacturer (OEM) gaskets are designed specifically for your oven model. They offer the best fit and durability but can be pricier. For my early repairs, I opted for an OEM gasket after reading reviews, and it lasted over five years without issues. To verify compatibility, check your oven’s model number and compare it to the gasket’s part number, which you can often find in the oven’s manual or on the manufacturer’s website.
Quality Check on Aftermarket Gaskets
Aftermarket gaskets are generally less expensive and readily available online. However, their quality varies significantly. Look for reviews that mention heat resistance and fit. I once bought a generic gasket that was cheaper but cracked after a few months, leading me to replace it again. To avoid this, stick to reputable suppliers and verify the gasket’s material specifications align with your oven’s requirements.
Ordering with Confidence
When purchasing, use the exact part number, or bring your measurements and model details to a knowledgeable seller or website. Cross-reference with the manufacturer’s recommended parts list. Remember, a gasket that is even slightly mis-sized can cause heat leaks, unsafe conditions, or inefficient operation. For detailed part number searches, refer to the [oven repair parts guide](https://appliancebargainz.com/parts-and-diagnostics-how-to-identify-dishwasher-faults-quickly). This preemptive step saved me hours of troubleshooting later.
Install the Gasket Correctly
Once you have the right gasket, clean the door frame thoroughly to ensure proper adhesion. Apply a thin bead of oven-safe gasket cement if necessary, then press the gasket into place, ensuring it is seated evenly around the door perimeter. Use clamps or tape to hold it temporarily until the adhesive sets. I found that an even gasket cushion prevents heat leaks and maintains door pressure, which significantly improves oven performance. Proper installation is crucial to avoid future gaps and potential safety hazards.
By following these precise steps, you can confidently replace your oven gasket with the right part, ensuring optimal sealing, safety, and energy efficiency. Remember, taking the time to measure accurately and choose quality parts will pay off in the long run, saving you money and frustration.
Many DIY enthusiasts assume that choosing parts based solely on price or generic compatibility guarantees success, but in my experience, this approach often leads to recurring issues. One common myth is that all replacement parts are created equal, which is simply not true. OEM parts are engineered for precise fit and longevity, whereas aftermarket options can vary wildly in quality, leading to pitfalls like poor sealing or premature failure. For example, I once replaced a dishwasher spray arm with a cheap aftermarket part, only to find it caused leaks and water pooling at the bottom, forcing me to troubleshoot again. The reality is, investing time to verify part specifications and sourcing from reputable suppliers can save you frustration and money in the long run.
Another nuance often overlooked is the importance of proper diagnostics before replacing components. Many people jump straight to part replacement when troubleshooting oven or dishwasher faults, but this can be a costly mistake. Advanced issues like control board failures or sensor malfunctions require nuanced testing using multimeters or diagnostic tools, rather than guesswork. For instance, testing an oven’s temperature sensor for electrical continuity can reveal whether it’s truly faulty or just giving false readings, preventing unnecessary part swaps. For comprehensive diagnostic steps, check out [this guide on oven diagnostics](https://appliancebargainz.com/oven-diagnostics-pinpointing-faults-before-calling-a-repair-expert).
Beware of the trap where users believe that replacing a single component will always restore full functionality. In reality, many parts are interconnected, and a failure in one often indicates broader issues. For example, a faulty thermostat might trigger the oven’s error codes, but underlying wiring problems could cause intermittent operation if left unaddressed. A holistic approach—testing related components, inspecting wiring, and understanding the system’s physics—is key.
Now, here’s an often misunderstood aspect: many assume that all repair tasks require professional intervention. While certain complex problems do, many advanced issues like testing the thermal fuse or reseating control boards are well within the scope of a determined DIYer. Just ensure you follow safety procedures, especially with gas appliances or high-voltage systems. To stay safe, review detailed procedures and use [trusted online diagnostics resources](https://appliancebargainz.com/dishwasher-parts-a-comprehensive-guide-to-diy-diagnostics).
Finally, a common mistake is neglecting regular maintenance that could prevent breakdowns in the first place. Descaling, cleaning spray nozzles, inspecting gasket integrity—these small steps go a long way. Regularly checking and maintaining your appliances can dramatically reduce the likelihood of costly repairs.
Remember, mastering these nuances transforms your repair skills from basic to advanced. Have you ever fallen into this trap? Let me know in the comments. For more expert tips, don’t hesitate to explore our [comprehensive repair guides](https://appliancebargainz.com/privacy-policy-2) and elevate your appliance troubleshooting skills.
Tools I Recommend for Longevity and Precision
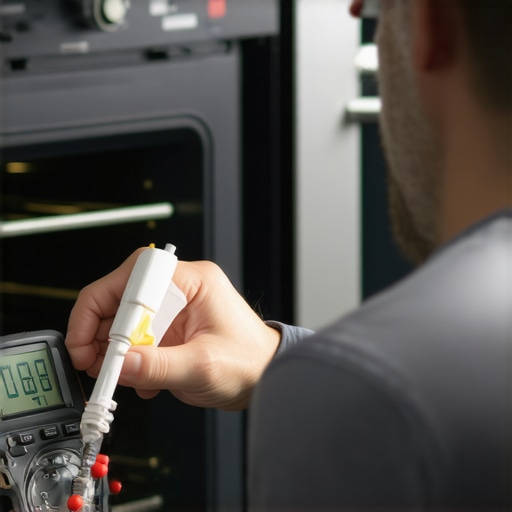
Maintaining your appliances and ensuring long-term performance begins with having the right tools at your disposal. I personally swear by a high-quality digital multimeter, like the Fluke 117, because it provides accurate readings essential for diagnosing electrical faults in ovens and dishwashers. A reliable multimeter allows me to differentiate between faulty thermostats, control boards, or wiring issues without unnecessary part replacements.
Additionally, a set of precision screwdrivers, especially Phillips and Torx heads, is invaluable for removing panels and component covers without stripping screws. My go-to is the Wiha Precision Screwdriver Set, which offers the durability and precision needed for delicate appliance work.
For cleaning, a dedicated ultrasonic cleaner has been a game-changer. It effectively removes mineral buildup from spray nozzles and contacts, significantly improving performance and extending the lifespan of components. I’ve used the Magnasonic Professional Ultrasonic Cleaner for thorough cleaning of small parts like thermostat probes and spray assembly components.
The Significance of Diagnostic Software and Manuals
Deep troubleshooting often benefits from diagnostic software—many modern appliances have diagnostic modes built into their control systems. For example, most oven control panels allow you to enter a diagnostic mode through button sequences, helping identify error codes before committing to replacements. This guide details some of the most common diagnostic procedures for dishwashers, which I highly recommend mastering. Download manuals from manufacturer websites and keep them accessible; they contain invaluable troubleshooting flowcharts and wiring diagrams that save time and prevent costly errors.
Predicted Trends in Appliance Maintenance
Looking forward, I believe that diagnostic tools integrated with smartphone apps and IoT sensors will revolutionize appliance maintenance. Imagine being able to run a quick check via an app and get real-time performance data, alerting you to issues before they cause breakdowns. This proactive approach could extend appliance lifespans even further and reduce emergency repairs.
How do I maintain my appliances over time?
Consistent maintenance—such as regular cleaning spray nozzles and inspecting gaskets—prevents most issues from escalating. Developing a routine, like checking wiring connections semi-annually and keeping diagnostics manuals handy, ensures you catch problems early, saving money and reducing downtime. Using tools like multimeters to periodically test electrical components can preempt failure, especially for critical parts like control boards and sensors. Incorporating software updates and firmware checks where available also ensures your appliances stay at peak performance.
If you haven’t already, try using your multimeter to test an oven’s thermal fuse or sensor as outlined in this comprehensive guide. It’s a simple step that can tell you a lot about your appliance’s health and empower your DIY maintenance efforts. Remember, a little preventive care today can prevent expensive repairs tomorrow.
The Hidden Lessons Appliance Repairs Taught Me
- Trusting OEM parts over cheaper alternatives often saves time and money—I’ve learned this the hard way after repeatedly facing subpar replacements that failed prematurely.
- Precise measurements are the secret to snug fits; even a small mismatch in gasket thickness can cause heat leaks, so investing in quality tools makes all the difference.
- Proper diagnostics before replacing parts save countless headaches—using multimeters and understanding each component’s role prevents unnecessary expenses.
- Lack of regular maintenance invites trouble—simple tasks like cleaning spray nozzles and inspecting gaskets can prevent major failures.
- Patience and attention to detail turn DIY repairs into opportunities for learning and confidence—rushing often leads to overlooked issues and rework.
Tools That Keep My Appliance Troubleshooting on Point
- High-quality digital multimeters like the Fluke 117—verified by years of reliable use—are indispensable for electrical testing and ensuring accurate diagnoses.
- Precision screwdrivers from Wiha—durable and easy to handle—make opening panels and tightening screws a breeze without damaging delicate parts.
- Ultrasonic cleaners—such as the Magnasonic Professional—help me clear mineral buildup from spray nozzles, improving performance while prolonging component lifespan.
- Diagnostic manuals and software links—like those found on manufacturer websites—provide invaluable step-by-step guidance that keeps me confident during complex repairs.
Embrace the Future of Appliance Fixes Today
Your journey into appliance repairs is just beginning, and every challenge you face is a chance to learn something new. By applying these insights and tools, you’re not only saving money but also gaining the satisfaction of becoming your own repair hero. Remember, patience, curiosity, and a bit of adventure go a long way toward mastering the art of maintaining your trusted appliances. Keep experimenting, stay safe, and don’t hesitate to share your successes or ask questions below—your next breakthrough might just be a repair away!