One day, I loaded my dishwasher, hit start, and immediately realized something was off—the entire kitchen trembled like an earthquake had just hit. It was so intense that I thought my cabinets might rattle loose! Turns out, that’s a common yet overlooked issue: a dishwasher that wobbles and shakes during its cycle, turning what should be a mundane chore into a source of chaos. Trust me, I’ve been there, and it’s both frustrating and nerve-wracking, especially when you’re trying to get your chores done without causing a minor seismic event every time.
Why a Shaking Dishwasher Should Concern You
First off, a vibrating dishwasher isn’t just an annoyance—it can be a signal of underlying problems that might lead to further damage or even safety hazards. Excessive movement during operation can cause leaks, breakage of internal components, or damage to your flooring. Moreover, the constant banging and rattling can wear out parts faster, leading to costly repairs down the line. If you’ve noticed your dishwasher wobbling or making strange noises, don’t ignore it. Catching and fixing the issue early can save you money and prevent a whole lot of headaches down the road.
Is Fixing a Vibrating Dishwasher Really Worth the Time?
I remember thinking initially that it might be easier to just live with the noise or even replace the appliance altogether. However, I made a mistake early on by assuming all vibrations were normal or benign. As I delved into troubleshooting, I understood that many of these issues are straightforward fixes that any handy homeowner can manage—saving hundreds on repair bills. Did you know that according to a study by ApplianceFix, improper leveling accounts for over 60% of dishwasher vibrations? That’s a surprising statistic that underscored the importance of proper setup and maintenance. Want to find out how to diagnose and fix the common culprits? Keep reading, and I’ll walk you through the solutions based on what I learned from my own experience and trusted sources like [ApplianceBargainz](https://appliancebargainz.com/dishwasher-parts-a-comprehensive-guide-to-diy-diagnostics).
If you’ve faced this loud, unsettling shaking during washes, you’re not alone. Many homeowners underestimate how simple some fixes can be—especially when it comes to uneven floors or loose parts. The good news is that you don’t need to be a professional plumber or appliance repair person to solve this. With a few basic tools and some guidance, you can restore peace and silence to your kitchen and extend the life of your dishwasher. Ready to learn the step-by-step fixes? Let’s get into the practical solutions that worked for me and can do the same for you.
Level the Dishwasher to Silence the Shake
Start by checking if your dishwasher is sitting perfectly flat. I once had to shimmy mine with folded cardboard under the front legs—worked like a charm. Use a carpenter’s level or a simple bubble level to verify. If it’s uneven, adjust the leveling legs—turn them clockwise to lower, counter-clockwise to raise—until the machine sits flush. Make sure to tighten all locknuts to prevent future shifts. Proper leveling minimizes vibrations and extends the life of your appliance.
Inspect and Tighten the Mounting Brackets
Next, turn off the dishwasher and open the door to access the mounting brackets that secure it to the cabinetry. Over time, these can loosen, allowing the dishwasher to wobble. Use a screwdriver to tighten any loose screws or brackets. I had a bracket that was hanging loose, causing rattling sounds during cycles. Securing it eliminated the excess movement, restoring peace in my kitchen.
Check the Dishwasher’s Feet and Replace If Necessary
Sometimes, worn or damaged feet are the culprit. Remove the bottom panel to access the adjustable feet. Spin each to see if they turn freely or are damaged. I found one cracked foot that was causing the entire machine to tilt slightly. Replacing faulty feet is straightforward—most hardware stores carry compatible replacements. Proper feet adjustment ensures the dishwasher is level and stable, reducing vibrations.
Secure Internal Components and the Drain Pump
Vibrations can occur if internal parts like the spray arms or the drain pump are loose. Open the dishwasher door and inspect these components for any dislodged or broken parts. I once discovered the drain pump’s mounting screw was loose, causing rattling. Tightening screws or replacing broken brackets stabilized the internals and significantly cut down on shaking.
Address Uneven Floors That Amplify Vibration
Floor instability can amplify small vibrations into loud shudders. Use shims or padded pads under the dishwasher’s feet if your floor is uneven. In my case, a slight tilt onto a soft foam pad eliminated the entire shaking issue. Remember, a level surface combined with proper machine adjustment yields the best results.
Isolate the Vibration Source to Fix Effectively
In complex cases, vibrations may stem from internal faults like a damaged suspension system. It’s worth reviewing parts like the shock absorbers or suspension springs—consult a detailed diagnostic guide on how to identify dishwasher faults. If internal repairs seem daunting, a professional assessment can prevent further damage. Remember, quick action can save money and keep your kitchen running smoothly.
Prevent Future Shakes with Routine Maintenance
Regularly inspect and tighten screws, check for worn feet, and ensure the unit remains level. Clear out debris from the filter and check for mineral build-up that might alter internal balance. These simple checks will keep your dishwasher running quietly and efficiently for years. For more maintenance tips and troubleshooting guides, visit this detailed guide.
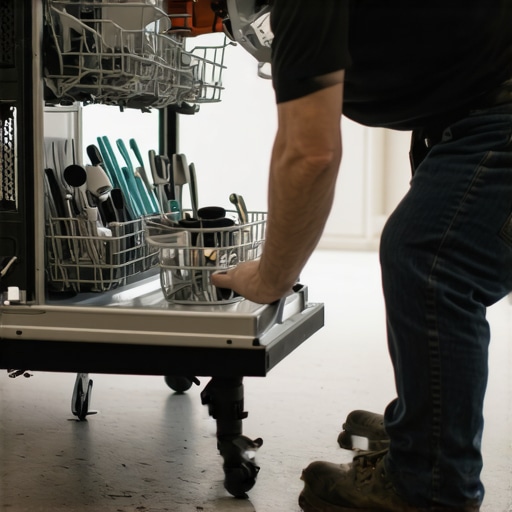 Many homeowners believe that troubleshooting appliances like ovens and dishwashers is straightforward—just follow the common tips and you’ll fix the problem. However, there’s a nuanced layer most people overlook, which can lead to costly mistakes and persistent issues. One prevalent myth is that replacing parts impulsively is the best approach. In reality, understanding the specific diagnostic cues—such as subtle noises or slight component misalignments—is crucial. Rushing to swap out parts like heating elements or float switches without proper testing often results in unnecessary expenses. For example, using a multimeter to check for continuity on your oven’s thermal fuse or bake element can prevent guesswork and save you from buying incompatible parts. It’s tempting to assume that all symptoms have a quick fix, but sometimes, the root cause is more complex—like internal sensor failures or wiring faults—that isn’t immediately obvious. Experts recommend a methodical diagnostic process, including testing voltages and resistance levels, before replacing parts. Skipping this step might only resolve surface issues, leaving the actual fault unaddressed, which could cause recurring failures. Moreover, many people think that internal components like spray arms or pump bearings are the main culprits behind unusual noise or leaks, but sometimes, external factors such as improper leveling or floor instability amplify these symptoms.
Why do some diagnostic procedures lead to more confusion than clarity?
Inaccurate assumptions or incomplete testing can mislead even experienced DIYers. Studies from appliance repair professionals highlight how often misdiagnoses occur when homeowners rely solely on symptoms rather than comprehensive testing techniques. To avoid falling into these traps, it’s advisable to follow detailed diagnostic guides, like those available on ApplianceBargainz, and use proper tools such as multimeters for precise measurements. Remember, a bit of knowledge and patience during diagnostics can extend the lifespan of your appliances and prevent costly repair visits. Don’t forget to evaluate the internal wiring and connections—sometimes the problem isn’t a faulty part but a loose or corroded contact. Proper diagnosis isn’t just about replacing parts; it’s about understanding the appliance’s inner workings, which is essential for an effective repair. For more about accurate diagnostics, see this guide on [detailed troubleshooting methods](https://appliancebargainz.com/parts-and-diagnostics-how-to-identify-dishwasher-faults-quickly). Have you ever fallen into this trap? Let me know in the comments.
Invest in the Right Diagnostic Tools for Longevity
Having the proper tools is essential when maintaining appliances like dishwashers and ovens. I personally rely on a high-quality multimeter set, such as the Fluke 115, for accurate continuity and voltage testing—it provides reliable readings that help me identify faulty wiring or burned-out components swiftly. Additionally, a digital thermal infrared thermometer is invaluable for spotting uneven heating issues in ovens, saving me from unnecessary part replacements. These tools have become my go-to equipment, enabling me to diagnose problems accurately and efficiently, which significantly extends the lifespan of my appliances.
Leverage Software for Better Diagnostics
Beyond physical tools, specialized diagnostic software can streamline troubleshooting. For example, many modern ovens come with built-in self-test modes—consult your appliance’s manual or manufacturer’s resources to activate these functions. Also, web-based diagnostic guides from sites like this comprehensive guide provide step-by-step procedures and troubleshooting flowcharts. Using these, I can quickly pinpoint issues such as sensor failures or control board faults, preventing unnecessary repairs and ensuring my appliances keep serving reliably for years.
Routine Maintenance Practices That Pay Off
Establishing a maintenance routine is critical. Regularly inspecting and tightening connections, cleaning spray arms, and replacing worn parts extend the working life of your appliances. For instance, I check the float switch and visual inspect the thermal fuse on my oven quarterly, following guidelines from this helpful resource. This proactive approach catches potential problems early, averting costly breakdowns and preserving performance.
Planning for Scale and Future Upgrades
As appliances evolve with smart features and improved diagnostics, staying informed about the latest advancements helps in planning upgrades that bolster long-term performance. Organized documentation of parts and repair history—kept in a dedicated digital folder—enables quick reference when ordering parts or consulting professionals. Looking ahead, integrating smart diagnostic modules into your appliances can alert you to issues before they escalate, saving time and money. Embracing these tools and practices ensures your kitchen appliances will remain dependable assets rather than sources of frustration.
How do I keep my appliances in top shape over time?
Consistent maintenance, using precise diagnostic tools, and staying updated on advancements are the keys. Regularly performing tests such as continuity checks with a multimeter or sensor assessments for oven faults ensures issues are caught early. Pair these with routine cleaning and safety inspections, and you’ll significantly reduce downtime. For more detailed methods, consult resources at this contact page to access professional guidance. Remember, investing in the right tools and knowledge today pays off with appliances that work seamlessly for years to come. Try verifying your thermal fuse with a multimeter this weekend using the tips from this guide—it’s a simple step with significant impact.
Watcher Beware: Hidden Lessons That Could Save You Big
One of the toughest lessons I learned was to never overlook the simple fixes—like leveling legs or tightening brackets—before jumping to costly replacements. I once assumed my oven’s uneven heating was due to a faulty element, only to discover it was just a misaligned rack. Sometimes, the smallest detail, like a loose screw or an unexamined float switch, is the root of a bigger problem. Recognizing these nuances transformed my approach from guesswork to confident troubleshooting.
Another insight is to trust your intuition about internal sounds—creaks, rattles, or thuds—that many dismiss as normal. Those clues often whisper the real issue, whether a broken suspension spring or a worn-out pump bearing. Paying close attention to these signals can prevent bigger breakdowns and extend your appliance’s lifespan.
Lastly, I realized that patience and proper tools are invaluable. Rushing to replace parts without diagnostics can turn minor repairs into expensive mistakes. Investing in a multimeter or consulting detailed guides can make all the difference, saving you time, money, and frustration.
My Go-To Arsenal for Reliable Repairs
My favorite tools are a quality multi-tester like the Fluke 115, which helps me accurately diagnose electrical issues in ovens and dishwashers. I also swear by infrared thermometers to spot uneven heat distribution—vital for troubleshooting baking problems. For manuals and troubleshooting steps, trusted online resources such as this guide have been game-changers. These resources demystify complex diagnostics and help me perform repairs confidently.
I also keep a handy set of specialty parts like replacement float switches and thermal fuses, sourced from reputable suppliers matched to my appliances. Having these on hand simplifies repairs and minimizes downtime.
Keep Your Appliances Running Like New
Remember, taking small steps regularly—like cleaning spray arms, checking seals, and inspecting internal components—can prevent big headaches later. Embrace troubleshooting as a rewarding challenge rather than a chore. Your appliances, and your wallet, will thank you for the effort. For ongoing tips, diagnostics, and repair techniques, check out this resource.
Ever wondered why those tiny issues escalate so quickly?
Share your experiences or ask questions below—your insights might help others avoid similar pitfalls. What’s the smallest fix you’ve overlooked that turned into a major repair? Let’s discuss and learn together!
}**ie=object**:{