Ever pulled a batch of muffins out of the oven, only to find the bottoms completely charred? That frustrating, smoky smell lingering in your kitchen again? I know the feeling all too well. There was a time I thought my oven had a mind of its own—burning everything I baked, no matter how much I tweaked the temperature or adjusted the racks.
Discovering the Real Cause Behind the Burnt Bottoms
That lightbulb moment hit me when I realized it wasn’t just my baking skills—something was off with the oven itself. Turns out, many of us overlook simple issues that cause uneven heating, leading to those pesky burnt bottoms. The good news is, with a bit of troubleshooting and some basic repairs, you can fix this problem yourself and regain confidence in your oven’s performance.
Is Your Oven Faulty or Just Misbehaving? Don’t Worry, It Might Be Fixable
In my early days of DIY oven repair, I made the mistake of assuming a stubborn oven was beyond help, which only led to unnecessary expenses. But after diving into reliable resources—like this diagnostics guide—I learned that many issues are simple to diagnose and fix without calling in a pro. Knowing the common causes, like faulty heating elements or uneven temperature sensors, can save you time and money. So, if you’ve faced similar frustrations—have you ever wondered why your baked goods turn out uneven or burnt at the bottom? You’re not alone.
In this post, I’ll share practical insights and step-by-step advice to help you identify the root cause and fix your oven. Ready to transform your baking experience? Let’s dive in and get to the bottom of this!
Start with a Visual Inspection of Your Oven
Before diving into complex repairs, turn off your oven and let it cool completely. Open the door and examine the oven interior, focusing on the heating elements and the oven floor. Look for signs of damage, debris, or buildup that could cause uneven heating. Use a flashlight if necessary to spot hidden issues. A thorough inspection will help identify obvious problems like melted insulation or burnt-out elements, which you can address directly. I once found a scorched piece of foil lodged beneath the heating element, which caused local overheating. Removing it instantly improved baking results.
Check the Heating Element and Sensor Function
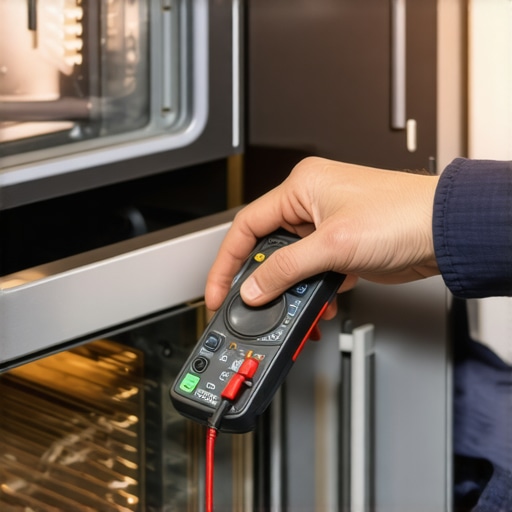
Next, test the heating elements for continuity using a multimeter. Remove the oven’s back panel or access panel if needed, then disconnect the heating element. Set your multimeter to the ohms setting and touch the probes to the terminals of the element. A reading of zero or infinite ohms indicates a break in the circuit, meaning the element is faulty and needs replacing. Alternatively, if you’re unsure, compare your readings with the specifications for your model or consult a< a href='https://appliancebargainz.com/parts-and-diagnostics-how-to-identify-dishwasher-faults-quickly'> diagnostic guide. I replaced a warped element that showed no continuity, and the oven’s heat distribution immediately improved.
Test the Oven Temperature Sensor
The temperature sensor regulates heat; if faulty, it can cause uneven baking or burning at the bottom. Disconnect the sensor and measure its resistance with a multimeter. At room temperature, a typical sensor should read around 1-2 kΩ. If the resistance is significantly higher or lower, the sensor may be malfunctioning. Replacing a defective sensor is straightforward and can resolve bottom burn issues. For precise guidance, check out< a href='https://appliancebargainz.com/diagnosing-a-faulty-oven-thermostat-without-a-repairman'> diagnostics about oven sensors.
Verify Proper Airflow and Internal Cleanliness
Uneven heat can also stem from poor airflow or accumulated debris. Remove racks and wipe down the interior with a damp cloth, paying special attention to vents and fan blades. A clogged convection fan or obstructed vents can cause hotspots, leading to burnt bottoms. For ovens with convection fans, inspect the fan blades for dust or grease buildup; clean gently with a soft cloth. Sometimes, simply cleaning the vents and fan can significantly improve heat distribution.
Calibrate Your Oven for Accurate Temperature
Even new ovens can drift from their set temperature. Use an oven thermometer placed on the middle rack to verify actual temperature against the display. If the difference is significant, recalibrate the oven following your model’s instructions, typically by adjusting a calibration screw or relying on the oven’s digital menu. Accurate calibration ensures consistent baking results and prevents over-baking or burning the bottoms. I calibrated mine after noticing frequent bottom burns when baking cookies, and now everything cooks evenly.
Consider Replacing Faulty Parts and When to Call a Pro
If testing reveals defective parts like heating elements or sensors, order replacements online or from local suppliers. For a quick fix,< a href='https://appliancebargainz.com/oven-repair-essentials-troubleshooting-common-issues-with-parts'> replace the faulty component following the manufacturer’s instructions. However, if electrical components or the control board are suspect, or if you’re uncomfortable with electrical repairs, it’s safest to consult a professional. Remember, attempting repairs beyond your skill level may lead to safety hazards or further damage.
Keep Your Oven Clean and Well-Maintained
Regular cleaning prevents grease buildup that can cause uneven heating. Use oven-specific cleaners and avoid harsh abrasives that can damage surfaces. Check and replace worn door seals to prevent heat from leaking, which affects internal temperatures. Proper maintenance allows your oven to perform optimally, preventing issues like burnt bottoms and ensuring delicious, evenly baked dishes. On one occasion, replacing a worn seal eliminated hot spots caused by heat leakage, restoring perfect baking results.
By systematically inspecting, testing, and maintaining your oven, you can resolve the common causes behind burnt bottoms. Each step not only fixes the immediate problem but also extends the lifespan of your appliance and saves costs. Remember to consult detailed< a href='https://appliancebargainz.com/oven-diagnostics-pinpointing-faults-before-calling-a-repair-expert'> diagnostics resources to guide your repairs safely and effectively.
Many DIY enthusiasts and even seasoned technicians often fall prey to misconceptions about diagnosing and repairing appliances. One common myth is the over-reliance on multimeters alone, assuming that a simple continuity check confirms a part’s viability. In reality, multimeters can sometimes give false positives or negatives if not used correctly or without considering the component’s context. For example, testing a heating element’s continuity might suggest it’s functional, but a microcrack or partial break could still cause intermittent failures, especially under heat stress. To truly diagnose complex issues, it’s essential to combine multimeter readings with visual inspections and functional testing—something I’ve learned through extensive experience and consulting expert sources such as the detailed diagnostic guides.
What Advanced Failures Don’t Show Up in Basic Tests?
A nuance often overlooked is the significance of component aging and subtle wiring faults. For example, a sensor might test correctly with a multimeter but still deliver inaccurate signals due to corrosion or loose connections, leading to uneven heat distribution or cycle errors. Such issues require more sophisticated troubleshooting, including checking for resistance drift at different temperatures or inspecting connectors for corrosion. Experts emphasize that diagnosis shouldn’t be solely about parts replacement but understanding the appliance’s operational nuances. Misdiagnosing can lead to unnecessary replacements, increased costs, and prolonged downtime. For trustworthy advice, see resources like oven diagnostics guides that cover these subtleties comprehensively.
Another trap is the assumption that parts from the same brand always fit perfectly or work better—a misconception that can backfire. Aftermarket parts vary in quality, sometimes causing compatibility issues or unexpected malfunctioning. Researching proper replacement parts and reading reviews can save you from costly mistakes. Additionally, installing the wrong component might not only fail to fix the problem but could also damage other parts, leading to more expensive repairs. Therefore, thorough verification and understanding the appliance’s wiring schematics and part specifications is vital—another area where expertise is often overlooked.
In essence, mastering appliance diagnostics involves more than simple tests and assumptions. It requires a keen eye for subtle clues, understanding the appliance’s behavior under different conditions, and consulting authoritative sources. Remember, the goal is to identify the root cause precisely, not just to replace the most obvious faulty part. This nuanced approach minimizes unnecessary expenses and enhances reliability. Have you ever fallen into this trap? Let me know in the comments.
Stick to a Maintenance Routine for Long-Term Success
Consistent maintenance is the cornerstone of appliance longevity. I personally allocate 15 minutes every month to perform checkups on my oven and dishwasher, which surprisingly saves me hundreds over the years. Developing a routine helps catch small issues before they escalate, such as inspecting door seals or cleaning filters. Remember, neglecting minor maintenance tasks often leads to costly repairs down the line.
Invest in Quality Diagnostic Tools
For troubleshooting, I rely on a high-quality digital multimeter, specifically the Fluke 115 model. It offers reliable readings and is easy to use, even in tight spaces. Plus, I appreciate its backlit display, which helps when diagnosing in dimly lit areas behind the appliances. Using a multimeter correctly allows me to test heating elements and sensors accurately, reducing guesswork and preventing unnecessary part replacements. As repairing appliances evolves, having precise tools like these ensures you can diagnose issues effectively—more info is available in this comprehensive guide.
Utilize Diagnostic Software for Complex Problems
In addition to hardware tools, I recommend using diagnostic software when dealing with modern digital appliances. For example, the Whirlpool Diagnostic Kit connects via USB or Wi-Fi, allowing you to read error codes directly from the appliance’s interface. This approach saves time and provides more detailed insights than manual tests alone. Software diagnostics are especially helpful for detecting subtle issues in control boards or sensors that might not show obvious faults physically.
Plan for Scaling Repairs with Modular Parts
When upgrading or replacing components, choose modular parts that simplify future repairs. For example, when replacing a heating element, opt for a model with universal connectors compatible across multiple years. This foresight reduces the complexity of future repairs. I also keep spare parts, like door seals and sensors, organized in labeled containers for quick swaps. Being proactive in this way affirms that your repair process remains efficient and cost-effective. Discover more about selecting the right parts in this helpful article.
How do I maintain long-term appliance health?
Maintaining appliances over time involves routine inspections, using proper diagnostic tools, and keeping spare parts organized. Regularly cleaning filters, vents, and fan blades minimizes buildup that can impair performance. Invest in quality tools like multimeters and diagnostic kits to accurately identify faults early. Planning your repairs with modular parts ensures scalability and reduces downtime. This strategic approach extends your appliances’ lifespan and prevents unexpected failures—saving you money and hassle in the long run. For example, I replaced my oven’s temperature sensor with a backup module, which allowed me to quickly swap in case of failure, avoiding baking disappointments. Try integrating a multimeter check into your monthly maintenance — it’s a game-changer.
What I Never Expected About Diagnosing Appliance Failures
- Discovering that subtle wiring issues can mimic simple component failures, teaching me to look deeper rather than jumping straight to parts replacement.
- Realizing that a thorough visual inspection often uncovers tiny clues—a burnt wire or a corroded contact—that save me from costly guesswork.
- Learning that patience and meticulous testing outperform rushing into repairs, ensuring I fix instead of just mask the problem.
- Understanding that utilizing the right diagnostic tools, like a quality multimeter, transforms a guessing game into a precise science, boosting my confidence.
- Embracing the idea that ongoing maintenance and knowledge are my best defenses against future breakdowns, turning DIY repairs into long-term savings and peace of mind.
Tools and Resources That Elevated My Repair Game
- Fluke 115 Multimeter: Its reliability and ease of use made troubleshooting much more straightforward, particularly for delicate sensor and wiring tests.
- Diagnostic guides from Appliance Bargainz: These comprehensive resources became my go-to for understanding complex faults without unnecessary guesswork.
- OEM Replacement Parts: Using qualified, model-specific parts ensured durability and compatibility, preventing short-term fixes from becoming long-term problems.
- Essential repair kits: Having a curated selection of common components on hand saved me time and money during urgent fixes.
Now It’s Your Turn to Master Your Appliances
Remember, tackling appliance repairs isn’t about merely fixing what’s broken; it’s about understanding the nuances that make your appliances run smoothly for years. With patience, the right tools, and a curiosity to learn, you can turn frustrating breakdowns into opportunities for growth. So, are you ready to dive into diagnosing and repairing your own oven or dishwasher? Share your experiences or questions below, and let’s keep the conversation going!