Ever had that sinking feeling when your oven or dishwasher suddenly refuses to work and you realize the culprit might be a faulty heating element? I know that gut-wrenching moment all too well—panicking at the thought of what could go wrong and how expensive the repair might be. One day, my trusty oven stopped heating just days before a big family dinner. I scrambled to find a replacement, only to realize I had no idea whether I was choosing the right part for my model. That embarrassing misstep cost me both time and extra money, making me wish I had known more about selecting the correct heating element from the start.
Why Picking the Right Heating Element Matters More Than You Think
Choosing the wrong replacement part can turn a simple repair into a lengthy headache. Not all heating elements are created equal, and mismatched parts can lead to even more damage or safety risks. Whether you’re tackling a stubborn oven that won’t heat or a dishwasher that won’t dry, ensuring you select the right replacement is crucial. In my experience, a proper match not only restores functionality faster but also prolongs the lifespan of your appliance, saving you money in the long run.
Question: Is It Really Worth the Hassle to Get the Correct Part?
At first, I thought I could just find any heating element online and swap it out. Turns out, that was a rookie mistake. I learned that every model has specific requirements, and using an incompatible part can cause overheating, electrical issues, or even fire hazards. Early on, I replaced an inexpensive generic part without checking its compatibility, only to have it fail prematurely, leading to another round of repairs. Trust me, the extra effort to verify your model’s specs is well worth it. For more tips on diagnosing your appliance before jumping into parts replacement, visit pinpointing fault diagnosis.
Now that I’ve shared my mistake, I want to help you avoid the same pitfalls. Let’s walk through how to identify and select the best replacement heating element tailored for your specific model, ensuring your appliance works perfect every time. Ready to become confident in your repair skills? Let’s dive in.
Identify Your Appliance Model Precisely
The first critical step is to know the exact make and model of your appliance. Look for the data plate, usually located on the door frame or behind the control panel. Take clear photos for reference. During my own repair, I once assumed my oven was a certain model, only to realize I had the wrong specifications, leading to ordering an incompatible part. Accurate identification saves time and prevents costly mistakes.
Gather Detailed Specifications of the Original Part
Next, obtain detailed specifications of your current heating element. These include length, wattage, voltage, and connector type. Compare these specs to potential replacements. For instance, I once bought a generic heating element based solely on appearance and faced rapid failure because it didn’t match my oven’s wattage requirements. Always verify specifications through manufacturer datasheets or your appliance’s service manual.
Use Trusted Resources to Find Compatible Parts
Consult reputable sources like official manufacturer websites or specialized parts suppliers. Enter your model number to access exact part options. During a recent project, I used a recognized retailer’s website, which provided detailed compatibility charts, ensuring a perfect fit. Avoid unreliable sites or generic marketplaces to minimize risks of incompatible parts.
Check Compatibility and Return Policies Before Purchase
Before finalizing your order, double-check the compatibility list and review return policies. You don’t want to be stuck with a part that doesn’t fit. I once ordered a heating element from a seller without proper returns, and when it didn’t fit, I had to go through a lengthy exchange process. Favor sellers that provide easy return options and detailed fitment info.
Verify Physical Matching Before Installation
Once your part arrives, compare it physically with the old one. Ensure connector types, mounting brackets, and length match exactly. A quick check against your old part avoids installation surprises. I learned this the hard way when I didn’t verify pin connectors and had to modify the wiring to make it fit.
Install Carefully and Test
Follow manufacturer instructions precisely during installation. Turn off power before proceeding. After installation, power on the appliance and observe for proper operation. During my last repair, I kept a multimeter handy to check for proper voltage and continuity, which helped me confirm successful installation and prevent future failures.
Consult Expert Resources When in Doubt
If you’re uncertain about specifications or installation procedures, consult detailed guides like oven repair guides. Sometimes, a quick video tutorial can reveal nuances you might miss otherwise. Don’t hesitate to seek professional help if needed; many repair shops can assist or verify your work to ensure safety and longevity of your appliance.
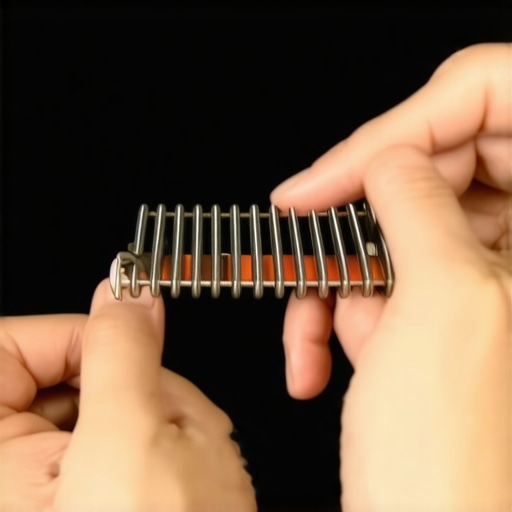
While many home repair enthusiasts focus on the basics, like swapping out a faulty heating element or cleaning the filter, there’s a deeper, often overlooked layer of nuance that can make or break your repair success. One common misconception is that matching parts by appearance suffices; however, nuances like internal resistance, connector compatibility, and even subtle design differences can lead to premature failure or safety hazards. Contrary to popular belief, buying generic parts isn’t always a cost-saving move; in many cases, OEM components ensure longevity and safety, especially in sensitive systems like ovens or dishwashers.
What advanced diagnostics reveal about hidden faults often missed by beginners
For example, a faulty thermostat might be the root cause behind uneven heating, but it’s easy to mistakenly replace the heating element alone. Advanced diagnostics, such as testing sensor resistance with a multimeter, can save you time and money. Proper diagnostics go beyond visual inspection, revealing issues like micro-cracks in heating elements or subtle wiring faults that cause intermittent problems.
Another nuance involves the myths surrounding parts compatibility. Many assume that if a part looks similar, it will fit and work correctly. This can lead to ‘oops’ moments that damage your appliance further. For example, mismatched wattage ratings in heating elements may cause overheating or insufficient heating performance, ultimately shortening your appliance’s lifespan. Double-check specifications and consult manufacturer datasheets to avoid this pitfall.
Advanced repair also demands familiarity with electrical safety standards. Overlooking minor grounding issues or improper wiring during installation can introduce fire hazards. Professionals often use specialized tools to verify proper grounding and voltage levels, which is a step most DIYers tend to skip. It’s worth mentioning that rushing through wiring checks can be a costly mistake—an overlooked safety check might save your home from a fire.
So, how do you elevate your repair skills beyond basic DIY? First, invest in a quality multimeter and learn to interpret readings accurately, especially for sensors and thermostats. Second, always confirm part specifications—do not rely solely on appearance. Third, utilize advanced diagnostics tools and techniques to uncover hidden faults before replacing parts. Lastly, prioritize safety standards—if you’re unsure, consult a professional or leverage reputable guides like oven repair essentials.
Remember, many ‘simple’ repairs harbor unseen complexities that can trip up even seasoned DIYers. Recognizing these nuances is what separates a amateur fix from a professional-level repair. Have you ever fallen into this trap? Let me know in the comments.
Maintaining your appliances over time requires more than just occasional checks; it demands the right tools, a strategic approach, and a keen understanding of diagnostics. Personally, I swear by a high-quality digital multimeter like the Fluke 115, which provides precise voltage, continuity, and resistance readings essential for diagnosing complex issues without guessing. Additionally, a set of fine-tip screwdrivers and needle-nose pliers are invaluable for accessing tight spots and delicate connectors in dishwashers and ovens. Regularly scheduled maintenance, such as cleaning terminal connections and inspecting heating elements, goes a long way in preventing unexpected failures.
To stay ahead of potential problems, I utilize advanced diagnostic software compatible with many appliance control boards. For example, certain oven models allow you to run self-diagnostic routines that pinpoint faulty sensors or control units, saving time and money. Keeping a detailed maintenance log—note dates, issues, and parts replaced—helps track patterns that could indicate upcoming failures. In my experience, proactive checks based on these logs often reveal subtle wear before they escalate.
Looking ahead, I predict that the integration of IoT-enabled diagnostic tools will revolutionize appliance maintenance, making remote monitoring and predictive repair a standard feature. Imagine receiving a smartphone alert that your dishwasher’s circulation pump shows signs of fatigue, allowing you to schedule repairs proactively rather than reacting after a leak or failure.
How do I maintain appliance diagnostics over time? The key is consistency. Regularly updating firmware when available, calibrating sensors using manufacturer-approved procedures, and consulting trusted resources like detailed diagnostics guides ensures your troubleshooting skills stay sharp. I also recommend developing a specialized toolkit that includes thermal imaging cameras for spotting hotspots or insulation issues—these can reveal problems invisible to the naked eye.
For those serious about long-term appliance health, integrating software-based diagnostics with manual checks and proper parts management forms a holistic approach. When paired with a reliable parts supplier and knowledge of how to reseat heating elements or test control boards, you’re equipped to extend your appliances’ life significantly.
Start by testing your oven’s temperature sensor with a multimeter—this simple step can reveal inaccuracies that lead to inefficient heating and resolve issues before they become costly. Remember, investing time in proper diagnostics now will pay off with fewer repairs and more efficient appliance operation in the future.
Hidden Traps That Almost Gave Up My Repair Dreams
One of the toughest lessons I faced was trusting appearance over specs. A heating element that looked identical to my original failed prematurely because it had a different wattage rating. This taught me to always double-check technical details rather than relying on visual similarity—a mistake that could have been costly and dangerous.
The Power of Proper Diagnostics Before Parts Swapping
I used to jump straight to replacing parts based on common symptoms, but I realized that a quick multimeter test could reveal micro-cracks or faulty sensors hidden deep within the appliance. Investing in a reliable diagnostic approach has saved me money and extended the lifespan of my appliances, proving that careful diagnosis beats guesswork every time.
The Myth of One-Size-Fits-All Replacement Parts
It’s tempting to buy generic parts for convenience, but I found they often led to more problems down the line, especially with sensitive appliances like ovens and dishwashers. OEM components, though slightly pricier, offer peace of mind and longer lasting performance. Learning to select the right part based on precise specifications transformed my repair game.
Embracing Safety Standards as a Non-Negotiable
Overlooking wiring checks or grounding safety is a rookie mistake that I paid dearly for with a minor shock and a costly repair. Now, I always verify proper grounding and proper wiring configurations, especially when reinstalling heating elements or control boards. Prioritizing safety isn’t just recommended; it’s essential for any DIY repair enthusiast.
Curated Arsenal for Troubleshooting Triumphs
From my experience, having the right tools makes all the difference. My favorite go-to is a sturdy multimeter, a set of fine screwdrivers, and a digital inspection camera for hard-to-see spots. I trust these tools because they turn complex diagnostics into manageable tasks, ensuring each repair is thorough and safe. For expert advice on choosing the best tools, check out calibration tips.
A Final Spark of Confidence—You Can Do This
Repairing appliances might seem daunting at first, especially with all the nuanced details involved, but every successful fix boosts your confidence. Investing a little time to learn diagnostics, verify specs, and follow safety protocols pays off in longer-lasting, safer repairs. Remember, small improvements today pave the way for a more skilled DIY journey tomorrow. Are you ready to take on your next appliance challenge? Share your experiences or questions below—I’d love to hear your stories.