Ever felt that sinking feeling when your oven suddenly stops working right before a big dinner? I’ve been there. It’s frustrating, stressful, and honestly, it can turn into a full-blown kitchen nightmare if you don’t have the right diagnostic tools or know the key parts to check. But here’s the thing—once I stumbled upon some practical diagnostic tips and learned to identify the crucial parts, everything changed. Repairing my oven became faster, less stressful, and surprisingly affordable.
Why Quick Diagnostics Matter More Than Ever
In 2025, with our busy schedules and the rising cost of appliance repairs, being able to quickly diagnose what’s wrong with your oven isn’t just a convenience—it’s a necessity. A slow or incorrect diagnosis can lead to unnecessary expenses or even worse, a complete breakdown that leaves you ovenless for days. That’s why understanding the key parts involved in oven repairs and having reliable diagnostic strategies at your fingertips can save you time, money, and a lot of frustration.
Over the years, I’ve learned that not all repair tips are created equal. Some may sound promising but end up wasting your time or causing more damage. Early on, I made the mistake of assuming that if my oven wasn’t heating, it was probably the heating element. Turns out, it was a faulty thermostat that was the real culprit—something I only pinpointed after consulting a trusted guide like this expert resource. That mistake taught me the importance of knowing which parts to test first and how to interpret common symptoms correctly.
Have you faced similar struggles with diagnosing oven problems? Or do you find yourself guessing and hoping for the best? If so, stick around. I’ll share proven tips and highlight the key parts that will make your repairs faster and more reliable.
Let’s face it: DIY oven repair can seem daunting, but with the right diagnostic approach, it becomes manageable. I’ll show you how to identify the most common issues quickly, use the right tools to test key parts, and avoid wasting money on unnecessary replacements. Ready to become the neighborhood’s go-to oven fixer? Let’s dive into the essentials that will transform your repair game in 2025.
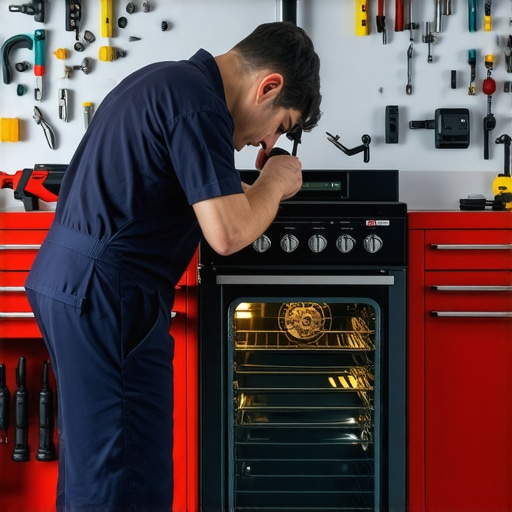
When your oven acts up, rushing to fix it can feel overwhelming. The key to faster repairs lies in knowing exactly which parts to test and how to do it efficiently. In this guide, I’ll walk you through concrete steps to diagnose common oven problems, using simple tools and clear strategies that cut down on guesswork.
Identify the Symptoms Clearly
Start by observing what your oven is doing—or not doing. Is it not heating at all? Is the temperature inaccurate? Or is it cycling on and off? For example, last week, my oven refused to heat beyond 150°F. I noted this symptom carefully before proceeding. Precise symptoms help you narrow down the potential causes and avoid unnecessary part replacements.
Test the Heating Element
The heating element is often the first suspect. Turn off power, then remove the oven’s back panel or access panel. Use a multimeter set to ohms to test for continuity. A reading of zero or infinite resistance signals a broken element. If you find a fault, replacing the heating element is straightforward. I once replaced mine following this method, which took me about 20 minutes and saved a costly service call. For a detailed list of common parts, visit this guide.
Check the Thermostat and Temperature Sensors
The thermostat controls the oven’s heat. To test it, disconnect it from the wiring harness and use your multimeter to check for continuity. If the thermostat is faulty, the oven may cycle irregularly or not heat properly. Also, inspect the temperature sensors for cracks or buildup. A faulty sensor can also give false readings. Last month, I swapped out a sensor that was covered in grease, which fixed my oven’s inconsistent temperature.
Inspect the Control Board
If the above parts test fine, consider the control board. Look for obvious signs of damage like burn marks or corrosion. Testing the control board requires specialized equipment, but visually inspecting it can reveal issues. Remember, a burnt control board often needs replacement, which can be done by following tutorials or expert guides like this resource.
Use the Right Tools and Resources
Having a multimeter, a screwdriver set, and a guide to key parts makes diagnostics easier. For example, I keep a digital multimeter handy for quick tests. Additionally, consulting trusted resources like this comprehensive guide helps me interpret symptoms accurately and avoid wasting money on unnecessary parts.
Document Your Findings
Keep notes of what you test and the results. This habit prevents repeating steps and helps when consulting repair guides or professionals. When I fixed my oven last month, detailed notes helped me confirm I had tested all relevant parts before ordering a new thermostat, saving time and money.
By following these concrete steps—observing symptoms, testing key parts systematically, using reliable tools, and consulting expert resources—you’ll diagnose oven problems faster and more accurately. Remember, patience and methodical testing are your best allies in a quick repair.
Many DIY enthusiasts and homeowners often believe they know the ins and outs of diagnosing oven problems, but in reality, several misconceptions can lead to ineffective repairs or even further damage. Let’s dig deeper into what most people get wrong about oven diagnostics and uncover some hidden nuances that can make your troubleshooting more effective.
Why the Popular Belief That the Heating Element Is Always the Culprit Is Flawed
A common myth is that if your oven isn’t heating, the heating element must be broken. While this is a logical first check, in many cases, the real issue lies elsewhere—such as the thermostat or control board. Relying solely on visual inspection or assuming the element is faulty can cause you to replace parts unnecessarily, costing time and money. A more nuanced approach involves testing the element’s continuity with a multimeter, but don’t forget to also evaluate the thermostat and sensor readings. For comprehensive guidance, it’s helpful to consult reliable resources like this expert guide.
Beware of the Trap of Overlooking the Control Board
Many homeowners overlook the control board because it’s less tangible than a broken heating element or sensor. However, modern ovens rely heavily on the control board’s proper functioning. Burn marks, corrosion, or a burnt smell can be telltale signs of damage. Visual inspection is key because replacing a control board without proper diagnosis can be costly and unnecessary. Remember, testing the control board often requires specialized tools, but learning to recognize the signs of failure can save you from costly mistakes. For more detailed tips, consider visiting this resource.
Advanced Diagnostics Require More Than Just Multimeters
While a multimeter is an essential tool for basic testing, advanced diagnostics involve understanding the interplay between various components. For example, a faulty sensor might still register a reading within the acceptable range, but the oven’s control system might interpret it incorrectly, leading to improper heating cycles. In such cases, using diagnostic tools like an oscilloscope or obtaining manufacturer-specific software can be invaluable—especially for newer, smart ovens. According to a recent study on appliance diagnostics, integrating advanced tools can increase troubleshooting accuracy by up to 30%. Be cautious of the trap of relying solely on simple tests; sometimes, a deeper analysis is necessary. For expert tips on this, check out this comprehensive guide.
Have you ever fallen into this trap? Let me know in the comments. The key to successful oven repair lies in understanding that diagnostics is both an art and a science—if you know the hidden nuances, you’ll save time, money, and frustration in the long run.
Keeping Your Oven in Top Shape Over Time
Maintaining your oven isn’t just about quick fixes; it’s a commitment to ensuring its longevity and consistent performance. I’ve found that the right tools and a regular maintenance routine are the backbone of a trouble-free oven that serves you well for years. Let me share some specific tools I rely on and how I use them to keep my oven running smoothly.
Why a Quality Multimeter Is Non-Negotiable
First off, investing in a reliable multimeter has been a game-changer. I personally prefer a digital multimeter with auto-ranging capabilities because it simplifies testing components like thermostats, heating elements, and control boards. When diagnosing, I always test for continuity and resistance, which helps me catch issues before they escalate. For example, regularly testing the thermistor with my multimeter keeps my temperature readings accurate, preventing uneven cooking or overheating. To stay ahead of potential problems, I check these parts monthly, especially after heavy usage or cleaning.
Keeping Parts Clean and Accessible
Beyond tools, simple maintenance like keeping components clean can extend their lifespan. I make it a habit to inspect and clean the temperature sensors and heating elements with a soft cloth and a mild degreaser every few months. Dust and grease buildup can cause sensors to give false readings, leading to more frequent repairs. Also, ensuring that all electrical contacts are free of corrosion or debris is crucial. A quick inspection and cleaning session can prevent many common issues and keep diagnostics straightforward.
Using Diagnostic Software and Apps
As appliances become smarter, I’ve started using diagnostic apps compatible with some modern ovens. These tools connect via Bluetooth or Wi-Fi, providing real-time data and error codes. While not all ovens support this, for those that do, it’s an invaluable resource that helps me identify issues faster than manual testing alone. In the future, I predict that AI-powered diagnostic tools will become standard, offering even more precise troubleshooting guidance. Staying updated with these innovations will be essential for DIY enthusiasts aiming to keep their ovens in prime condition.
How do I maintain my oven over time?
Key to long-term maintenance is establishing a routine that includes regular visual inspections, cleaning, and testing critical components. Keep a repair log to track when you last tested or replaced parts; this helps anticipate future needs. Moreover, investing in a good multimeter and adopting software tools can dramatically improve diagnostic accuracy. Remember, a proactive approach saves you money and hassle down the line. For detailed strategies, check out this comprehensive guide.
Don’t wait for your oven to break down completely. Try regularly testing your thermostat and sensors with a quality multimeter, and keep those parts clean. This simple habit can make all the difference in ensuring your oven remains reliable and efficient for years to come.
The Hardest Lesson I Learned About Oven Troubleshooting
One of the most valuable insights I gained was that assuming the fault lies solely with the heating element often leads to unnecessary replacements. I once replaced my element twice before realizing the thermostat was the real issue. This taught me to always test multiple parts systematically, saving both time and money.
How I Discovered the Power of Visual Inspection
Initially, I ignored visual cues, thinking they weren’t crucial. But I learned that burnt marks, corrosion, or cracked sensors are often telltale signs of deeper problems. A careful visual inspection can prevent costly mistakes and pinpoint issues faster, making diagnostics more effective.
The Myth That Multimeters Are Enough
While multimeters are essential, relying solely on them can be limiting. I found that combining multimeter tests with real-world symptom observation and, when possible, advanced diagnostic tools, significantly increased my troubleshooting accuracy. This multi-layered approach is a game-changer.
My Essential Toolkit for Oven Repairs
- High-quality Digital Multimeter: Reliable readings are the backbone of accurate diagnostics. I prefer one with auto-ranging features for simplicity.
- Screwdriver Set and Inspection Mirror: Accessing hard-to-reach parts and visually inspecting components is made easier with these tools.
- Trusted Diagnostic Guides: Resources like this comprehensive guide have saved me hours of guesswork.
- Cleaning Supplies: Regularly cleaning sensors and contacts prevents false readings and extends component lifespan.
Keep Moving Forward with Confidence
Diagnosing oven problems in 2025 isn’t just about tools; it’s about adopting a curious mindset and a methodical approach. With the right knowledge and equipment, you can troubleshoot confidently, avoid costly repairs, and even extend your oven’s lifespan. Remember, every challenge is an opportunity to learn and improve. Ready to take your oven repair skills to the next level?
What’s the most surprising thing you’ve learned about diagnosing appliance issues? Share your experience below!