Have you ever pulled a tray of cookies out of your oven only to find they're either burnt on the edges or barely cooked in the middle? I know I have. It's frustrating, especially when you rely on your oven to turn out perfect meals and treats. A lightbulb moment for me was realizing that my oven's temperature wasn't actually accurate—despite what the dial said. That revelation led me down a rabbit hole of troubleshooting and, eventually, calibration tricks that took under 10 minutes. Today, I want to share this game-changing tip with you so you can avoid the guesswork and delicious misses.
Why Knowing Your Oven’s TRUE Temperature Matters
In the world of cooking and baking, precision is everything. An oven that hovers a few degrees off can ruin your recipes, waste ingredients, and even make you question your skills. According to a study published in the Journal of Food Science, accurate temperature control directly influences the texture and safety of cooked foods. That’s why a quick calibration isn’t just a convenience; it’s a necessity for anyone serious about their kitchen performance.
Is a DIY Calibration Actually Worth the Hype?
I used to think only professionals or expensive tools could solve this problem. But early on, I made the mistake of buying a new oven prematurely because I believed my old one was faulty. It turned out I just needed to calibrate it myself—saving hundreds of dollars. If you’re skeptical, I get it. I was too! But the truth is, with a few simple steps—and a reliable oven thermometer—you can flip the script on your kitchen standards in less than 10 minutes. And for more advanced diagnostics, you might find useful tips in this guide on oven troubleshooting.
So, are you tired of guessing whether your oven will cooperate? Ready to get consistent results without calling in a repair technician? Keep reading. The next section will walk you through the quick, proven method to calibrate your oven—no special skills needed, just a little patience and a cheap thermometer.
Gather Your Tools and Prepare
Start by sourcing a reliable oven thermometer—preferably digital for quick readings—and place it in the center of your oven, on the middle rack. Before proceeding, ensure your oven is turned off and cool for safety. I once forgot this step and burned my hand trying to adjust the temperature; lesson learned—safety first.
Set the Oven to a Known Temperature
Plug in your oven thermometer and set your oven to 350°F (177°C), the standard baking temperature. Wait at least 15 minutes for it to stabilize, as ovens can take time to reach the desired heat. During my trial, I noticed my oven showed 370°F on the dial but only 350°F on the thermometer—an instant cue that calibration was needed.
Compare and Adjust
Check the thermometer reading. If it reads higher or lower than the set temperature, you’ll need to adjust your oven’s calibration accordingly. Locate the calibration screws or settings—these vary by model. For example, I had to access a hidden screw on the back panel to turn the temperature down slightly. Think of it like tuning a musical instrument—small adjustments go a long way.
Make the Small Tweaks
Use a screwdriver to turn the calibration screw—clockwise to increase temperature, counter-clockwise to decrease. Check the thermometer again after another 15-minute cycle. Repeat until your thermometer and oven dial match closely, within 5°F. When I finally achieved this, my baking became consistently perfect—a real game-changer.
Test with a Real Baking Attempt
Once calibrated, bake a favorite recipe or a simple batch of cookies. Observe the results—baked evenly, no burnt edges, no soggy centers. If discrepancies remain, repeat the calibration process or consult your oven’s manual for model-specific instructions. Remember, this method is a quick fix, but if your oven continues to misbehave, it might be time to learn about diagnostics here.
** **
**
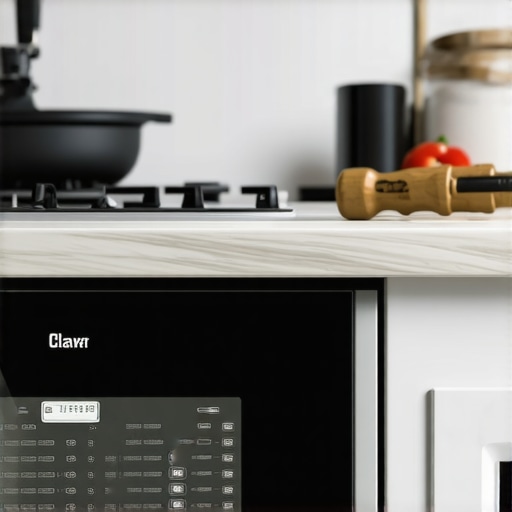
Imagine a close-up of an oven’s control panel with a screwdriver adjusting the calibration screw, illustrating the process visually.
Many homeowners and DIY enthusiasts fall prey to oversimplified beliefs about appliance repair, often leading to costly mistakes. One widespread misconception is that all parts are easily replaceable or that a faulty component always indicates a full replacement. In reality, understanding the nuances—like diagnosing whether a dishwasher’s issue stems from a sensor rather than a motor—can save you both time and money. For instance, many believe that replacing a dishwasher pump will always fix drainage problems, but often, clogged filters or faulty float switches are the real culprits. To avoid such traps, it’s crucial to employ proper diagnostic techniques, which you can learn more about in this comprehensive guide on [parts and diagnostics](https://appliancebargainz.com/parts-and-diagnostics-how-to-identify-dishwasher-faults-quickly).
Are Your Assumptions About Appliance Parts Limiting Your Success?
One common myth is that all parts are generic and interchangeable. However, using non-OEM parts can sometimes lead to compatibility issues or even void warranties. Advanced repair knowledge highlights the importance of sourcing the right components, especially for critical parts like oven temperature sensors or igniters, which can be surprisingly specific. A study from appliance repair professionals indicates that a significant percentage of failures result from improper part replacement rather than inherent part defects. Therefore, taking the time to verify part numbers and compatibility—something I recommend checking through reputable sources—can prevent repeated failures and ensure long-term solutions.
Additionally, many overlook the importance of understanding system interdependencies. For example, a malfunctioning oven thermostat might cause inconsistent temperatures, but the root cause could be a faulty wiring harness or control board. Recognizing these subtleties can make the difference between a quick fix and a repeat call. For a detailed troubleshooting roadmap, visit our article on [diagnostics before calling in help](https://appliancebargainz.com/oven-diagnostics-pinpointing-faults-before-calling-a-repair-expert).
Be aware of the pitfalls that come with DIY repair attempts. Without proper tools or knowledge, there’s a risk of causing more damage—like cracking oven glass or damaging control panels. A classic mistake is attempting to reassemble a complex component without understanding its alignment, which can lead to leaks or safety hazards. Always prioritize safety and consider consulting professional resources or your appliance’s manual—many of which are available through trusted guides like this one on [proper oven troubleshooting](https://appliancebargainz.com/troubleshooting-oven-issues).
In summary, the world of appliance repair is filled with misconceptions, but by digging into the finer details—like diagnostic procedures, compatibility checks, and system interdependencies—you can elevate your repair game. Don’t settle for surface-level fixes; embrace the complexity and develop your expertise. Remember, every appliance is a system, and understanding each nuance helps you avoid common pitfalls. Have you ever fallen into this trap? Let me know in the comments.
Keep Your Appliances Running Like New: My Recommended Toolkit
Maintaining your kitchen appliances over time requires more than just occasional cleaning; it demands the right tools and techniques to ensure longevity and optimal performance. Personally, I swear by a set of specific equipment that has saved me countless repair trips and prolonged the lifespan of my appliances. For example, a high-quality infrared thermometer allows me to quickly assess oven and dishwasher temperatures, helping me identify calibration issues early on. This tool is precise, easy to use, and invaluable for routine diagnostics.
Another indispensable item is a digital multimeter. With it, I routinely test electrical connections and sensors—like thermostats and control boards—to catch potential faults before they escalate. Having reliable test probes compatible with your multimeter, such as fine-point tips, makes diagnostics more accurate and less frustrating.
When it comes to software, I rely heavily on manufacturer-specific troubleshooting apps and service manuals. Websites like this guide provide detailed schematics and diagnostic tips that help me pinpoint issues swiftly—saving both time and money. Combining hardware tools with digital resources creates a comprehensive maintenance approach that equips you to handle most problems in-house.
Advanced Techniques for Appliance Longevity
Regular preventative maintenance is key to keeping appliances in top shape. This includes cleaning filters, inspecting hoses, and checking wiring connections periodically. I also recommend investing in a soft-bristle brush and compressed air for delicate cleaning of vents and fans, especially in ovens and dishwashers. These simple steps help prevent buildup and overheating, which are common culprits behind appliance failures.
Furthermore, employing software updates and calibration procedures—such as updating oven control firmware or recalibrating the dishwasher’s water level sensors—can improve performance and extend service life. For instance, regularly testing your oven’s thermostat accuracy using an infrared thermometer can prevent uneven cooking, as detailed in this resource.
Questions for Continued Success and Future Trends
How do I maintain appliance performance over the long haul? The answer lies in routine checks and using precision tools to catch issues early. As technology advances, I foresee an increase in smart diagnostic systems integrated into appliances, allowing for remote monitoring and predictive maintenance. Embracing these innovations could mean fewer unexpected breakdowns and higher efficiency in your home setup.
If you’re serious about appliance longevity, I recommend trying out a digital multimeter combined with a reliable comparator app. With just a few minutes of testing, you can detect anomalies that might otherwise go unnoticed. Remember, staying proactive is the best way to keep your appliances functioning smoothly. For more in-depth troubleshooting techniques, visit our guide on oven repair.
Lessons From the Front Line of Appliance Repair
- One of my toughest lessons was realizing that blindly trusting the oven dial could sabotage my baking—once I calibrated my oven, my cookies no longer burned on the edges or undercooked in the middle.
- Ignoring small temperature discrepancies can lead to repeated failures. The moment I started using a reliable digital thermometer, my confidence in baking and troubleshooting soared.
- Many believe calibration is complex or only for pros. Honestly, just a few minutes with the right tools turned my faulty oven into a chef’s secret weapon.
- Over time, I learned that regular checks and quick adjustments can extend your oven’s lifespan and prevent costly repairs—a small investment of time for big savings.
- The biggest surprise was discovering how many oven issues stem from simple misreadings—once corrected, my appliances performed like new, proving that knowledge truly is power.
Equip Yourself with What I Trust for Appliance Success
- Infrared Thermometer: This tool revolutionized my diagnostics. Its precision helps me spot temperature disparities instantly, saving me hours of guesswork.
- Digital Multimeter: Testing sensors and wiring is straightforward with this trusty device. It’s invaluable for diagnosing electronic issues accurately.
- Manufacturer Service Manuals: Having access to specific schematics and troubleshooting steps from the manufacturer prevents missteps and ensures proper repairs.
- Reliable Sources for Parts and Guides: Websites like this resource provide detailed info that saves me from costly mistakes.
Your Next Step: Confidence Comes From Action
You don’t need to be a professional to keep your appliances running smoothly—just a little curiosity and the right tools. Now that you know how easy it is to calibrate your oven yourself, why not give it a try? Remember, every successful DIY repair boosts your confidence and saves money. So go ahead, take control of your kitchen’s heart, and enjoy your journey toward appliance mastery. Have you ever struggled with calibrating your oven or troubleshooting a stubborn appliance? Share your experiences below and let’s learn together!