Have you ever pulled open your dishwasher expecting clean dishes, only to be greeted by a stubborn, half-closed door that refuses to stay latched? That frustrating moment when your appliance gets temperamental, and you realize it’s more than just a minor annoyance. I know that sinking feeling all too well, because I’ve been there—standing in my kitchen, dishwasher door hanging crooked, wondering if I needed a costly repair or a new machine altogether.
One lightbulb moment for me was realizing that the culprit was a worn-out door cable and linkage kit. Instead of calling expensive technicians or hefty repairs, I decided to roll up my sleeves. I learned that replacing these tiny, often overlooked parts could breathe new life into my dishwasher’s performance. And honestly, the process was more doable than I initially thought.
Today, I want to share my experience and guide you through the easy steps to fix a worn dishwasher door cable and linkage kit. Trust me, tackling this repair not only saves money but also restores your appliance’s lifespan. Before diving in, I’ll also touch on a common mistake I made early on—misdiagnosing the problem—which could save you from potential frustrations.
But first, let’s address the big question many of us have: Is replacing a dishwasher door cable really worth the effort? The good news is, yes! This small fix can resolve issues like the door not closing properly, making your dishwasher safe and functional again. Plus, knowing how to do this repair can be a handy skill for future appliance troubles.
Now, if you’re tired of dealing with a door that won’t stay shut or keeps falling open mid-cycle, stick around. I’ll walk you through the practical steps, so you can avoid unnecessary replacements and get your dishwasher back in tip-top shape. Ready to save time and money? Let’s get started!
Why Fixing Your Dishwasher Door Cable Matters More Than You Think
Disconnect Power and Empty the Dishwasher
Before starting any repair, ensure the appliance is unplugged to prevent electrical shocks. Remove all dishes and utensils from inside. You’ll want a clear workspace—imagine it as preparing your tools before tackling a DIY project like fixing a bicycle. I once neglected this step and got a jolt; lesson learned the hard way.
Access the Door Mechanism
Open the dishwasher door fully and locate the screws securing the inner door panel—usually along the perimeter. Use a screwdriver to remove these screws, placing them in a safe container. Gently lift the panel away—think of peeling back a fragile shell to reveal the inner workings, similar to opening a high-tech watch for maintenance. This exposes the door cable and linkage assembly.
Identify the Worn or Broken Parts
Examine the cable for fraying, rust, or stretching. The linkage might be loose or cracked. If the cable appears worn or the linkage has visible damage, it’s time to replace. I once misdiagnosed a misaligned latch as a broken cable, only to realize it was a bent linkage. Double-check your diagnosis by moving the parts manually—if they feel loose or stiff, replace them.
Remove the Damaged Cable and Linkage
Carefully detach the cable from its anchor points—usually clips or slots. For the linkage, unscrew or unclip it from the door assembly. Remember, cables are like the veins of your machine—gentle handling is essential to avoid additional damage. Take a photo before removal to guide the reassembly, similar to documenting your bike’s chain routing before a derailleur fix.
Replace with New Parts
Install the new cable by threading it through the same pathways as the old one, ensuring all clips and anchors are secure. Attach the new linkage in the reverse order of removal. Confirm that the cable is taut but not overly tight—like tuning a guitar string. This step is critical to ensure smooth door operation.
Reassemble the Door Panel and Test
Reattach the inner door panel with screws, tightening them firmly but without overdoing it to prevent cracking. Plug the dishwasher back in and run a short cycle to verify door latch functionality. Keep an eye on the door closing smoothly—if it sticks or drops prematurely, recheck the cable tension.
Replacing the door cable and linkage kit may seem intimidating initially, but it’s manageable with patience and the right tools. Think of it as repairing a bicycle brake cable; once you get the hang of threading and tensioning, it becomes second nature. For more detailed diagnostics and troubleshooting tips, visit this guide.
Many DIY enthusiasts believe that troubleshooting appliances is straightforward and rely on superficial signs, but this approach often leads to misdiagnosis. In my experience, one common myth is that a simple visual inspection reveals the exact faulty part. However, appliances like dishwashers and ovens can mask underlying issues—such as electrical faults or sensor malfunctions—that aren’t visible to the naked eye. Relying solely on surface symptoms can divert you from the real problem and lead to unnecessary part replacements, increasing costs and frustration. It’s crucial to understand that devices often have nuanced behaviors; for example, a dishwasher that stops mid-cycle might not just have a clogged vent or faulty spray arm—it could be a failing pressure sensor or control board issue, which requires more advanced diagnostics. Moreover, many amateur repairers overlook the importance of testing components electrically, risking misidentification. For instance, a damaged heating element in an oven might still glow faintly, but that doesn’t mean it’s functioning properly. Using a multimeter to measure resistance or continuity can clarify whether the part needs replacement, as detailed in expert guides. A significant mistake I see regularly is misinterpreting diagnostic signals. For example, a dishwasher that fills but doesn’t drain isn’t always because of a clogged pump; it might be a faulty float switch or wiring issue. Remember, adopting a systematic troubleshooting approach—gathering facts and verifying each component—is far more efficient than guessing. As noted by appliance repair specialists, understanding the interconnected nature of parts and their diagnostic procedures leads to more accurate repairs. Before attempting complex fixes, consult comprehensive diagnostic guides—like this detailed troubleshooting resource—to avoid common pitfalls. Also, avoid the trap of replacing parts based solely on error codes without proper testing; this strategy often wastes money and time. Remember that some issues originate from inaccuracies in initial diagnosis or assumptions about appliance behavior. For advanced troubleshooting, consider testing components like thermistors, sensors, or relays, following expert advice from sources such as oven diagnostics guides. In essence, developing a nuanced understanding of appliance functions—beyond the basics—can drastically improve your repair outcomes. If you’re interested in diving deeper, explore resources like this guide to diagnosing dishwasher faults. Have you ever fallen into this trap? Let me know in the comments.
Tools I Recommend for Long-Term Success
When it comes to keeping your appliances running smoothly, investing in the right tools makes all the difference. I personally rely on a high-quality digital multimeter to test electrical components like heating elements, sensors, and switches, ensuring accurate readings without guesswork. For instance, Fluke multimeters are my go-to because of their durability and precise measurements, which are crucial when diagnosing tricky issues in ovens or dishwashers. Additionally, a precision screwdriver set with various bits allows me to access tight corners without damaging screws or panels, saving time and preventing unnecessary damage.
For cleaning and maintenance, I use a magnetic parts tray to keep track of small components during disassembly—losing tiny screws is a common frustration, and this simple step keeps everything organized. A flexible, braided pick-up tool helps remove debris and grime from hard-to-reach areas like vents or filters, which can impact appliance efficiency. Investing in a quality vent fan cleaning kit ensures optimal airflow, helping prevent overheating and prolonging the lifespan of your dishwasher or oven.
As appliance technology advances, I predict a rise in smart diagnostic tools that connect via Bluetooth or Wi-Fi, providing real-time data and troubleshooting steps. This trend could make DIY repairs more accessible for amateurs and reduce reliance on costly service calls. Devices like the SmartDiagnostic Pro are already showing promise, allowing users to perform complex diagnostics with a smartphone app—think of it as having a professional technician in your pocket.
How do I maintain appliances over time?
Consistent maintenance is key. I schedule quarterly inspections where I check for loose connections, clean filters, and replace worn parts proactively—think of it as giving your appliances a wellness checkup. Regularly inspecting components like door seals, spray arms, and vents can prevent small issues from escalating into major repairs. Using specialized cleaning solutions and tools designed for each appliance type helps keep everything in top shape. For example, in dishwashers, cleaning the filter and spray arms using a dedicated vent fan cleaning kit prevents buildup that can compromise cleaning performance.
Moreover, documenting your maintenance and repair history using digital logs or apps helps identify patterns and plan future upkeep—this habit can extend your appliance lifespan significantly. Remember, employing the right diagnostic tools like the comprehensive diagnostic guides ensures you’re addressing the root cause rather than just symptoms.
To really elevate your repair and maintenance game, try using a multimeter to test the continuity of heating elements or sensors. For example, testing your oven’s thermal switch with a multimeter can reveal if it’s causing inconsistent temperature regulation. Such advanced techniques save money and deepen your understanding of appliance functionality. Take this challenge: pick one component—like the heater element or pressure switch—and use your multimeter to verify if it’s functioning correctly. Doing so will reinforce your diagnostic skills and prepare you for more complex repairs in the future.
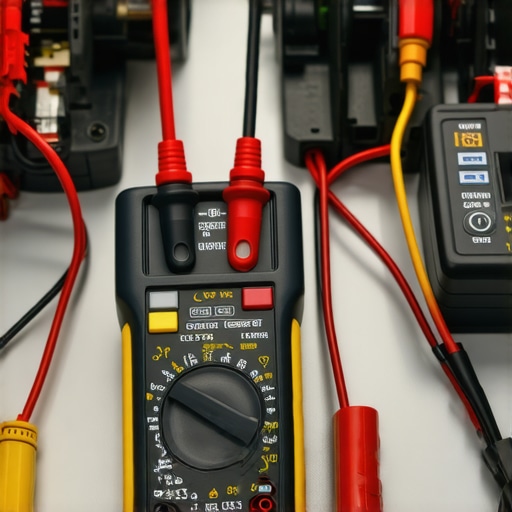
With these tools and proactive practices, maintaining appliances becomes less daunting and more satisfying. As technology progresses, embracing smart diagnostics and precision tools will only make DIY repairs more accurate and less stressful. Stay ahead of potential problems by integrating these tips into your routine—your appliances will thank you in the long run, and your wallet will too.
The Hardest Lesson I Learned About diagnostics,dishwasher,parts,oven repair
One of the most valuable lessons I discovered was the importance of accurate diagnosis. Early in my fixing adventures, I relied on surface symptoms, which led me to replace parts unnecessarily. It wasn’t until I learned to methodically test components with a multimeter, like testing the door latch switch or the door cable tension, that I finally stopped throwing parts at problems and started fixing them efficiently.
3 Myths About diagnostics,dishwasher,parts,oven repair That Held Me Back
I used to believe that all problems were obvious and that a quick visual inspection was enough, but the truth is, many issues require deep testing. For example, a dishwasher that stops mid-cycle isn’t always a clogged drain; it could be a faulty float switch or control board. Busting these myths saved me time and money, and I want to share this insight so you can avoid unnecessary frustration.
What Experts Won’t Tell You About diagnostics,dishwasher,parts,oven repair
Many pro tips are behind-the-scenes, like how to use simple tools for complex diagnostics. I discovered that properly tensioning a new dishwasher door cable ensures smooth operation, preventing future breakdowns. Also, understanding the interconnectedness of parts—such as knowing that a leaking door seal might cause the door latch to misalign—has been crucial in my DIY repairs. Learning these nuances gave me confidence and saved costly service calls.
Curated Tools That Changed My Approach to Appliance Fixes
Investing in quality tools truly transformed my repairs. The Fluke multimeter became indispensable for testing electrical components like door sensors or heating elements, providing accurate readings that guide my decisions. A precision screwdriver set helped me access tight spots without damaging delicate panels, while organizing small screws with a magnetic tray made reassembly a breeze. For more advanced diagnostics, I rely on digital guides like comprehensive troubleshooting resources that build my confidence step-by-step.
Embrace the Challenge: Your Path to Confident Repairs
Repairing dishwasher doors and understanding their intricate parts isn’t just about fixing an appliance—it’s about empowering yourself to save money and extend your appliance’s lifespan. Every successful repair boosts your skills and confidence. If I can do it, so can you! Start with small projects, educate yourself with reliable guides, and don’t shy away from experimenting; the satisfaction of a job well done is truly priceless.