One evening, I opened my oven door and almost recoiled. Instead of the clean, shiny glass I remembered, it was streaked with disgusting brown lines. At first, I thought, “Did someone spill something?” But no—it was a persistent, stubborn grime that refused to budge. That moment was a real wake-up call. It made me realize how neglected oven maintenance can turn our favorite kitchen appliances into unwelcoming eyesores.
Getting to the Heart of Brown Streaks on Your Oven Glass
The truth is, that unsightly brown streaking isn’t just a cosmetic issue. It signals underlying problems that could impact your oven’s performance and even your health. Over time, stubborn grease, food splatters, and burnt residues build up on the glass surface. When subjected to the high heat cycles of baking and broiling, these residues can turn into carbon deposits, which appear as dark streaks and stains. Additionally, if your oven isn’t cleaning properly or if there’s a faulty element, the buildup accelerates.
Many homeowners, myself included, initially dismiss these streaks as superficial cleaning mishaps. But this mistake can lead to more severe issues, like poor heat distribution or even dangerous fumes. That’s why understanding the root causes is essential for keeping your oven in good shape and safe to use.
Ever Wonder if Scrubbing Can Actually Make Things Worse?
Early on, I thought just scrubbing harder with harsh chemicals would fix the problem. Turns out, that was a mistake I paid for later. Using abrasive cleaners or overly aggressive scrubbing can scratch the glass or damage its protective coating, making stains worse and even impairing temperature sensors. A better approach is choosing the right cleaning agents and techniques, which I’ll share in the next section.
Research shows that regular maintenance and proper cleaning extend the life of kitchen appliances significantly. According to professionals, neglecting the buildup not only affects appearance but can lead to thermostat misreadings and uneven cooking. So, if you’re tired of staring at your grimy oven glass, it’s high time to learn some effective cleaning strategies and understand what’s really going on behind those streaks.
Are you facing this exact problem in your kitchen? You’re not alone. Keep reading, and I’ll help you troubleshoot, clean, and restore your oven’s clear outlook—so you can bake without embarrassment and worry.
Start with Safety and Preparation
Before diving into cleaning or diagnostics, unplug your oven to ensure safety. Wear gloves and protective eyewear to guard against harsh chemicals and debris. Remove oven racks to access the glass thoroughly. Gather necessary supplies: a non-abrasive cleaner, a soft cloth, a plastic scraper, and a spray bottle with warm water.
Apply the Right Cleaning Solution
Use a mixture of baking soda and water to create a gentle abrasive paste. Spray warm water on the glass to loosen grime, then spread the paste evenly across the surface. Let it sit for 15-20 minutes to break down stubborn residues. For heavily stained areas, this allows the solution to work effectively without damaging the glass.
Scrape Off Residues Carefully
Using a plastic scraper, gently dislodge loosened grime and burnt-on deposits. Avoid metal tools that can scratch or weaken the glass. If you encounter persistent streaks, reapply the baking soda paste and repeat the process. After scraping, wipe the surface with a damp cloth to remove loose debris.
Clean and Polish for a Clear Finish
Spray the glass with a vinegar-water solution to remove any remaining residue and restore shine. Wipe with a microfiber cloth in circular motions. For streak-free results, finish with a dry cloth, ensuring no water spots remain. This step not only improves appearance but also helps detect any underlying damage or cracks.
Identify and Address Underlying Damage
While cleaning, inspect the glass for cracks, chips, or signs of warping. These issues can cause streaks or compromise safety during oven operation. If damage is found, consider replacing the oven glass or contacting a professional repair service. For DIY replacements, visit this guide for detailed instructions.
Perform Diagnostics for Persistent Streaks
If streaks reappear after cleaning, the problem might be related to the oven’s internal components. Consider testing the thermal fuse or thermostat to rule out overheating or faulty sensors. Use a multimeter or follow diagnostic procedures outlined at this resource. Diagnosing early prevents costly repairs and ensures safe operation.
Reassemble and Test Your Oven
Once cleaning and inspections are complete, reassemble the oven racks and plug your appliance back in. Conduct a test bake at a moderate temperature, observing the glass for new streaks or discoloration. If issues persist, professional evaluation may be necessary to examine internal components or seals.
By following these steps, you turn a daunting cleaning task into a straightforward process that restores clarity to your oven glass and prolongs its lifespan. Regular maintenance not only keeps your appliances looking good but also ensures safe and efficient operation for years to come.
While many home repair enthusiasts focus on surface-level fixes, true expertise requires understanding the nuances that often go unnoticed. One common misconception is that diagnosing appliance issues is straightforward—simply replacing a faulty part usually solves the problem. However, in my experience, overlooking the interconnectedness of components can lead to recurrent failures and wasted effort. For example, replacing a heating element without testing the thermal fuse or control board may only be a temporary fix, as the root cause remains unaddressed, leading to repeat breakdowns.
Are You Missing Critical Diagnostic Steps in Your Repairs?
Many assume that listening for strange noises or observing error codes is enough, but advanced diagnostics involve testing electrical continuity, measuring resistance, and understanding diagnostic protocols. Professional technicians often use multimeters to check components like thermostats, sensors, and switches—steps that amateurs frequently skip. According to a study published by the Appliance Repair Association, improper diagnostics account for nearly 60% of repeat service calls, highlighting a gap in basic troubleshooting knowledge.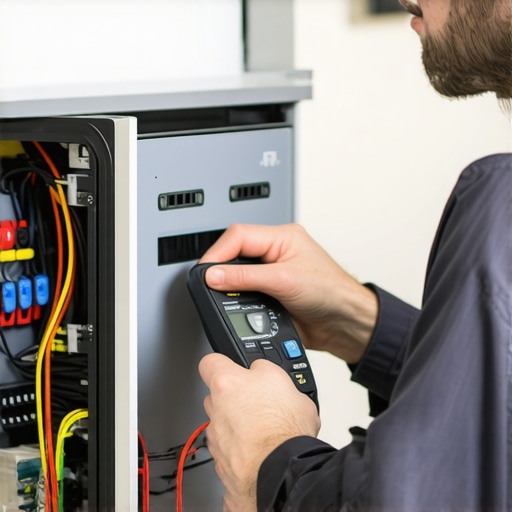
Another overlooked aspect is the condition of parts themselves. Even a brand-new part can fail prematurely if it’s incompatible or if other components are faulty. For instance, installing an aftermarket heating element instead of an OEM part might seem cost-effective but can lead to inefficiencies or damage to other components due to mismatched specifications. Always verify part compatibility before installation, and consult manufacturer guidelines or trusted repair guides.
Furthermore, many individuals don’t realize how environmental factors influence appliance longevity. Hard water, for example, causes mineral buildup that degrades heating elements and sensors over time if not properly maintained. Regular cleaning of water inlets, filters, and spray nozzles can prevent such issues, but this preventive measure is often neglected, resulting in unnecessary part replacements. To avoid falling into this trap, incorporate routine maintenance checks and follow recommended cleaning schedules.
Have you ever fallen into this trap? Let me know in the comments. Remember, mastering the details of diagnostics and part compatibility elevates your repair game from basic to expert, saving time and money in the long run.Maintaining your kitchen appliances requires more than just surface cleaning; it demands precision tools and reliable methods to diagnose and repair issues effectively. Over the years, I’ve discovered that the right equipment makes all the difference in saving time, reducing costs, and ensuring safety. One essential tool I rely on is a high-quality digital multimeter. It’s invaluable for testing electrical continuity and resistance across various components, such as thermostats and sensors, helping to pinpoint faults without guesswork. I personally prefer the Fluke 117 model because of its durability, accuracy, and user-friendly interface, which allows me to perform quick diagnostics even in tight spaces.
For more detailed diagnostics, especially with complex systems like oven control boards, I use a specialized thermal imaging camera. This device helps me spot irregular heat patterns, indicating malfunctioning elements or failing sensors. The FLIR E8 camera, for example, offers high-resolution images and is worth the investment if you’re serious about troubleshooting. It allows me to identify hot spots in heating elements or control boards before they cause further damage, enabling proactive repairs.
When it comes to cleaning and maintenance, I swear by ultrasonic cleaning devices for parts like spray nozzles, filters, and small components. Ultrasonic cleaners use high-frequency waves to dislodge mineral deposits and grime that regular scrubbing can miss. This ensures your parts are thoroughly cleaned, extending their lifespan and maintaining optimal performance. I recommend the iSonic P439, which balances affordability with professional-grade results.
Software tools have also become game-changers in appliance diagnostics. I utilize diagnostic software compatible with many appliance control boards, which interfaces via USB or Bluetooth to read error codes and internal sensor data. These programs can often simulate different operating conditions, giving insights that manual testing might miss. Though more common in professional settings, beginner-friendly options like the Whirlpool Diagnostic Tool are increasingly accessible for DIY enthusiasts.
Looking ahead, I predict that smart diagnostic tools, integrating AI and machine learning, will revolutionize appliance repair. Imagine apps that analyze photos or sensor data to suggest specific parts to replace, reducing the need for multiple trips to the hardware store. As wireless connectivity improves, remote diagnostics could become standard, allowing technicians or skilled amateurs to troubleshoot appliances from afar.
**How do I maintain diagnostic tools over time?** Keep calibration in check by following manufacturer guidelines and periodically testing your devices against known standards. Clean your multimeter leads and sensors regularly to prevent false readings. Store temperature sensors and cameras in dry, protected environments to prolong their lifespan. Proper maintenance ensures your tools provide accurate, reliable data when you need it most.
If you’re ready to enhance your repair toolkit, start by investing in a good multimeter and experiment with basic diagnostics at home. For specific parts like oven thermostats or dishwasher control boards, consulting detailed guides or reaching out to professionals through links like [this repair guide](https://appliancebargainz.com/oven-repair-essentials-troubleshooting-common-issues-with-parts) can be incredibly helpful. Remember, the key to long-term appliance health is not just fixing problems as they arise but diagnosing potential issues early with trustworthy tools. Try incorporating one of these advanced equipment pieces into your routine this month and see how much easier repairs become.
What I Wish Someone Had Told Me About Oven Glass Restoration
One of the most eye-opening lessons I learned was that stubborn brown streaks aren’t just a cleaning hassle—they’re a sign of deeper issues that can affect safety and performance. Now, I always inspect oven glass carefully and recognize that neglecting these signs can lead to costly repairs or dangerous fumes. Also, experimenting with harsh chemicals taught me that abrasive cleaners can worsen the damage, so choosing the right, gentle solutions is essential for longevity and safety. Lastly, I’ve discovered that regular maintenance and early diagnostics save me time and money, turning a daunting task into a manageable routine, and I wish I started this disciplined approach years ago.