I remember the exact moment I realized I was wasting hours on a stubborn oven glitch, chasing in circles without any real progress. It felt frustrating, almost comical in hindsight. All I had was a vague hunch and a pocket full of random parts I hoped would fix the problem. That day, I learned the hard way—proper diagnostics are the secret weapon of efficient oven repair.
Why Skip the Guesswork in Oven Fixes
Matching parts to problems blindly is a surefire way to prolong repairs and drain your wallet. Early on, I made the mistake of replacing parts without proper testing, believing that more parts meant faster fixes. Turns out, that’s a common pitfall among DIY enthusiasts and even seasoned techs alike. According to appliance repair experts, understanding the core diagnostic process can cut repair time dramatically and even prevent costly misfires. For instance, [this comprehensive guide](https://appliancebargainz.com/oven-repair-diagnostics-key-parts-for-faster-fixes-in-2025-2) emphasizes how focusing on key diagnostic steps streamlines troubleshooting.
If you’ve ever faced a non-heating oven or a control panel that refuses to respond, you know how draining it can be. The question is, how do we avoid wandering aimlessly through potential fixes? The answer lies in mastering diagnostic strategies that pinpoint issues quickly and accurately.
Is It Really Worth the Hype?
Initially, I believed diagnostics were overly technical and unnecessary—just swap parts until something works, right? But jumping into repairs without a systematic approach often leads to wasted time and extra expenses. A confession: I once replaced a bake element without testing, only to realize later that the problem was with the control board. That was an expensive lesson. To prevent that, I started relying on proven diagnostic tips, which you can explore further in [this quick guide to diagnostics](https://appliancebargainz.com/oven-repair-parts-diagnostics-quick-guide-to-fix-your-appliance-fast-2025).
So, now I focus on understanding the root causes before replacing anything. It’s like having a clear map instead of wandering through a maze. Want to keep your repairs swift and effective? Let’s dive into the essential diagnostics that every DIYer and professional should master.
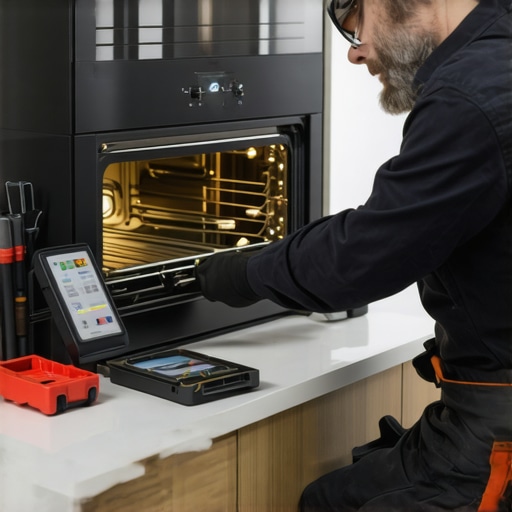
Gather the Necessary Tools and Prepare Your Workspace
Before diving into diagnostics, assemble a multimeter, screwdrivers, and a flashlight. Clear a clean area around the oven to access components easily and safely. For instance, I once started diagnosing my oven on a cluttered countertop; a clear workspace helped me identify loose connections quickly.
Identify Symptoms and Gather Clues
Pinpoint the Exact Issue
Ask specific questions: Is the oven not heating? Is the control panel unresponsive? These clues narrow down potential causes. For example, when my oven didn’t heat, I checked if the display was working—if it was, the problem likely wasn’t the power supply but a faulty heating element.
Check for Error Codes
Modern ovens often display error codes. Refer to the manual to interpret these signals. In my case, an error code pointed directly to a temperature sensor fault, saving me hours of random part replacements.
Perform Basic Visual Inspection
Look for obvious signs like burnt wiring, broken parts, or stubborn debris. I once found a disconnected wire harness behind the oven’s control panel that caused intermittent operation. Reconnecting it restored functionality without further testing.
Test Components Methodically
Use Your Multimeter Effectively
Set your multimeter to resistance mode. Test elements like heating coils—measuring continuity indicates they are intact. When my bake element showed no continuity, replacing it fixed the issue instantly. For detailed testing procedures, see this diagnostic guide.
Check Switches and Controls
Operate switches manually while measuring voltage. Faulty switches often prevent the oven from starting. My experience taught me that faulty oven thermostats can mimic wiring issues, so testing each switch helps target the real problem.
Examine Electrical Connections
Loose or corroded connectors can cause erratic behavior. Tug gently on wires and inspect terminals. Remember, safety first—disconnect power before testing. Once, I discovered a partially melted connector that needed replacement, which resolved the control glitches.
Replace Parts Based on Evidence, Not Assumptions
After confirming a component’s failure, replace only the faulty part. Avoid the temptation to swap multiple parts; this wastes time and money. My approach: test, confirm, replace, then retest. This method consistently speeds up repairs and reduces guesswork.
Double-Check Your Repair
After replacing a component, restore power and test the oven. Ensure it heats properly and all functions respond. When my oven started working after replacing the thermostat, I also checked other controls to prevent future issues. Confirming each repair step prevents return visits and keeps the repair effective.
Many DIY enthusiasts fall prey to misconceptions when diagnosing appliances, especially ovens and dishwashers. One prevalent myth is that replacing components at random speeds up repairs. In reality, this approach often complicates the process and increases costs. Instead, understanding the subtle nuances of diagnostic procedures—such as interpreting error codes accurately or recognizing signs of specific failures—can drastically improve outcomes. For instance, relying solely on visual inspection without testing components like thermostats or motors can lead you astray. Advanced diagnostics involve systematic testing with tools like multimeters, measuring resistance, continuity, and voltage levels—skills that separate amateurs from seasoned pros. A common mistake is assuming that a visual cue, such as a burnt wire, is the root cause, overlooking underlying issues like control board faults. Properly diagnosing requires a layered approach: gather clues, perform targeted tests, and interpret results cautiously. Expert sources emphasize that understanding these nuances prevents costly errors and reduces repair times. For an in-depth guide on effective diagnostic strategies, visit [this comprehensive diagnostics resource](https://appliancebargainz.com/oven-repair-diagnostics-key-parts-for-faster-fixes-in-2025-2). Remember, rushing to replace parts without proper testing is a trap that can turn a simple fix into a costly nightmare. Have you ever fallen into this trap? Let me know in the comments.Maintaining your appliances over time requires more than just basic knowledge; it demands the right tools, consistent routines, and an understanding of their evolving needs. One tool I can’t recommend enough is a high-quality digital multimeter, specifically the Fluke 117. Its accuracy and durability make it indispensable for quickly diagnosing issues like faulty sensors or broken wiring without guesswork, ultimately saving you time and money. Additionally, a reliable thermal camera, such as the Seek Thermal Compact, provides visual insights into overheating components or electrical hotspots that aren’t visible to the naked eye, enabling preemptive repairs before critical failures occur. For software, I depend on diagnostic apps like iFixit’s repair guides combined with my multimeter readings, which streamline troubleshooting by offering step-by-step procedures tailored to specific fault codes or symptoms. As appliance technology advances with smart features and complex electronic controls, staying updated with the latest diagnostic tools is crucial. These tools help identify issues rapidly, ensuring you get appliances back to optimal performance faster than ever. Looking ahead, I believe the trend will shift even further toward integrated diagnostic systems that connect appliances directly to troubleshooting apps, simplifying maintenance for both professionals and DIYers.
How do I maintain diagnosis skills over time?
Practice employing these tools regularly—testing old appliances or those currently functioning well—to refine your technique. Keep your diagnostic tools calibrated and up-to-date, and regularly review manufacturer manuals and online resources like appliancebargainz.com to stay informed about new parts and fault codes. Remember, mastering these techniques not only accelerates your repair process but also prolongs the lifespan of your appliances, saving you money in the long run. If you haven’t already, try the tip of using a thermal camera to spot unusual heat patterns—they can reveal hidden problems before they escalate into costly repairs. This proactive approach is changing how I keep appliances in top shape, and I highly recommend giving it a shot!
What I Wish I Knew When I Started Diagnosing Ovens
The biggest lesson I learned was that patience and systematic testing trump guesswork every time. Rushing into part replacements without thorough diagnostics only extended my frustration and costs. Once I slowed down and mapped out my approach, repairs became more predictable and less stressful.
Another insight is the importance of understanding error codes and subtle symptoms. An error message or a strange smell can point directly to specific components, saving me hours of unnecessary testing. This also taught me to trust my tools—like multimeters and diagnostic apps—over assumptions.
Finally, I realized that learning from others’ experiences—reading detailed guides and watching repair videos—accelerates my skills and confidence. Continuous learning turned a once-daunting task into an empowering routine.