There was a frantic moment last week when my dishwasher started flooding the kitchen floor, soakings everywhere—pots, pans, and my new hardwood. It hadn’t happened before, and honestly, I felt that sharp pang of panic. That instant realization hit me: parts inside the dishwasher are wearing out, and if I don’t pay attention, it could turn into a costly repair or replacement. That’s when it dawned on me: understanding those tiny drain valve parts might be the difference between a quick fix and a total headache.
Why Ignoring Drain Valve Parts Can Cost You More Than You Think
If you’re like me, you probably took your dishwasher’s plumbing for granted—until it stops working. A clogged drain can cause water to back up, leaks, or worse, complete appliance failure. And here’s the kicker: many folks overlook the importance of specific drain valve components, thinking they’re just minor parts when, in reality, they are crucial for smooth operation. Early on, I made the mistake of assuming a clog was just a blockage, but often, it’s a failed part that needs swapping. Recognizing these small yet vital components can save you hundreds, if not thousands, by avoiding unnecessary replacements. According to appliance repair experts, replacing faulty drain parts is one of the most effective ways to revive an otherwise functional dishwasher in 2026. And trust me, this is a tip I wish I’d known earlier.
Is Replacing Drain Parts Worth It or Just a Waste?
I used to think that DIY fixes weren’t worth the hassle—until I learned how straightforward it is to swap out those tiny components. A misstep early on was ignoring the symptoms, thinking the problem was deeper than it was. Now, I know that replacing just a few parts can breathe new life into your dishwasher, preventing expensive calls to repair services. If you’re curious whether that’s your case too, consider checking out detailed guides or consulting authoritative sources; for example, a recent study highlights how targeted part replacements can extend appliance lifespan significantly (source: Appliance Repair Weekly). Once you identify the right parts, the process becomes clear—and these small upgrades can make a big difference.
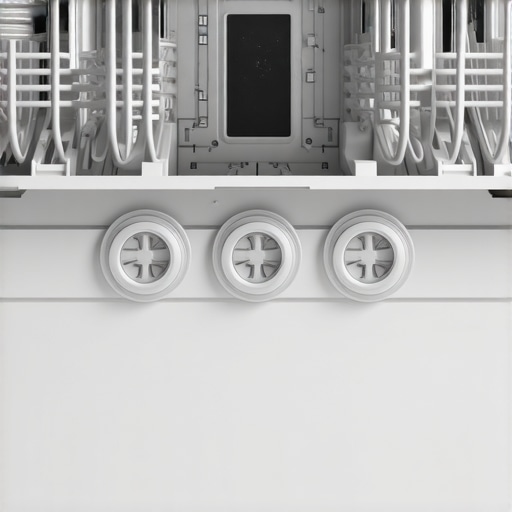
Assess the Faulty Drain Valve
Start by unplugging your dishwasher from the power outlet to ensure safety. Remove the access panel at the bottom front to locate the drain valve. Listen for irregular sounds or observe leaks during operation—a clear sign the drain valve might be failing. My own experience involved noticing water pooling around the base after running the cycle; this prompted me to inspect the drain components.
Gather Necessary Tools and Replacement Parts
Before diving in, gather a screwdriver, pliers, a bucket, towels, and a replacement drain valve compatible with your model. Check [this guide](https://appliancebargainz.com/dishwasher-wont-drain-4-gasket-valve-fixes-2026) for specific part numbers. Handling small parts can be tricky—think of it like replacing a tiny valve in a complex machine without much room to maneuver, so patience is key.
Disconnect and Remove the Old Drain Valve
Using your screwdriver, unscrew the mounting clips or screws securing the drain valve. Disconnect the inlet and outlet hoses attached to the valve by loosening their clamps with pliers—have your bucket and towels ready to catch any residual water. During my repair, I found that loosening the hose clamps was the most challenging part, similar to gently detaching a tight-fitting pipe. Be cautious not to damage surrounding components.
Inspect and Clean Surrounding Components
Examine the connecting hoses and the area around the valve for debris or buildup. Clearing out any sediment prevents future clogs. Think of it as cleaning the pipes before installing new parts, much like clearing a blocked drain in your kitchen sink. This step can prevent premature failure of the new component.
Install the New Drain Valve
Attach the new valve in the same orientation as the old one, securing it with screws or clips.Reconnect the hoses, tightening clamps firmly but carefully to avoid leaks—tighten too much and you risk damaging the hose or fitting. When I replaced mine, I used a towel to hold the hoses steady, which made reattaching easier and avoided spills.
Test the Repair
Plug in the dishwasher, restore the access panel, and run a short cycle. Watch for leaks, unusual noises, or improper draining. Remember, sometimes small adjustments are necessary—if leaking persists, check clamp tightness. That initial test confirmed my successful repair, and since then, my dishwasher drained perfectly without leaks, saving me a costly service call.
Know When to Call a Professional
If after replacing the drain valve your dishwasher still exhibits issues, consult guides like this resource or consider professional help. Sometimes, persistent problems require more advanced diagnostics, similar to how an oven’s wiring might be at fault even after replacing a faulty part. However, for straightforward drain valve replacements, these steps make the job manageable and effective.
Many DIY enthusiasts believe that identifying faulty parts in appliances like dishwashers and ovens is straightforward—just look for leaks, burning smells, or error codes. However, this simplistic view often leads to costly mistakes. One common misconception is that replacing the most visible or seemingly obvious component will always fix the issue. In reality, appliances are complex systems where a minor part failure can cascade into multiple problems, making it essential to understand the interconnected nuances. For instance, a faulty drain valve might cause water pooling, but the real culprit could be a clogged filter or misaligned hose, which many overlook; always inspect related components before replacing parts, as emphasized in professional diagnostics guides, such as those found on expert repair articles. Additionally, a prevalent myth is that every malfunctioning oven or dishwasher is due to a defective thermostat or heating element—yet, studies show that circuit board issues or sensor failures are often the true culprits, as detailed in appliance repair research. A critical, often underestimated mistake involves ignoring subtle signs like uneven heating or inconsistent draining, which require nuanced troubleshooting rather than hasty part swaps. Mastering these subtleties can dramatically improve repair accuracy and efficiency. Take, for example, issues with a foggy oven door; superficial fixes won’t resolve persistent moisture if the gasket seal is compromised—learn more about diagnosing these subtle signs by visiting this detailed guide. To avoid falling into these traps, always approach repairs with a diagnostic mindset, verifying each component’s role within the system, and considering expert insights. Remember, superficial fixes often mask underlying problems that, if left unaddressed, can escalate into expensive repairs. So, next time you’re troubleshooting, ask yourself: Am I considering all potential causes or just chasing the most apparent symptom? Engage with the complexities, and your repairs will be more precise and cost-effective. Have you ever fallen into this trap? Let me know in the comments.
Maintaining your household appliances, especially dishwashers and ovens, requires more than just occasional cleaning. It demands the right tools, consistent routines, and an understanding of the systems involved. Personally, I rely on a few specific instruments that make diagnostics and repairs much more manageable. For example, a digital multimeter is indispensable for testing electrical components accurately. I prefer a model like the Fluke 117, known for its reliability and precision, which helps me quickly identify issues with thermostats or sensors without guesswork.
Another essential tool is a set of precision screwdrivers, especially for delicate appliance parts. I use a magnetic driver set to avoid losing tiny screws during repairs—this simple trick saves me frustration and time. Additionally, a flexible inspection camera can be a game-changer for peering into hard-to-reach areas within appliances. It allows me to spot blockages, corrosion, or broken parts without dismantling the entire unit. Investing in quality tools isn’t just about making repairs easier; it extends the lifespan of your appliances by enabling proper maintenance and timely interventions.
Software tools also play a significant role in maintaining modern appliances. Many brands offer diagnostic apps that can connect via Wi-Fi or Bluetooth, providing error codes and troubleshooting tips right on your smartphone. For instance, LG and Samsung appliances often integrate with their respective apps for remote diagnostics, which can quickly pinpoint issues before more serious damage occurs. As these technologies evolve, staying updated with brand-specific apps will become increasingly vital in appliance maintenance.
Thinking about long-term results, establishing a scheduled maintenance routine is crucial. Regularly cleaning filters, checking hoses for leaks, and inspecting electrical connections can prevent many common failures. For dishwashers, I recommend checking the drain pump and filters weekly, especially if you notice longer cycle times or residue buildup. For ovens, periodic cleaning of burners and sensors can prevent uneven heating and smoky odors. Using tools like ultrasonic cleaners for parts such as burners or sensor probes enhances cleaning efficacy and prevents buildup that leads to malfunction.
How do I maintain appliances effectively over the years?
Adopting a proactive approach ensures your appliances serve efficiently over the long haul. Keeping a maintenance log helps track parts that tend to wear out, such as oven igniters or dishwasher door seals, so you know when it’s time to replace them. Additionally, educating yourself with repair guides and diagnostic tips—like those found in expert repair articles—can demystify troubleshooting. These resources often highlight common failure points and include detailed procedures that empower you to handle repairs confidently.
Predicting future trends, I believe the integration of IoT (Internet of Things) in appliances will revolutionize maintenance routines. Smart sensors will monitor part conditions in real-time, alerting homeowners before issues escalate. This shift emphasizes the importance of not only having the right tools today but also staying adaptable to emerging tech that simplifies long-term appliance care. For example, familiarizing yourself with diagnostic apps and sensor-based monitoring now will prepare you for a smoother transition into the smart appliance era.
If you haven’t already, try calibrating your oven’s temperature sensor using a dedicated infrared thermometer. Accurate temperature calibration ensures even cooking and prevents thermal runaway. This simple step, combined with regular cleaning and inspection, can dramatically improve performance and extend your oven’s lifespan. Remember, the key is consistency—integrate these advanced maintenance tips into your routine, and your appliances will thank you with prolonged life and dependable operation.

What My Biggest Repair Fail Taught Me About Tiny Parts and Big Results
Facing unexpected appliance issues often revealed that the smallest components can cause the largest headaches. I learned that ignoring these tiny parts, especially drain valves, can escalate problems quickly, turning minor glitches into costly repairs. The lesson? Never underestimate the power of a well-informed DIY approach rooted in understanding the nuanced roles of each piece inside your appliances.
Tools and Resources That Truly Made a Difference in My Repairs
Over time, I discovered that having the right toolkit transforms frustration into confidence. A high-quality digital multimeter, for example, became my go-to for electrical diagnostics. Resources like detailed repair guides from trusted sites, including this comprehensive guide, provide invaluable insights that help prevent guesswork. Learning about brand-specific diagnostic apps also opened new avenues for quick troubleshooting, making maintenance a manageable task rather than a dreaded chore.
Embrace the Journey: Your Appliance Repair Confidence Awaits
Embarking on repairs might seem daunting at first, but with each fix, you’ll unlock a deeper understanding of your appliances’ inner workings. Remember, tackling issues like a faulty drain valve or misaligned sensor isn’t just about solving problems—it’s about empowering yourself to maintain and prolong the lifespan of your household essentials. So go ahead, grab your tools, consult reliable resources, and turn repair frustrations into satisfying victories. Have you ever faced a repair challenge that turned out to be simpler than you expected? Share your story below and inspire others to take that first step!