Ever had that sinking feeling when your oven suddenly refuses to heat, and you’re staring at a cold, useless appliance right before dinner? I’ve been there, frustrated because I didn’t have the right diagnostic tools or parts on hand. It was a lightbulb moment for me—realizing that quick, accurate diagnostics could save hours and money. Since then, I’ve learned that understanding the right essential parts and diagnostic strategies isn’t just helpful; it’s essential for faster repairs in 2025. Today, I’ll share how you can avoid the common pitfalls and become more confident in diagnosing oven issues quickly and effectively.
Why Diagnostics Are the Heart of Faster Oven Repairs
Most of us underestimate just how complex ovens can be. A simple malfunction often masks a deeper problem—think faulty thermostats, broken heating elements, or control board issues. The key is knowing exactly which parts to check first. When I started, I made the mistake of randomly replacing parts or guessing. That approach costs time and money. Instead, focusing on the right diagnostic tools and essential parts helps zero in on the real issue fast. Reliable diagnostics aren’t just about fixing your oven—they’re about saving your sanity and your wallet. If you want to avoid wasting hours troubleshooting, developing a solid diagnostic approach is the way to go. For a comprehensive guide, check out top oven repair diagnostics tips.
Have you faced the frustration of multiple failed repair attempts? You’re not alone. Many homeowners and even pros fall into the trap of guessing, which often leads to unnecessary part replacements. Early on, I replaced the heating element simply because I thought it was the problem—only to find out the control board was faulty. That was a costly lesson. Building a diagnostic process rooted in the right parts and tools is what separates quick fixes from prolonged headaches. And trust me, knowing which parts are essential for diagnostics in 2025 makes a huge difference. Want to learn more? Dive into essential diagnostic parts for faster fixes.
Are you ready to ditch the guesswork and master your oven repairs? Let’s explore the key diagnostic strategies and parts that will make your next fix a breeze.
Identify What Is Truly Broken
Before diving into repairs, get familiar with your oven’s core components. Think of each part as a piece of a puzzle—knowing their function helps you see the bigger picture. I once faced an oven that refused to heat, and instead of randomly replacing parts, I started by checking the key diagnostic parts. Using a multimeter, I tested the thermostat and heating element, which quickly revealed a faulty thermostat. This precise check saved me hours of guesswork and unnecessary replacements.
Use the Right Diagnostic Tools Effectively
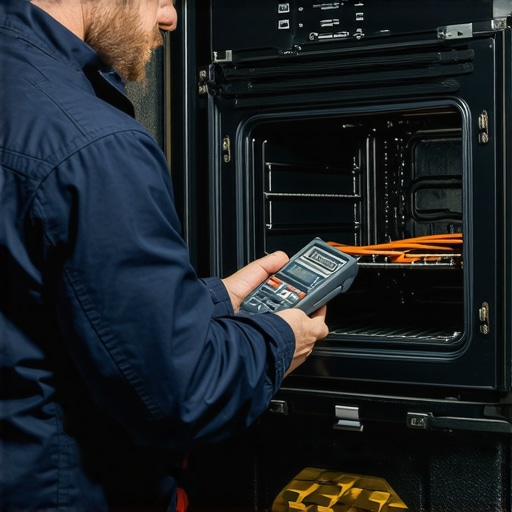
Think of diagnostic tools like a detective’s magnifying glass—they reveal hidden clues. A multimeter is essential for testing electrical continuity and resistance in parts like heating elements, thermostats, and control boards. When I first started, I relied on basic visual checks, but that often led me astray. Now, I follow a structured approach: first, visually inspect for obvious damage, then use a multimeter to confirm electrical faults. This method ensures no faulty part slips through unnoticed, enabling faster fixes. For detailed techniques, see essential diagnostic parts for faster fixes.
Test Components Systematically
Treat your diagnostic process like a systematic scan—don’t jump around randomly. Start with the thermostat, then move to the heating element, and finally check the control board. I once overlooked the control board, assuming the issue was with the thermostat, which led to repeated failures. When I finally tested the control board, I found a burnt-out relay. This experience taught me to follow a logical sequence. Use a multimeter to check each component’s resistance and continuity. If you find a part with inconsistent readings, replace it. This approach minimizes guesswork and speeds up the repair process. For more tips, visit key parts for faster fixes.
Prioritize Essential Parts for Diagnostics
Focus on parts that commonly cause issues—these are your diagnostic allies. In my experience, the thermostat, heating element, and control board are the top suspects. Having these parts ready or easily accessible means you can quickly test or replace them without delay. For example, I keep spare thermostats and heating elements in my toolbox, which drastically reduces downtime. Remember, not every part needs replacement—accurate diagnostics mean only fixing what’s broken. For a comprehensive list, check top diagnostic parts.
Document Your Findings for Future Repairs
Keep a simple log of what you test and the results. It’s like creating a map of your repairs—this helps identify recurring issues and improves your diagnostic speed over time. I once faced a stubborn oven that kept malfunctioning after a control board replacement. Reviewing my notes, I noticed a pattern of faulty thermostats. That insight saved me from unnecessary replacements in subsequent repairs. Use a checklist or a digital note to track tested parts, readings, and outcomes. Over time, this record becomes your personal diagnostic guide, making future repairs even faster. For more insights, visit diagnostic parts for efficient fixes.

Many homeowners and even professionals fall into traps when diagnosing oven problems, often relying on misconceptions that can lead to costly mistakes. One popular myth is that the most visible or easily accessible part, like the heating element, is almost always the culprit. While visually inspecting parts is important, assuming it’s the primary cause without proper testing can waste valuable time. In my experience, the real nuance lies in understanding the interconnectedness of oven components and knowing when to use diagnostic tools effectively. For example, a burnt-out heating element might seem obvious, but a faulty control board or thermostat could be the root cause, especially in modern ovens with complex electronics. To avoid this mistake, always approach diagnostics systematically, starting with basic visual checks but confirming with resistance tests using a multimeter. Developing this nuanced understanding can save hours and prevent unnecessary part replacements. It’s also a common misconception that replacing parts at random is a quick fix. In reality, this often leads to repeat failures and increased costs. Instead, focus on accurate diagnostics, leveraging expert strategies like those outlined in top diagnostic tips for 2025. Moreover, beware of the trap of ignoring the control circuitry, which in many modern ovens is where the failure originates, even if the symptoms seem peripheral. Recognizing these subtleties can be the difference between a quick fix and a prolonged headache. Have you ever fallen into this trap? Let me know in the comments.
Invest in Quality Diagnostic Equipment
To keep your oven running smoothly, I highly recommend investing in a reliable digital multimeter. Personally, I prefer the Fluke 117 because of its durability and precision. It allows me to quickly test resistances and continuity in components like thermostats and heating elements, saving hours of guesswork. Additionally, a non-contact voltage tester is invaluable for ensuring safety before working on electrical parts. As technology advances, tools like smart multimeters with Bluetooth connectivity are emerging, enabling real-time data sharing with apps for more accurate diagnostics. Predicting the future, I see diagnostic tools becoming more integrated with AI, guiding even amateurs through complex troubleshooting processes seamlessly.
Develop a Routine Maintenance Schedule
Consistent maintenance is key to long-term oven health. Every 6 to 12 months, I recommend inspecting and cleaning critical components: vacuuming out dust from the control panel, checking wiring for wear, and testing thermostats and sensors. Use a soft brush and compressed air for delicate parts, ensuring no debris hampers performance. Keeping a maintenance log helps track issues before they escalate. For instance, I noticed my oven’s temperature drifted slightly, prompting me to recalibrate the thermostat, which prevented potential failures. Setting reminders for seasonal checkups can drastically extend your appliance’s lifespan and reduce emergency repairs.
Streamline Parts Inventory for Quick Fixes
Having essential parts on hand accelerates repairs. I keep a stock of commonly faulty components like thermostats, heating elements, and control boards. To stay organized, I use labeling systems and digital inventories—this way, I know exactly what I have and what needs replacing. For example, during a recent repair, I replaced a control board in under 30 minutes because I had the exact part ready. As we move into 2025, I predict that supply chain integrations with repair apps will become standard, allowing instant ordering of parts with just a few taps. This shift will make scaling your repair capacity much more manageable.
Leverage Expert Repair Strategies
Following proven diagnostic strategies ensures you don’t waste time on unnecessary replacements. For instance, using the systematic testing approach outlined in top oven repair diagnostics tips, I test components in a logical sequence—starting with thermostats, then heating elements, and finally control boards. This method minimizes guesswork and ensures accurate repairs. Additionally, documenting your findings helps identify recurring issues and refine your process. I encourage you to try the tip of creating a detailed diagnostic checklist—it’s a game-changer for maintaining consistent results over time.
How do I maintain my oven over time?
Regular cleaning, periodic inspections, and updating your diagnostic tools are essential. Also, staying informed about the latest repair techniques through trusted sources like expert repair guides will keep you ahead of common issues. Remember, proactive maintenance not only prevents breakdowns but also makes troubleshooting faster and more accurate. Try setting a quarterly maintenance routine and see how much longer your oven stays in top shape!
After years of fixing ovens, I’ve learned that the real secret to quick repairs lies in mastering diagnostic strategies and knowing exactly which parts matter. My biggest breakthrough was realizing that rushing to replace parts without proper testing only extends the repair time and costs. Today, I want to share some insider lessons I wish I knew earlier, so you can avoid common pitfalls and fix your oven faster in 2025.
The Hardest Lesson I Learned About Oven Diagnostics
I once spent hours replacing the heating element, only to find out the control board was the actual culprit. It taught me that visual checks are just the starting point. Confirming faults with a multimeter saved me from unnecessary replacements, and that’s a lesson I carry into every repair now. Trusting your diagnostic tools over assumptions is crucial to avoid repeating costly mistakes.
My Favorite Tools for Fast Repairs
Investing in a quality multimeter, like the Fluke 117, has revolutionized my approach. It’s reliable, precise, and helps me quickly test thermostats, heating elements, and control boards. Plus, a non-contact voltage tester adds an extra layer of safety. For ongoing repairs, I also keep spare thermostats and control boards handy, so I’m never caught waiting for parts. In 2025, I see diagnostic tools becoming even smarter, integrating AI to guide amateurs through complex troubleshooting.
Emotional Push to Get Started
Fixing your oven might seem daunting, but with the right diagnostic approach and essential parts, you can turn a frustrating experience into a rewarding skill. Every successful repair boosts your confidence and saves you money. Remember, the key is to stay curious, patient, and always keep learning. Your journey toward mastering oven repairs starts today—don’t wait for the next breakdown to get proactive!
What’s Your Biggest Challenge When Fixing Ovens?
Share your experiences or ask questions below—let’s learn from each other and make oven repairs faster and easier in 2025!