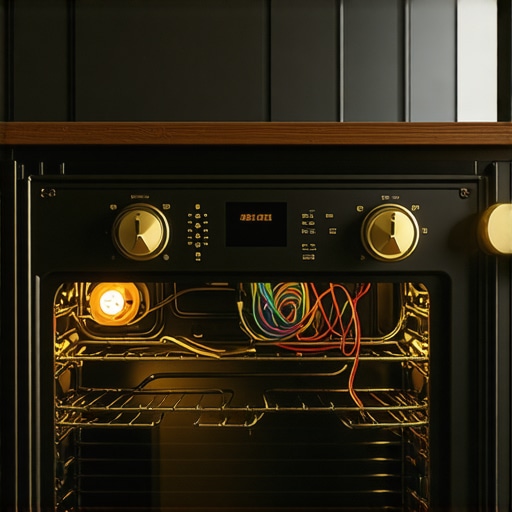
It was a quiet Saturday afternoon when I noticed something odd in my kitchen—my oven light flickering unpredictably, casting intermittent shadows that made me question whether my oven was trying to tell me something. At first, I brushed it off as a minor annoyance, but soon enough, the flickering became persistent, disrupting my cooking plans and turning my kitchen into a strobe light zone. I realized that this seemingly small issue could be more than just an inconvenience; it might be a sign of deeper wiring or socket problems, especially with appliances as complex and tech-savvy as those in 2026.
Why Oven Light Flickering Can Signal Bigger Troubles
In my experience, flickering oven lights aren’t just about a burnt-out bulb or loose connection—they often hint at underlying electrical issues that can escalate if ignored. A faulty socket or wiring flaw could lead to complete light failure, or worse, electrical shorts that pose safety hazards. With the rapid technological advances in appliances, older troubleshooting methods won’t cut it anymore. Understanding the root cause now can save you from costly repairs or replacements later.
Did you know that according to recent studies, flickering lights in household appliances can sometimes precede more serious electrical failures? This makes addressing the problem promptly even more crucial.
If you’re like me and have faced this frustrating flickering, you’re probably wondering whether trying to fix it yourself is worth the risk or if it’s better to call in a professional. Early on, I made a mistake by blindly replacing the bulb without inspecting the socket or wiring, which only temporarily masked the problem. Trust me, jumping straight into part replacements without diagnostics can lead to wasted time and money.
Luckily, I found a reliable approach to tackle this issue head-on. In the next sections, I’ll walk you through the practical steps to identify and fix the common causes of oven light flickering in 2026, including socket repairs and wiring checks. For comprehensive guidance on similar appliance diagnostics, you might want to explore [effective oven repair diagnostics](https://appliancebargainz.com/oven-repair-tips-diagnostics-effective-fix-strategies-2025) or check out [quick fix strategies for faster repairs](https://appliancebargainz.com/oven-repair-tips-diagnostics-quick-fix-strategies-for-2025). Let’s get started, so your kitchen stays warm and bright—minus the flickering.
Inspect the Bulb and Socket
Start by turning off the oven and unplugging it from the power source to ensure safety. Remove the oven’s interior panels to access the light socket, similar to opening a toolbox before starting repairs. Carefully unscrew the light bulb and inspect it for any signs of burn marks or damage—if the filament looks broken or blackened, it needs replacing. Next, examine the socket for corrosion or loose connections. Use a multimeter to test for continuity; if there’s no signal, the socket may be faulty, requiring replacement. Remember, older sockets can act like weak links in a chain, potentially causing flickering in your oven light. For quick replacements, check out [cheap oven parts](https://appliancebargainz.com/3-cheap-oven-parts-to-swap-in-2026-to-prevent-costly-breakdowns).
Check the Wiring Connections
Wiring issues are often the root of flickering lights, much like uneven electricity flow causing a flickering streetlamp. Carefully open the connection panel near the light socket. Inspect all wires for corrosion, fraying, or loose connections. If a wire feels loose or damaged, disconnect and reconnect it securely; if frayed, cut back the wire and attach a new connector or replace the wire altogether. Use a multimeter to verify that power is reaching the socket consistently. Remember, inconsistent wiring can create voltage drops, leading to flickering. To diagnose further, consult [diagnose and fix dishwasher problems](https://appliancebargainz.com/diagnose-fix-dishwasher-problems-fast-expert-troubleshooting-tips), which offers similar principles applicable to your oven’s wiring checks.
Test the Power Supply and Switches
Next, verify the power supply’s stability; fluctuations can cause the light to flicker unpredictably, like voltage surges during thunderstorms. Plug the oven into a different outlet or use a surge protector to exclude external issues. Inspect the light switch mechanism—if accessible—and ensure it consistently completes the circuit without hesitation. Sometimes, switches wear out or become misaligned, akin to an inconsistent switch flipping. Use a multimeter to check for continuity when toggling the switch. If faulty, replace the switch or contact an electrician for a professional diagnosis. This step resembles testing a circuit breaker’s reliability, ensuring steady current flow. For parts replacement tips, see [flickering lights troubleshooting](https://appliancebargainz.com/oven-repair-secrets-key-diagnostics-parts-for-faster-fixes-in-2025-2).
Assess the Control Board and Voltage Regulator
If the previous steps don’t resolve the issue, the problem likely lies within the oven’s control board or voltage regulator, functioning as the brain orchestrating power distribution. Look for signs of burnt components, corrosion, or damaged circuits on the control board—these can cause inconsistent signals, leading to flickering. Use a magnifying glass and multimeter for detailed inspection. In some cases, a defective control board might need replacing, similar to updating outdated software for smoother performance. Before replacing, consult [key diagnostics for oven repair](https://appliancebargainz.com/oven-repair-diagnostics-effective-fix-strategies-2025-2) to confirm the fault. Remember, advanced electronics in 2026 have integrated systems that require precise diagnostics, so if in doubt, reaching out to a professional can save time and prevent further damage.While many believe that diagnosing appliance issues is straightforward—often just a matter of checking parts or following basic troubleshooting steps—this mindset misses several nuanced realities that can lead to costly mistakes. As an expert who has navigated countless repair scenarios, I can tell you that understanding the subtle complexities and avoiding prevalent misconceptions can significantly improve your success rate.
One widespread myth is that a faulty part is always the root cause. For example, if your oven isn’t heating properly, some might immediately assume the heating element is dead. However, in many cases, the culprit could be a defective sensor or poorly connected wiring, which are often overlooked because they aren’t visibly damaged. Rushing to replace parts without thorough diagnostics can lead to unnecessary expenses. For insights into effective troubleshooting strategies, check out [fast fix strategies for oven repair diagnostics](https://appliancebargainz.com/oven-repair-tips-diagnostics-fast-fix-strategies-for-2025).
Beware of the trap of superficial fixes. For instance, replacing a dishwasher’s heating element to solve poor drying might not address underlying issues like faulty thermostats or control boards, which can cause the element to never reach desired temperatures. This approach leads to recurring problems and wasted money. Instead, a comprehensive diagnostic approach is essential, which you can learn more about in [effective appliance diagnostics](https://appliancebargainz.com/dishwasher-diagnostics-parts-expert-troubleshooting-tips).
Another common misconception is that all replacements are straightforward. In reality, selecting compatible parts and understanding their nuances is vital. When choosing parts, such as those listed in [cheap oven parts in 2026](https://appliancebargainz.com/3-cheap-oven-parts-to-swap-in-2026-to-prevent-costly-breakdowns), recognizing quality, compatibility, and specific function can mean the difference between a lasting fix and a new problem.
Have you ever fallen into this trap? Let me know in the comments.
Now, let’s address an advanced question that often stumps even seasoned DIY enthusiasts: How can nuanced electronic diagnostics prevent misdiagnosis in complex appliance control systems?
The key lies in understanding that modern appliances are governed by intricate control boards and sensors that communicate through precise signals. A subtle voltage fluctuation or a tiny burnt component on a board may cause intermittent failures, misleading the diagnosis towards simpler parts like switches or thermostats. Embracing expert-level diagnostics—such as using oscilloscopes or advanced multimeters—can reveal these hidden issues before replacing expensive modules. For example, in [diagnostics for oven repair](https://appliancebargainz.com/oven-repair-diagnostics-effective-fix-strategies-2025-2), professionals highlight how targeted electronic testing saves time and money, ensuring that repairs are both effective and durable.In the world of appliance repair, having the right tools and a solid maintenance routine is essential for ensuring longevity and reliable performance. I recommend investing in a high-quality multimeter like the Fluke 115, which I personally use to diagnose electrical issues in ovens and dishwashers with precision. Its durability and accuracy make it indispensable when testing wiring continuity or voltage fluctuations, especially in complex control boards. Additionally, a digital thermocouple thermometer, such as the Pyrometers Inc. model, enables quick verification of temperature sensors and heating elements, helping you identify faulty parts before they cause bigger problems.
Regularly cleaning and inspecting components, like thermostat probes and sensor connectors, prevents buildup that can lead to inconsistent readings. I also use a small soldering kit to reattach loose wires and repair minor circuit board damages, which often extends the lifespan of electronic parts without replacing entire modules. For software diagnostics, I rely on manufacturer-specific apps that connect via Bluetooth to retrieve error codes directly from smart appliances—saving time and providing a comprehensive view of internal issues.
Looking ahead, I predict that diagnostic tools will become increasingly integrated with AI-powered diagnostics, offering real-time troubleshooting suggestions based on subtle electronic signals. This will make DIY repairs more accessible and reduce dependency on professional technicians for minor issues.
**How do I maintain my appliances over time?** The key is establishing a routine that includes periodic inspections, cleaning of critical parts, and updates to diagnostic software. For instance, checking dishwasher inlet valves and filters regularly can prevent overflows and leaks, saving money and avoiding water damage. When working on these components, always refer to detailed repair guides like [diagnose and fix dishwasher problems](https://appliancebargainz.com/diagnose-fix-dishwasher-problems-fast-expert-troubleshooting-tips), which offer step-by-step procedures tailored for 2026 models.
Don’t forget to keep spare parts on hand, particularly those recommended in [cheapest oven parts to swap in 2026](https://appliancebargainz.com/3-cheap-oven-parts-to-swap-in-2026-to-prevent-costly-breakdowns). Regular maintenance not only keeps appliances running smoothly but also helps you catch small issues before they escalate into costly repairs. As you develop your toolkit, remember that precise diagnostics and attention to detail are your best friends in long-term appliance management—so try calibrating your temperature sensors with a thermocouple today, and see how much more reliable your cooking becomes.
Three Lessons That Changed My Approach to Repairs
First, never assume a problem stems from a single faulty part. Each component exists in a network, and sometimes the issue is a symptom rather than the root cause. Second, patience in diagnostics prevents unnecessary expenses—rushing to replace parts without thorough testing can cost more in the long run. Third, tools like multimeters and advanced diagnostics can reveal subtle electronic issues that aren’t visible to the naked eye, saving you time and money. Embracing these lessons has empowered me to tackle repairs confidently, making me less dependent on guesswork and more confident in my ability to solve complex problems.
My Toolbox for Reliable Repairs
In my repair journey, a quality multimeter, such as the Fluke 115, has been indispensable for precise electrical testing and diagnosing wiring issues. I also rely on detailed manuals and repair guides like those found at this resource, which provide step-by-step instructions suited for 2025 and beyond models. Additionally, keeping a set of replacement parts like the affordable oven components listed at this page helps me act quickly when a part fails. Finally, engaging with community forums and expert blogs deepens my understanding of electronic diagnostics and emerging repair techniques.
Ignite Your Confidence: Your Next Repair Awaits
Real progress in appliance repair comes from curiosity, patience, and a willingness to learn from each experience. Whether you’re fixing an oven that flickers or deciphering the mysteries of your dishwasher’s behavior, remember that every challenge is an opportunity to grow. With the right tools and knowledge, you can reduce costs, extend your appliances’ lifespan, and gain a satisfying sense of mastery. So, take that first step today—your kitchen appliances are waiting for your expert touch!