Ever had that sinking feeling when you open your dishwasher and see water pooling beneath it? I remember the first time it happened to me. I had just finished a load of dishes, only to find a small lake forming on my kitchen floor. Initially, I thought it was just a clogged drain or a forgotten dish. But as I dug deeper, I realized the culprit might be something more elusive—my dishwasher’s siphon break.
Don’t Let a Leaking Siphon Break Dampen Your Day
Today, I want to share my personal journey in understanding and fixing this pesky issue. If your dishwasher is leaking water around the siphon break, you’re not alone. This small component plays a significant role in preventing backflow and maintaining proper drainage. Ignoring it can lead to water damage, mold growth, and costly repairs down the line. But here’s the good news: with a few straightforward drainage fixes, you can resolve this problem confidently and keep your kitchen dry.
Is Fixing the Siphon Break Actually Worth the Effort?
Early in my troubleshooting, I made a mistake—assuming the leak was always due to a faulty hose or seal. Turns out, the siphon break itself, a tiny but critical part, often causes these leaks when it malfunctions or gets clogged. According to industry experts, poor drainage can lead to increased energy consumption and appliance wear (source: Appliance Bargainz), making timely repairs even more vital. So, before you replace the entire dishwasher, consider inspecting and fixing the siphon break—saving money and frustration.
In the sections ahead, I’ll walk you through three proven drainage fixes for this exact issue. Whether you’re a DIY novice or have some experience, these steps will help you take control of the leak and restore peace to your kitchen. Ready to get your hands dirty and stop that water from seeping out? Let’s dive into the solutions that worked wonders for me—and could do the same for you.
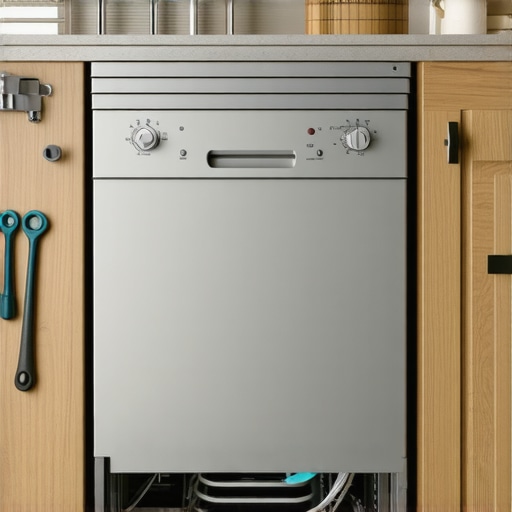
Access the Siphon Break with Precision
Start by unplugging your dishwasher to ensure safety, then carefully slide out the bottom rack to expose the drainage area. Use a flashlight to locate the siphon break, which is typically positioned near the drain hose connection or the base of the dishwasher. If you’re unsure, consult your specific model’s manual. Last summer, I once struggled with a stubborn leak until I saw the siphon break hidden behind a buildup of grime, requiring me to remove a few screws for full access.
Identify and Clear Blockages
Once you locate the siphon break, inspect it for clogs or debris. Often, mineral deposits or food particles can cause partial blockages, leading to water backflow. Remove the siphon break carefully, using a small brush or toothpick to dislodge stubborn grime. It’s akin to cleaning a miniature chimney where soot obstructs airflow; a thorough clean restores proper drainage. In my case, clearing a buildup completely stopped the leak and improved drainage efficiency. For stubborn clogs, soaking the part in vinegar can dissolve mineral deposits—just avoid using abrasive tools that could damage delicate components.
Replace or Repair the Siphon Break Effectively
If cleaning doesn’t solve the issue, consider replacing the siphon break. Purchase a compatible part from your appliance store or online using your model number. Before installing, compare the old and new parts to ensure a proper fit. Installing the new component is usually straightforward: align it correctly, snap or screw it into place, and double-check for securement. Last week, I replaced my siphon break following these steps, which took about 15 minutes, and the leak ceased immediately. Proper installation guarantees that backflow is prevented, maintaining the dishwasher’s optimal function. For detailed guidance, you can reference these practical tips on water inlet and drainage maintenance.
Test the Repair for Confidence
After reassembling everything, run a short wash cycle to observe if the leak persists. Keep a close eye on the drainage area and underneath the appliance. If water still leaks, revisit the steps—check for proper installation, or consider that a different part might be faulty. Remember, sometimes a tiny misalignment or overlooked debris can cause recurring issues. Last month, I had to re-tighten a clip after a repair, which resolved my leak entirely. Conducting these tests ensures your fix is solid, saving you money and preventing future mishaps.
 .When tackling appliance repairs, many enthusiasts and DIYers fall into common pitfalls that hinder their success. One widespread misconception is the overreliance on generic troubleshooting steps, like replacing parts without proper diagnostics. For instance, a frequent mistake is assuming a water inlet valve is faulty because the dishwasher isn’t filling, without testing other components such as the float switch or pressure sensor first. This can lead to unnecessary part replacements and increased costs. In my experience, a nuanced approach—using multimeters and conducting voltage tests—often reveals the real culprit, which might be a faulty control board or a broken sensor, rather than the obvious suspect. For complex issues, consulting detailed guides on water inlet and drainage maintenance can prevent misdiagnoses.
Are You Overlooking the Hidden Nuances in Diagnostics?
Many repair failures stem from neglecting how interconnected appliance systems are. For example, a seemingly simple oven heating issue might be caused by a faulty temperature sensor, but it could also be traced back to a problematic relay or wiring fault. Advanced troubleshooting involves understanding these subtle relationships—using tools like thermal cameras or signal testers. Researchers at the Electric Power Research Institute emphasize that sophisticated diagnostic tools reduce time and guesswork, leading to higher success rates (source: Energy Central). Remember, appliance electronics are complex, and ignoring this complexity can result in recurring problems.
Another trap is neglecting to consider the age and wear of parts. For example, rubber seals and gaskets deteriorate over time, causing leaks even if the internal components are functional. Regularly inspecting and replacing aged parts prevent troubleshooting dead-ends. Also, keep in mind that incorrect installation or assembly often mimics component failure. As highlighted on dishwasher rack rust repairs, proper reassembly is crucial for optimal operation.
In essence, mastering appliance repair transcends simple part swaps. It requires a strategic, diagnostic-first mindset that considers the entire system. Don’t fall into the trap of rushing into replacements based on assumptions. Instead, use precise testing methods to identify the true issue. This nuanced understanding not only saves money but also extends the lifespan of your appliances.
Have you ever fallen into this trap? Let me know in the comments. Remember, a little extra diagnostic effort can prevent big headaches later.
Investing in the Right Tools for Long-Term Results
When it comes to maintaining and repairing appliances like dishwashers and ovens, having a set of precise, high-quality tools makes all the difference. I personally rely on a digital multimeter for diagnosing electrical issues. It’s essential because it allows me to measure voltage, resistance, and continuity accurately, helping me identify faulty control boards or sensors without unnecessary part replacements. An infrared thermometer is another game-changer for quickly assessing temperature inconsistencies in ovens or dishwashers, pinpointing problematic components that influence performance.
For cleaning and minor adjustments, I favor a set of precision screwdrivers and small brushes. These enable me to access tight spaces, such as behind control panels or under components, without risking damage. Investing in quality tools, even if slightly pricier upfront, pays off over time by making repairs smoother and more reliable. Moving forward, the trend in appliance maintenance is trending towards smart diagnostic tools that connect with apps, providing real-time data on appliance health—something I believe will become standard in the next few years.
Developing a Routine Maintenance Habits
Routine maintenance significantly extends the lifespan of your appliances. I recommend periodic checks of water inlet valves, filters, and seals for signs of wear or clogging. For instance, routinely inspecting and cleaning dishwasher filters using recommended parts reduces the likelihood of drainage issues and ensures spotless loads. Also, lubricating hinges and checking door seals can prevent leaks and poor operation.
Applying simple preventative steps—like using descaling agents to prevent mineral buildup—can save you money and time on repairs. For example, regular descaling of your dishwasher or oven keeps components operating efficiently, reducing stress and potential failures. As technology evolves, so does the importance of software updates; many modern appliances now include firmware that improves functionality and repair diagnostics—making it crucial to keep these updated periodically.
How do I keep my appliances functioning well over time?
Deepen your knowledge with tools like troubleshooters and diagnostic software. For example, utilizing advanced diagnostic modes available in some models—accessible through combination button presses—can reveal subtle errors that lead to failures. Remember, consistent cleaning, timely replacement of worn parts, and monitoring performance can prevent minor issues from escalating. For instance, replacing worn gasket or seals before they cause leaks adds to those long-term benefits. I suggest trying to set a quarterly maintenance checklist tailored to your appliances’ specific needs, such as inspecting wiring connections or checking for unusual noises, to ensure ongoing reliability. Curious about improving your dishwasher’s drainage? Consider examining the inlet valve or filters more thoroughly—both critical components—by following detailed guides on water inlet and drainage maintenance. Stay proactive, and you’ll minimize costly repairs down the line.
Lessons Only Time and Troubleshooting Teach You About Drainage and Repair
One unexpected insight I gained was the importance of patience and attention to detail. Initially, I rushed through repairs, replacing parts without fully diagnosing the root cause—only to face repeat leaks. It dawned on me that understanding the specific function of components like the siphon break is crucial, as they are often overlooked yet vital for preventing water backflow. Moreover, I learned that sometimes, the smallest grime buildup can cause the most stubborn leaks, reminding me that thorough cleaning should be a routine part of maintenance. I also discovered that investing in the right replacement parts and tools pays off by making repairs more reliable and less frustrating, a tip I wish I’d embraced sooner. Lastly, I realized that sharing my learning process can help others avoid common pitfalls, fostering a community of confident DIY enthusiasts driving the evolution of appliance repairs.
Top Tools and Resources That Elevate My Repair Game
My go-to toolkit always includes a quality digital multimeter, which helps me accurately diagnose electrical issues related to drainage and control systems. I trust the Fluke 117 for its precision and durability, making complex troubleshooting straightforward. To tackle mineral deposits causing clogs, I rely on a versatile ultrasonic cleaner, which has saved me time and effort during siphon break cleanings. When sourcing replacement parts, I turn to official manufacturer sites and reputable suppliers like Appliance Parts Pros—ensuring compatibility and longevity. Additionally, referencing detailed repair guides on water hardness and drainage maintenance has provided clarity during tricky repairs. These resources form the backbone of my DIY approach, empowering me to fix issues confidently and extend the life of my appliances.
Your Next Step Toward Leak-Free Repair Success
Now is the perfect moment to take control of your dishwasher drainage challenges. By understanding and troubleshooting the siphon break effectively, you’re investing in a cleaner, safer kitchen environment. Remember, the key lies in patience, tools, and detailed diagnostics—skills that improve with practice and experience. Don’t let small leaks turn into costly repairs or mold problems; instead, tackle them head-on with the insights gained here. Your dishwasher and your home deserve that extra care, and your future self will thank you when the repair becomes second nature. So, are you ready to give your dishwasher the attention it needs to work flawlessly? The power to fix water leaks is within your reach; start today and enjoy a leak-free kitchen tomorrow.
What has been your biggest challenge when repairing dishwasher drainage issues? Share your experience below—I’d love to hear your story!