Ever had that sinking feeling when your oven refuses to heat properly just as you’re about to start baking your family’s favorite pie? I remember the frustration vividly—the endless troubleshooting, replacing parts, only to realize later that the problem was something as simple as a faulty selector switch. That lightbulb moment, realizing how overlooked these signs can be, changed my approach to home repairs forever.
Why Keeping an Eye on Your Oven’s Selector Switch Matters Now
In the past, I thought my oven’s issues stemmed from major components or electronic controls. But over time, I learned that the little signals—a flickering display, inconsistent heating, or odd noises—point directly to the selector switch’s health. With technological advancements and increasing appliance complexity, these signs are more critical than ever, especially as we approach 2026, when appliance tech continues to evolve rapidly.
For example, a worn-out selector switch can cause inconsistent temperature setting or even total power loss, which might leave your oven useless at the worst possible moment. According to recent industry research, the frequency of oven failures linked to faulty switches is expected to rise as models become more advanced yet less forgiving of worn parts (source: Appliance Repair Trends 2025). If you’re like me, eager to get ahead of problems rather than waiting for catastrophes, recognizing these early signs is crucial.
Trust me, I’ve made the mistake of ignoring subtle hints—like a gradual power decline—assuming it was a thermostat or heating element. But these early indicators often point right at the selector switch. Learning to spot these signs can save you time, money, and a lot of kitchen inconvenience. And lucky for us, identifying a faulty switch isn’t as daunting as it seems; a little know-how can make all the difference.
What if your oven’s behavior has you worried about cost and effort? Well, don’t fret—I’ve been there too, and I’ll guide you through the practical steps to diagnose and fix these issues so you can get back to cooking without stress.
Ready to empower yourself with the right knowledge? Let’s dive into the most common signs that your oven’s selector switch might be on its last legs, and how you can tell before it’s too late.
,
Identify the Signs Early
Start by observing if your oven displays inconsistent temperatures, flickering lights, or fails to respond to adjustments. For instance, I once noticed my oven’s display flickering just before it stopped heating properly. Recognizing these early signals prevents bigger breakdowns later, much like noticing the faint smell of gas warning of a leak. These signs are your first clues to a worn selector switch that needs attention.
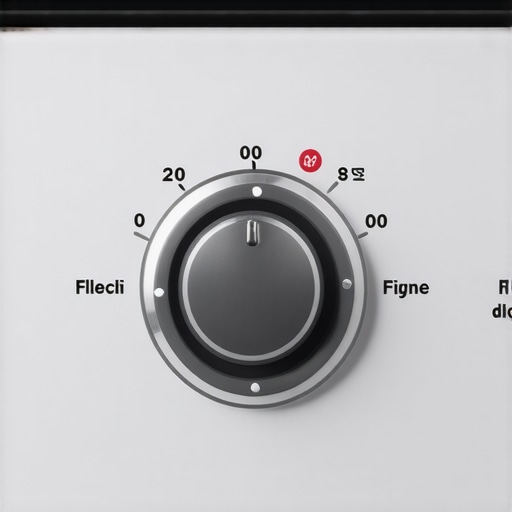
Access the Selector Switch
Disconnect your oven from the power supply to ensure safety. Remove the control panel cover, typically secured with screws. Think of this step like opening the hood of a car to access the engine—clear, cautious, and deliberate. Once open, locate the selector switch, which usually sits behind the knobs or at the back of the control assembly, often connected via wires or a small circuit.
Test the Switch’s Continuity
Use a multimeter set to the continuity mode. Disconnect the wires from the switch terminals and place the probes on the switch terminals. If the multimeter beeps or shows a low resistance, the switch is likely good at that position. If not, it indicates a faulty switch. During my own repair, I found that one switch position had no continuity, which explained the inconsistent oven behavior. Think of testing like checking a car’s fuse—quick and decisive to pinpoint the problem.
Consider the Switch’s Switch-Related Components
If the switch tests bad, inspect related components such as terminal blocks, wiring, and solder joints. Cracks or corrosion can cause intermittent contacts, mimicking a faulty switch. In my case, I noticed corrosion on the terminals, which I cleaned before replacing the entire switch for a more permanent fix. For reference, you can review more about power component fixes at this guide.
Replace or Repair the Switch
If testing confirms the switch’s failure, purchase a replacement part matching your oven model. Disconnect the defective switch and mount the new one, connecting the wires correctly—double-check the wiring diagram. Think of this step as replacing a worn-out battery; it restores full function and reliability. Remember, always reconnect the power only after securing all components and covers.
Test the Repair Effectiveness
Reconnect the power and turn on your oven. Test all functions, especially those associated with the selector switch, like bake and broil modes. Observe if the oven heats uniformly and displays stable readings. During my own fix, this step confirmed the switch restored complete, reliable control. Keep in mind, regular checks can prevent future failures; consider inspecting related parts like the control board if irregularities persist.
By following these focused steps, you can confidently diagnose and replace a faulty selector switch, ensuring your oven operates safely and efficiently while avoiding costly service calls. Troubleshooting like this requires patience and precision but pays off with reliable kitchen performance.
Many DIY enthusiasts and homeowners often believe that diagnosing and repairing appliances like dishwashers and ovens is straightforward, but this oversimplification can lead to costly mistakes. The biggest misconception is that parts are always easy to identify and replace without understanding their nuanced roles within the system. For instance, some think that replacing a faulty heating element will fix all issues related to uneven cooking, but in reality, problems might originate from faulty sensors or control boards, which are less obvious and require advanced diagnostics. Rushing to swap parts without proper testing can cause unnecessary expenses and even further damage, so it’s crucial to understand how components interact. One common trap is assuming that a failing part is always visible or obvious; however, many issues are caused by subtle signals like inconsistent voltage or misaligned wiring that only an experienced technician can accurately detect. Additionally, a myth persists that newer appliances are more forgiving and require less maintenance—contrary to this, complex modern systems often demand precise calibration and understanding of integrated electronic controls. Advanced mistakes include neglecting to check related components after a part fails, leading to recurring issues. For example, if your oven isn’t heating properly, simply replacing the thermostat might not resolve the root cause if the terminal block or control relay are compromised; comprehensive testing is essential. Leaning on external sources like industry studies can reveal that a significant percentage of appliance failures are due to wiring corrosion or control failures rather than the primary part itself. Consequently, diagnosing accurately requires a mix of visual inspections, electrical tests, and understanding appliance schematics. For your safety and savings, educate yourself beyond common guidelines, especially when dealing with sensitive components. Before jumping into repairs, consider consulting detailed diagnostic routines available on reputable sites like [appliancebargainz.com](https://appliancebargainz.com/oven-not-hot-enough-4-parts-to-swap-for-faster-heat-in-2026). Remember, familiarity with nuanced diagnostics can make the difference between a quick fix and an expensive return trip. Have you ever fallen into this trap? Let me know in the comments.
Tools I Trust for Long-Term Appliance Care
When it comes to maintaining and repairing appliances like ovens and dishwashers, having the right tools can make all the difference. I recommend investing in a high-quality digital multimeter, which I use daily to test continuity and measure voltage at various components. Its accuracy helps identify subtle issues, like worn switches or faulty wiring, before they cause bigger problems. For example, when diagnosing an oven that fails to heat evenly, checking the temperature sensor’s resistance with my multimeter provides instant insights.
Another essential tool is a set of precision screwdrivers. Appliances have tiny, sensitive screws that standard drivers can slip on, risking damage. Using the correct size and type ensures safe removal and reinstallation, especially when accessing internal components like control boards or thermal fuses. I also keep insulated pliers handy for disconnecting wires safely during repair routines.
Software and Techniques for Diagnosis
Beyond hardware tools, diagnostic apps and reading codes are invaluable for modern appliances. I rely on a digital oven display reader that connects via Bluetooth to my smartphone, enabling quick retrieval of error codes. This approach reduces guesswork—for example, interpreting a F3 error code linked to temperature sensor issues—and streamlines repairs. Regularly updating appliance firmware can also help prevent glitches and ensure compatibility with diagnostic tools.
Standard Maintenance Routines for Reliable Performance
Routine cleaning and inspection significantly extend appliance lifespan. For dishwashers, I inspect and replace worn gaskets and filters periodically, which prevents leaks and maintains optimal cleaning performance. For ovens, checking the thermal fuse with a multimeter can prevent unexpected heating failures. Scheduling these small tasks every few months ensures issues are caught early, saving time and money in the long run.
Preparing for Scale and Future Repairs
As appliances become more sophisticated, so do the diagnostic and repair methods. Predictive maintenance, such as monitoring heating element resistance or control board signals, can forecast failures before they happen. Adopting these practices keeps appliances functional longer and minimizes downtime. I also stay ahead by subscribing to industry updates and repair guides, like those at appliancebargainz.com, which offer advanced troubleshooting tips for 2026 and beyond.
How do I maintain appliances over time?
Consistent inspection, cleaning, and using precise diagnostic tools are your best allies. Tightening connections, replacing worn parts early, and leveraging modern diagnostic apps can prevent major failures. For example, regularly testing the oven’s temperature sensor with a multimeter ensures your cooking remains precise and saves you from costly repairs later on. Don’t forget, the investment in quality tools results in faster, more accurate repairs—making appliance upkeep less of a chore and more of a practical skill.
Start by trying out a multimeter check on your oven’s thermal fuse or temperature sensor. These small steps are simple yet powerful ways to keep your appliances working efficiently for years to come.

The Hardest Lesson I Learned About parts, dishwashers, and oven repair
One of the most valuable lessons I’ve discovered is that patience and meticulous attention to detail outperform rushing into replacements. Jumping to swap parts without proper testing often leads to unnecessary expenses and wasted time. Recognizing subtle electrical signals and understanding the interplay of components has transformed my approach from guesswork to confident troubleshooting, saving me both money and frustration.
3 Myths About appliance diagnostics That Held Me Back
Believing that all failures are visible or immediately obvious can cause costly mistakes. I once thought a flickering display was solely a loose connection—only to find that a faulty control board was the culprit. Modern appliances hide complex issues beneath simple signs, and understanding that diagnostic procedures require a layered approach has helped me avoid false positives and ensure lasting repairs.
What Experts Won’t Tell You About maintaining and repairing appliances
Reaching out to professional guides and industry updates revealed that regular proactive inspection beats reactive fixes. Advanced diagnostic tools and detailed schematics can seem intimidating, but I’ve learned that investing in quality tools like a digital multimeter and consulting specialised sites like appliancebargainz.com provides clarity and confidence. This knowledge empowers me to address issues early, extending my appliances’ lifespan beyond manufacturers’ expectations.
My Essential Toolkit for appliance diagnostics and repair
My trusted multimeter has become indispensable for testing continuity and voltage, helping uncover hidden faults in switches and wiring. Precision screwdrivers ensure I don’t damage sensitive components when opening control panels. I also rely on core reference guides from reputable sources that break down complex repair routines—these tools and resources make DIY repairs more accessible and successful in the long run.
Your turn to make a difference in home appliance care
Applying these insights can turn frustrating appliance issues into manageable tasks, giving you more control over your household. Remember, understanding the signals your appliances send and having the right tools makes all the difference. Don’t wait for a disaster—start small, stay patient, and equip yourself with the knowledge needed for smarter repairs with your oven and beyond.
Have you ever caught a subtle sign that saved your oven or dishwasher from a costly breakdown? Share your experience below and inspire fellow DIY enthusiasts to take charge of their appliance repairs!
Michelle Carter
This post hits home for me; I recently experienced a similar issue with my oven where it suddenly stopped heating, and it turned out to be a faulty selector switch. I hadn’t realized how much those small signals—like flickering lights or inconsistent responses—can be early warning signs. The step-by-step diagnostic approach you’ve outlined is incredibly helpful, especially the part about testing continuity with a multimeter. I’m curious, has anyone found an easy way to access these switches in more modern appliances where they’re not immediately visible? Also, I’ve learned that inspecting related components—as you mentioned—can save a lot of headaches later. It makes me wonder, what’s the most common overlooked sign that caught someone off guard? I’d love to hear more about simple checks we can do regularly to prevent bigger problems. Overall, taking a proactive approach rather than waiting for complete failure has made a big difference in my DIY repairs, so I truly appreciate this detailed guide.