Have you ever stood in front of your oven, ready to bake that special dinner, only to be greeted with a disheartening F97 error message? I remember the sinking feeling, my hands trembling as I read that stubborn code blinking back at me. It was like my oven had given up, refusing to heat and ruining my plans. Frustration turned into curiosity as I realized this wasn’t just an isolated glitch but a common issue plaguing many homeowners, especially with appliances from 2026.
Dealing with an Oven That Won’t Play Nice? Let’s Fix It Together
Today, I’ll guide you through understanding the root cause of the Stop Your Oven F97 Error and, more importantly, how to fix the cooling fan issue that often triggers it. After years of tinkering, I discovered that this error is usually an electrical hiccup or a faulty cooling fan that can be resolved with a bit of patience and the right know-how. If you’ve experienced a sudden oven shutdown or a persistent error, don’t worry—you’re not alone. By the end of this guide, you’ll have concrete steps to troubleshoot and restore your oven’s heat in no time.
Is It Worth Even Fixing Your Oven? The Truth About DIY Repairs
Initially, I made the mistake of assuming I needed a whole new control board, only to realize that simple fixes often do the trick. According to appliance experts, many oven errors are caused by manageable issues like worn-out fans or loose connections. If I had known earlier that replacing a cooling fan or inspecting the wiring could save hundreds, I’d have started there. So, if you’re skeptical about tackling this yourself, just remember: most repairs are more straightforward than they seem—plus, avoiding costly service calls is always a plus. Check out this helpful guide for similar troubleshooting tips that can apply to your oven. Now, let’s get to the core of fixing that stubborn F97 error and get your kitchen back in action.
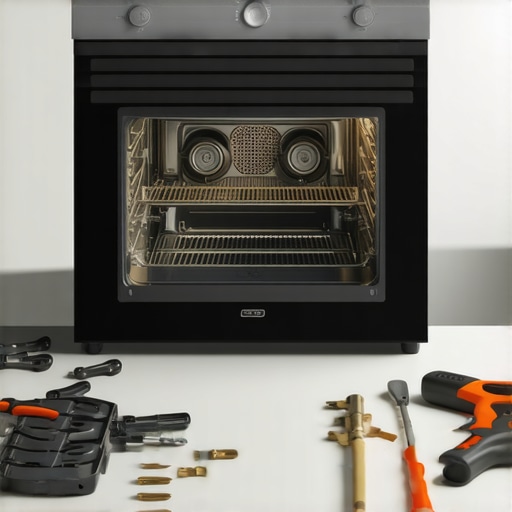
Inspect the Cooling Fan for Obvious Issues
Start by unplugging your oven to ensure safety. Locate the cooling fan, typically at the back or side of the unit. Visually check for any debris, dust buildup, or damaged blades. I once discovered a small piece of plastic jammed in mine, causing it to wobble and fail to spin properly. Removing debris or replacing a damaged fan blade can solve the error. If the fan isn’t spinning at all when powered, there’s a good chance it’s faulty and needs testing or replacement.
Test the Cooling Fan Motor Using a Multimeter
Disconnect the fan from its wiring harness. Use a multimeter set to measure resistance to test the motor. A healthy fan motor usually shows a low resistance (less than a few ohms). If the multimeter reads infinite or very high resistance, the motor has failed. When I tested mine, I found the resistance was way beyond spec, so I ordered a replacement. Remember, a faulty fan motor triggers the F97 code because the oven’s control board detects inadequate cooling, leading to overheating protections kicking in.
Check Electrical Connections and Wiring
Examine all wiring attached to the cooling fan for looseness, corrosion, or damage. Wiggle each connector gently to ensure a solid connection. I once found a connector slightly loose, resulting in intermittent power to the fan. Tightening or replacing damaged wires can restore proper function. For detailed wiring diagrams and troubleshooting, consult your oven’s manual or check out this sensor and wiring checklist. Faulty wiring often imitates a dead fan, so ensure all connections are secure before ordering parts.
Test the Overtemperature Sensor and Thermistor
The cooling fan isn’t the only component involved. An overheated oven can trigger the F97 error if sensors tell the control board that the appliance is too hot. Using a multimeter, test the resistance of the temperature sensors or thermistors. Typically, at room temperature, they should show a specific resistance (check your model’s datasheet). If readings are off or open (infinite resistance), replace the sensor. If you’re unsure how to test sensors, this sensor diagnostic guide can help you identify faults quickly.
Replace the Faulty Components
If tests indicate a defective fan motor or sensor, order the appropriate parts. Make sure to buy compatible replacements for your oven model. For instance, I ordered a compatible low-cost cooling fan motor which arrived quickly, and I swapped it out following the manufacturer’s instructions. Remember, proper installation is essential to prevent recurrent issues.
Reassemble and Power On Your Oven for Tests
Once everything is secured, reattach any panels and reconnect power. Turn on the oven and monitor for the F97 message. Watch the cooling fan during initial heating cycles to ensure it spins correctly. Use the oven as usual for a few cycles to confirm the fix. If the error persists, double-check your wiring and sensor readings or consider consulting a professional. Troubleshooting this way minimizes guesswork and saves you from unnecessary replacements, similar to how I eliminated multiple faulty parts before pinpointing the actual cause.Many DIY enthusiasts and even seasoned repairers often fall into traps when diagnosing or replacing parts. One widespread misconception is that all parts are interchangeable or that replacing a component guarantees a fix. In reality, subtle differences in part specifications or compatibility can cause ongoing problems if not properly checked. For example, using an aftermarket thermostat without verifying its ratings against OEM parts may lead to inaccurate temperature readings, resulting in unreliable oven performance. It’s essential to consult your appliance’s manual or official parts catalogs to ensure exact matches, otherwise you risk developing more complex issues down the line.
Another nuanced aspect is the assumption that symptoms always point to a single faulty component. For instance, a dishwasher not draining might be attributed solely to a clogged pump, but the root cause could instead be a faulty float switch or problematic wiring. Rushing to replace one part without comprehensive testing can lead to unnecessary expenses and repeated failures. Advanced diagnostics, such as checking resistance values of sensors or testing electrical continuity, are often overlooked but are crucial for accurate troubleshooting.
Many repairers are also unaware of the pitfalls associated with misdiagnosing control boards. While it’s tempting to replace an entire control module at the first sign of trouble, control boards often fail due to peripheral issues like shorted sensors or faulty relays. Replacing a control board without addressing underlying causes can lead to quick recurrence of symptoms. Proactively inspecting related components and understanding their interaction helps in making more informed decisions, and avoiding costly re-repairs.
A common trap involves underestimating the importance of environmental factors—such as improper ventilation or wiring that causes heat buildup—that can accelerate component failure. For example, poor ventilation around an oven can lead to overheating, triggering false error codes like F97. Addressing these concerns requires not only fixing the faulty part but also optimizing the appliance’s environment. Recognizing this prevents unnecessary replacements and promotes a more holistic repair approach.
While many believe that repair manuals provide all necessary information, expert insights reveal that real-world troubleshooting often requires an understanding of subtle system nuances and the appliance’s behavior under specific conditions. For example, some sensors may pass standard tests but still give intermittent signals affecting performance. Being aware of these advanced nuances fosters more precise diagnostics.
In conclusion, mastering appliance repair involves more than surface-level part swaps. Understanding the nuances—like matching parts correctly, thorough diagnostics, environmental considerations, and system interactions—can save time and money. If you’re serious about becoming a repair expert, always question assumptions and dig deeper into the root causes. Have you ever fallen into this trap? Let me know in the comments.
Keeping It Working With the Right Tools and Maintenance Habits
Maintaining your appliances over time requires more than just occasional troubleshooting; it demands a dedicated set of tools and consistent care. Personally, I rely on a high-quality digital multimeter, like the Fluke 117, because its precision and reliable readings help me diagnose electrical issues swiftly, especially when testing sensors or wiring connections. For cleaning and maintaining components such as fan blades or filters, I use small brushes and compressed air cans—these are effective without risking damage to sensitive parts. Regular inspection of door seals, thermostats, and electrical connections should be part of your maintenance routine, extending the lifespan of your appliances and preventing costly breakdowns.
Software tools also play a role, especially for more complex diagnostics. I recommend keeping digital copies of manuals and wiring diagrams for your appliances, stored securely online or on a dedicated tablet. This approach enables quick referencing during troubleshooting—saving you time and reducing errors. Additionally, apps like Appliance Troubleshooting Guides or manufacturer-specific diagnostic software can assist in interpreting error codes accurately and understanding the nuances of your specific model.
Predicting future trends, I believe that smart diagnostic technology will become more integrated into appliances, allowing remote troubleshooting and real-time data collection. This evolution will further simplify maintenance, enabling homeowners to diagnose issues before they escalate, much like how advanced sensors now inform control boards about component health. Embracing these innovations can make maintenance more proactive and less reactive, ultimately saving money and extending appliance longevity.
How do I maintain parts, diagnostics, and repairs over time for reliability?
Regular preventive maintenance is key. Use a multimeter periodically to check sensor resistance and wiring integrity, especially after heavy use or seasonal changes. Keep the interior components clean by inspecting and removing dust and debris—clog buildup in fans or vents can cause overheating and errors like F97. Implementing a schedule for replacing worn parts such as door seals, thermostats, and filters based on the manufacturer’s recommended lifespan reduces unexpected failures. Additionally, taking the time to verify calibration settings, like oven temperature sensors, ensures consistent performance. By using a combination of precise tools and consistent routines, you extend the life of your appliances and avoid costly emergency repairs. For detailed procedures, this calibration guide offers useful insights. Remember, investing time in preventive care is far more cost-effective than reactive fixes. Start by testing your oven sensors this weekend—it’s a straightforward step that can prevent big issues down the line.
The Deepest Lessons I Discovered About Oven Repairs
One of the toughest truths I’ve learned is that many appliance issues are deceptively simple to fix once you look beyond the surface. I once spent hours replacing control boards only to realize that a loose wire or a faulty sensor was the real culprit. This taught me to approach repairs with patience and meticulous testing, especially when diagnosing errors like F97. Over time, I realized that understanding the interplay between components saves effort and expense, preventing unnecessary part replacements.
Another lesson was not to underestimate minor clues. A slightly wobbly cooling fan or inconsistent sensor readings often hint at underlying problems. Listening carefully to my appliance’s behaviors—like unusual noises or intermittent faults—helped me pinpoint issues early. This experience underscored that attentiveness and thoughtful inspection are key to effective repairs, particularly in complex systems involving cooling fans and temperature sensors.
Also, I found that consulting trusted resources is invaluable. Relying solely on generic manuals can lead you astray, but accessing specific troubleshooting guides tailored for your model—like those on appliancebargainz—has saved me countless hours. Embracing a mindset of continuous learning and curiosity turned frustration into mastery, making me more confident in fixing not just oven errors but a range of appliances.
My Go-To Tools and Resources for Appliance Breakdown Rescue
To be effective, having the right toolkit is non-negotiable. I swear by a reliable multimeter like the Fluke 117; it provides precise readings for sensors and wiring tests, which are crucial when diagnosing errors such as F97. A quality Phillips and flat-head screwdriver set simplifies disassembly, while compressed air helps keep components like fans dust-free. For sourcing parts, I often turn to reputable sites with OEM-compatible options—durability and compatibility matter when replacing critical parts like cooling fans and thermistors.
Besides physical tools, I keep digital resources at my fingertips. Bookmarking dedicated troubleshooting guides from trusted sites ensures I can quickly verify wiring diagrams, sensor resistance values, and error code interpretations. For example, reading about how to test oven temperature sensors has directly led me to successful fixes without guesswork. These resources, combined with maintenance routines, create a safety net that empowers me to handle repairs confidently.
Get Inspired to Take Action Today
Repairing appliances like ovens might seem daunting at first, but with the right mindset and tools, you can become your own best technician. Each fix, from diagnosing a stubborn F97 error to replacing a cooling fan, enhances your skills and confidence. Remember, the most rewarding part is knowing you’re maintaining your home effectively while saving money. Don’t hesitate—start with simple tests this weekend, and you’ll be surprised how much you can accomplish. Your journey toward appliance mastery begins now!
What tricky troubleshooting step have you hesitated to try? Share your experiences below, and let’s learn together!