Have you ever stood in your kitchen, trying to start your dishwasher, only to be met with an unexpected loud buzzing noise? It’s a sound that instantly makes your stomach drop — it signals that something’s off, and often, it’s hard to pinpoint exactly what. I remember the first time my dishwasher emitted that stubborn buzz; I felt a flash of frustration, wondering if I had to call in a professional or if I could handle it myself. Turns out, many buzzing issues in dishwashers are surprisingly fixable with a bit of patience and some basic troubleshooting.
Why This Issue Sparks So Much Frustration and How to Fix It
That buzzing isn’t just noise—it’s a sign that your dishwasher’s motor or drain pump might be struggling. In 2026, with new models boasting advanced features, we’re seeing more complex components that can still be tackled with DIY repairs, saving you time and money. Addressing these problems early is crucial because ignoring them can lead to further damage, increased repair costs, or even complete appliance failure.
From personal experience, I learned the hard way that rushing into parts replacement without proper diagnosis can be a costly mistake. Early on, I replaced what I thought was the culprit, only to find the problem persisted. It wasn’t until I followed a systematic troubleshooting approach that I discovered a simple worn-out pump gasket or a clogged inlet valve was the real culprit. For detailed diagnostics and common issues, I recommend checking out the comprehensive troubleshooting guide for dishwashers from 2025, which offers valuable insights.
So, what exactly are these fixes? Before jumping into expensive replacements, you can try inspecting and cleaning key parts like the water inlet valve or testing the drain pump for obstructions. If you’re ready to roll up your sleeves, I’ll walk you through the actionable steps that can clear up that incessant buzzing and restore your dishwasher to quiet operation.
Is Diagnosing Dishwasher Buzzing Actually Worth the Effort?
One major hesitation I hear from folks is, “Is this really something I can fix myself?” Honestly, I used to think it was complicated and best left to the pros. But over the years, I realized that many common buzzing issues stem from simple causes—like a clogged pump or loose wiring—that you can address with basic tools. Early on, I made a mistake by rushing to replace the entire pump assembly without proper testing, which was unnecessarily costly. By learning the diagnostic steps from trusted guides, I avoided this pitfall and saved a good chunk of change.
If you’re curious about the most common causes behind these noises, or want to dive deeper into effective diagnostics, there’s a helpful resource I recommend: this detailed troubleshooting guide. Now, let’s get into how you can methodically troubleshoot and fix your buzzing dishwasher, turning what feels like a daunting challenge into a manageable DIY project.
Unplug and Access Your Appliance
Before diving into diagnostics, safety comes first. Unplug your dishwasher to prevent electrical shocks. Then, carefully remove the kickplate at the bottom front, revealing the drain pump and motor. Use a screwdriver to detach screws, setting aside the panel. Remember, working with electrical appliances requires caution—don’t rush.
Inspect and Clear the Drain Pump
The drain pump often causes buzzing if obstructed or faulty. Locate the pump, usually at the bottom rear. Disconnect the wiring harness and unscrew it. Gently spin the impeller by hand—if it’s stuck or feels loose, debris or wear could be the culprit. Remove any debris, leaves, or paper clogs. If the impeller spins freely but the noise persists, the pump motor might need replacement. For a detailed check, consider testing the pump with a multimeter to verify if it has continuity, indicating it’s working properly.
Replace the Pump if Necessary
If testing reveals a broken coil or no continuity, replace the pump. Locate the correct part number—refer to your model’s manual or visit trusted parts suppliers. Follow a tutorial like this step-by-step guide to swap it safely. During reassembly, ensure all connections are snug and free of debris, which can cause further issues.
Check and Clean the Water Inlet Valve
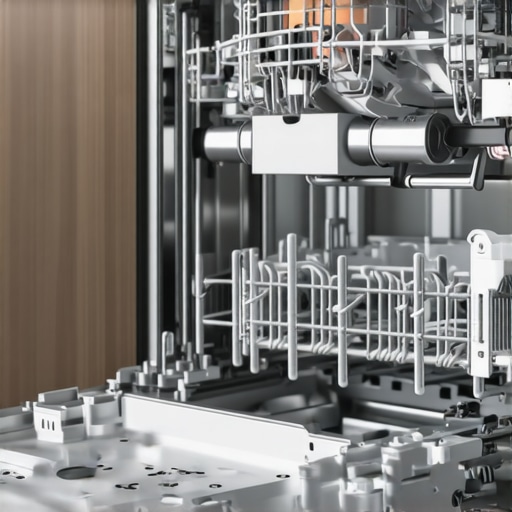
An obstructed water inlet valve can cause buzzing during fill cycles. Trace the water supply line to the inlet valve, usually mounted on the front left. Disconnect the water supply, then unscrew the inlet valve. Inspect for clogs or mineral deposits; soak in vinegar if needed, and clear out any debris with a small brush. Reinstall, making sure the valve closes fully and seals properly. A faulty inlet valve can also cause water pressure issues, so consider testing it with a multimeter for coil resistance—typically around 1-2 ohms. Find detailed troubleshooting tips here.

This illustration shows the location of common water inlet valves in dishwashers, helping you identify and inspect the part correctly.
Test Your Drain Pump and Inlet Valve
After cleaning or replacing these parts, restore power and run a short cycle. Listen carefully—if the buzzing sound is gone and the dishwasher operates smoothly, you’ve likely resolved the issue. If not, further diagnostics may involve testing electrical components or examining wiring connections for looseness or corrosion. For comprehensive diagnostics, visit this complete troubleshooting guide.
Prevent Future Buzzing Problems
Regularly clean filters, spray arms, and check for debris around the inlet valve and drain pump. Using a vinegar rinse occasionally can prevent mineral buildup. Keep an eye on unusual noises or leaks, addressing minor issues before they escalate. Proper maintenance extends the lifespan of your dishwasher and minimizes costly repairs.
,Many DIY enthusiasts believe that diagnosing oven and dishwasher issues is straightforward—simply swap out parts that look damaged or follow a generic troubleshooting chart. However, this oversimplification can lead to costly mistakes and prolonged frustration. In reality, effective repair requires understanding the subtle nuances and behaviors of these appliances, beyond the basic symptoms. For instance, a common myth is that a burnt smell from an oven always indicates a failed heating element—that’s not always true. Sometimes, accumulated grease or a faulty thermostat can cause odors, and replacing the element unnecessarily won’t fix the root cause. This is why comprehensive diagnostics, like testing the oven sensor or verifying wiring integrity, are crucial and often overlooked by casual repairers. Similarly, with dishwashers, many assume that water not draining is always due to a clogged pump. While debris is a frequent culprit, issues like faulty float switches or defective control boards can also cause drainage failures. Rushing to replace parts without proper testing can be a trap that wastes time and money.
A significant trap many fall into is replacing expensive components—like thermal fuses or control boards—without confirming their failure through testing. For example, hot oven temperatures can sometimes be caused by a stuck relay rather than a blown heating element. Advanced diagnostics, such as using a multimeter to check for continuity or voltage at specific points, prevent unnecessary replacements. An expert tip is to prioritize testing components systematically—refer to this diagnostic guide before swapping parts.
Another misunderstood aspect is the importance of understanding the appliance’s operation cycle. Many confuse symptoms; for example, a dishwasher that fails to dry dishes might near instinctively replace the heating element, but the problem could stem from a malfunctioning vent or a sensor issue, not just the element. Recognizing these nuances is vital for an efficient fix.
Have you ever fallen into this trap? Let me know in the comments. Let’s dig deeper into one such advanced question which stumps many DIYers:
Why do some oven sensors give inconsistent readings, and how can I accurately diagnose them?
Oven sensors, or thermistors, can sometimes produce fluctuating or false readings due to internal corrosion, wiring issues, or manufacturing defects. This inconsistency leads manufacturers’ diagnostic codes astray, causing unnecessary part replacements. To accurately diagnose a sensor’s reliability, it’s essential to test its resistance at multiple temperatures using a multimeter, and compare the readings against the manufacturer’s specifications. Variations beyond tolerances indicate a faulty sensor. Also, inspecting wiring for corrosion or damage can reveal problems that aren’t apparent from sensor resistance alone. The key is understanding that sensors are part of a larger diagnostic ecosystem; a faulty relay, control board, or even wiring harness can cause misleading readings. For comprehensive, step-by-step testing methods, check this guide.
Investing in the Right Equipment for Long-Term Success
Maintaining your home appliances isn’t just about quick fixes; it’s about building a toolkit that empowers you to troubleshoot and repair effectively. The foundation starts with selecting high-quality, durable tools. For instance, I personally rely on a digital multimeter like the Fluke 117—it’s accurate, reliable, and essential for testing components such as thermostats, sensors, and wiring continuity in ovens and dishwashers. A good set of screwdrivers, particularly insulated ones, helps remove panels safely without damaging delicate electronics or risking electrical shocks.
Why a multimeter is indispensable—it allows you to verify electrical components quickly, avoiding unnecessary part replacements. For example, when diagnosing a faulty oven sensor, testing resistance at different temperatures with a multimeter can confirm if the sensor is within spec, preventing costly and unwarranted part swaps. I recommend testing devices at regular intervals, especially if your appliances are several years old, to catch potential failures early.
Tools I Recommend for Routine Maintenance and Repairs
Beyond multimeters, a quality socket set and a multibit screwdriver make accessing internal components straightforward. For dishwashers, a plastic pry tool set helps remove panels without scratching or damaging trim. For ovens, thermal fuses are common failure points—having a reliable infrared thermometer, such as the Fluke 62 Max, helps detect uneven heating and hot spots, guiding you toward specific repairs like replacing a defective bake element.
Keep spare parts handy—buying genuine or OEM replacement parts, like water inlet valves or igniters, ensures longevity and compatibility. To streamline your repair process, I keep a dedicated parts organizer, labelling everything clearly so I can quickly access what I need. It’s worth investing in a small parts organizer container, which if systematically maintained, reduces the frustration of searching through clutter when repairing.
Organizing Your Repair Routine to Save Time
Document each repair process—taking notes or photos—so you can replicate successful fixes or diagnose recurring issues. Over time, you’ll identify patterns—like a particular sensor failing after a certain period—and can preemptively replace components during scheduled maintenance.
Online resources are invaluable. I frequently consult detailed guides, such as this repair tips page, which offers step-by-step instructions enhanced with tool recommendations. Staying informed not only improves your DIY skills but also helps prevent minor issues from escalating.
Looking Ahead: The Future of Appliance Maintenance
As smart home technology evolves, integrating diagnostic tools with AI-powered apps promises even more precise maintenance. Imagine using your smartphone to run diagnostics via Bluetooth-enabled sensors, pinpointing issues before your appliance exhibits symptoms. Investing in compatible digital tools now prepares you for this exciting future and makes proactive maintenance achievable.
How do I maintain my appliances over time?
Developing a regular maintenance schedule—cleaning filters, inspecting seals, checking wiring—can extend the lifespan of your appliances significantly. For example, frequently cleaning dishwasher spray arms with a small brush and vinegar prevents clogs, which in turn keeps the appliance functioning efficiently. Prioritize testing critical components periodically, such as oven temperature sensors and heating elements, to catch potential failures early. For an in-depth approach, I recommend reviewing this diagnostic guide, which provides expert strategies to maintain optimal performance.
What I Wish I Knew When I Started Fixing Appliances
The biggest lesson I learned was that patience trumps haste. Jumping into repairs without proper diagnosis often leads to replacing parts unnecessarily. Taking the time to test components systematically saved me money and frustration. I also realized that understanding your specific model—its quirks and common issues—makes troubleshooting much quicker and more effective.
Avoid the Pitfalls of Assumptions and Rushing
One mistake I made early on was assuming a problem was due to a faulty part simply because it looked damaged. Often, the issue was something simpler, like a clogged inlet valve or loose wiring. Using a multimeter and consulting reliable guides helped me avoid costly replacements. Remember, not every buzzing noise calls for a new pump; sometimes, a quick cleaning does the trick.
Prioritize Diagnostics Before Parts Replacement
It’s tempting to replace what seems broken, but testing is key. For example, testing the resistance of an oven temperature sensor or a dishwasher’s drain pump can prevent unnecessary expenses. Resources like this troubleshooting guide have become invaluable in my repair routine. Making diagnostic testing a habit transformed my DIY approach from guesswork to confidence.
Understanding the Inner Workings of Your Appliances
Knowing how components like the water inlet valve or thermal fuse work can help you spot issues at a glance. For example, a leaking dishwasher isn’t always a seal failure; sometimes, a clogged valve or a faulty float switch is the real culprit. Educating myself on these parts through detailed guides has empowered me to perform more complex repairs efficiently.
How Not to Fall for Repair Myths and Trap Costs
I discovered that many ‘quick fixes’ are based on myths—like replacing an element because the oven isn’t heating—when in reality, a simple sensor or control board might be at fault. Systematic testing and understanding diagnostic codes saved me plenty of cash. For example, verifying if the oven’s control board is sending power to the heating element often reveals the true source of the problem. For dependable info, I rely on expert guides like this comprehensive troubleshooting resource.
Keep Your Toolbox Ready for Anything
Having the right tools—like a quality multimeter, insulated screwdrivers, and cleaning brushes—makes all the difference. I keep a small, organized toolkit for quick access, and it drastically reduces my repair time. Investing in a good infrared thermometer helps me identify uneven heating issues in ovens before deciding whether a bake element or temperature sensor needs replacement.
Curated Recommendations for Confident Repairs
Over time, I found some resources and tools that consistently improve my DIY repair game. Firstly, a reliable multimeter, like the Fluke 117, is my go-to for testing electrical components because of its accuracy and durability. Secondly, this troubleshooting guide has been a cornerstone in my learning process, providing step-by-step diagnosis strategies. Thirdly, genuine replacement parts from trusted suppliers ensure longevity—don’t compromise on quality here. Lastly, online forums and detailed repair videos complement my hands-on experience, giving me new insights that keep me motivated and informed.
Don’t Wait—Start Mastering Your Repairs Today
The journey to becoming confident in appliance repair is rewarding. Every fix improves your understanding and empowers you to handle issues swiftly, saving money and reducing stress. Remember, the key is patience, proper diagnostics, and ongoing learning. Take that first step—your appliances will thank you, and you’ll gain skills that last a lifetime.