I’ll never forget the last time my dishwasher decided to wake up my entire house with a thunderous thud during the cycle. That jarring noise caught me off guard, and I immediately worried about a major breakdown. Turns out, it was a simple water inlet issue—something I overlooked at first. It was a lightbulb moment for me: I realized that many common dishwasher noises stem from water flow problems, and fixing these can save you both time and money.
Why Dishwasher Thumping Sounds Can Be Smarter Than You Think
When your dishwasher starts making loud banging or thumping noises, it’s tempting to assume a complex, expensive repair is on the horizon. But more often than not, the culprit is a water inlet valve that isn’t functioning properly. This part controls the water supply, and if it’s clogged, faulty, or partially closed, it causes irregular water flow—resulting in those jarring noises that sound like a mini earthquake inside your kitchen. Knowing how to troubleshoot this can prevent unnecessary replacements and help restore peace during your dishwashing routines.
Is It Really Worth the Fuss? My Early Mistake
Early in my repairs, I made the mistake of ignoring the simple causes. I once replaced a whole pump assembly because I thought the loud bang was due to a worn-out motor. But after some research and careful inspection, I found that a partially closed water inlet valve was the root cause. This experience taught me that diagnosing water inlet issues is often a straightforward process—one worth mastering for any homeowner. For a more comprehensive guide on diagnosing dishwasher problems, I recommend checking out expert troubleshooting tips.
Now, if you’ve been haunted by that annoying thump every time your dishwasher runs, don’t worry. Today, I’ll walk you through three simple fixes for the water inlet valve that can resolve these noises in 2026. With these steps, you can avoid costly repairs and restore silence to your kitchen, making dishwasher troubles a thing of the past.
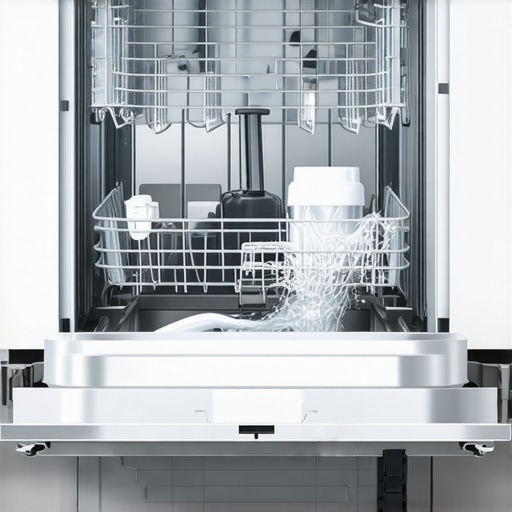
Inspect the Water Inlet Valve
Start by locating the water inlet valve, typically behind the lower front panel of your dishwasher. Turn off the power and water supply before proceeding. Disconnect the water hoses from the valve, and examine the filter screen for debris or buildup—think of it as checking the filter in a water bottle to ensure nothing’s blocking the flow. If the screen is clogged, clean it gently with a soft brush or soak it in vinegar to loosen deposits.
Test the Water Inlet Valve’s Operation
Next, test if the valve opens and closes correctly. Use a multimeter set to measure resistance; disconnect the wires from the valve solenoid. Place the probes on the terminals. A reading of zero or very high resistance indicates a faulty coil—similar to how a blown fuse disrupts an entire circuit. Replacing a defective coil can resolve water flow issues causing thumping sounds. For detailed testing procedures, visit this troubleshooting guide.
Check for Proper Water Pressure
If the inlet valve appears functional, ensure your home’s water pressure is adequate—low pressure can cause irregular fill cycles, leading to noise. Connect a pressure gauge to a nearby faucet, or observe if other appliances experience issues. Maintaining at least 40-60 psi ensures smooth water flow. If pressure is insufficient, consider installing a booster pump or calling a plumber to rectify the issue.
Adjust the Float and Float Switch
Sometimes, the float switch falsely signals a full tub, causing the dishwasher to stop filling early or rapidly close the inlet valve. Locate the float, usually a small dome or cylinder inside the tub. Gently lift it; if it moves freely and feels clean, check the float switch for continuity with a multimeter. Cleaning or replacing a faulty switch prevents erratic water intake, which can contribute to thumping noises.
Verify Proper Installation and Wiring
Loose or damaged wiring can cause the inlet valve to malfunction intermittently. Visually inspect the wiring harness connecting to the valve for frays or corrosion. Use the multimeter to verify voltage when the dishwasher is filling. If voltage is inconsistent, repair or replace wiring to ensure reliable operation. Poor wiring connections are often overlooked but are essential for smooth water flow.
Perform a Final Test and Observe
After completing these steps, reconnect everything, restore water and power, and run a test cycle. Listen carefully for the thumping noise. If the sound persists, reassess the water inlet valve and related components, or consider that other parts like the pump or spray arms might be involved. Regular maintenance—like cleaning filters and checking hoses—prevents future issues and keeps your dishwasher running quietly.
Many homeowners approach appliance diagnostics with oversimplified assumptions, often falling prey to misconceptions that hinder effective repairs. One prevalent myth is that replacing entire parts is always necessary when a problem occurs. In reality, many issues stem from minor faults or overlooked details, and targeted diagnostics can save both time and money. For example, it’s common to think that a loud dishwasher noise indicates a failing motor, but often, debris in the spray arm or a misaligned float switch are the culprits, which are easily fixable through precise inspection. Another misconception is that water inlet problems are always due to faulty valves; sometimes, mineral buildup or clogged filters are the root causes—regular cleaning and careful assessment can prevent unnecessary part replacements.
One nuanced area many overlook involves sensor diagnostics in ovens and dishwashers. Advanced appliances are equipped with multiple sensors that regulate temperature, water flow, and cycle timing. Misreading or ignoring sensor signals can lead to false diagnoses, prompting unneeded repairs. For instance, a faulty oven temperature sensor might cause uneven baking or failure to preheat, but testing the sensor with a multimeter often reveals that the issue is a simple wiring fault or a dirt-contaminated contact point. Properly understanding these nuanced interactions requires not just replacing parts but mastering diagnostic procedures.
Beware of the trap of chasing after high-tech solutions without thorough inspection. For example, some believe that replacing a control board will resolve all issues, but in my experience, many failures are caused by protective relays or poor wiring connections. External experts emphasize that systematic testing of each component, starting from the simplest (like filters and switches) to the more complex (like circuit boards), leads to more reliable repairs. To refine your diagnostic skills, check out this comprehensive troubleshooting guide.
So, what is the hidden nuance most repair newbies miss? It’s the importance of understanding the appliance’s entire ecosystem—sensors, wiring, and control logic—before assuming a defective part. Overlooking minor details can result in costly replacements and ongoing frustrations. For example, failing to clean a sensor or check for loose wiring might lead you to believe that the part itself is faulty, when in fact, a simple adjustment or cleaning restores proper operation.
How Can Advanced Diagnostics Improve Your Repairs
Recognizing the intricate signals and feedback mechanisms in modern appliances lets you perform faster, more accurate fixes. Leveraging tools like multimeters, sensor testers, and manufacturer service manuals enhances your troubleshooting capabilities, turning repairs from guesswork into precision work. Remember, in my experience and supported by industry experts, systematic diagnosis—rather than impulsive part swapping—is the key to mastering appliance repair. Have you ever fallen into this trap? Let me know in the comments.
Equip Yourself with Precision Tools for Long-Term Success
Being prepared with the right tools can significantly streamline your appliance repair journey. I personally rely on a high-quality multimeter like the Fluke 117—its accuracy and durability make it indispensable for testing sensors, thermostats, and wiring continuity. For dishwashers and ovens, a digital manometer helps monitor water and air pressure, ensuring optimal performance. A flexible inspection camera, such as the Depstech Wi-Fi Endoscope, allows me to peer into hard-to-reach areas behind panels or inside tubes without disassembly, saving time and preventing unnecessary parts replacement.
Investing in a good set of screwdrivers and socket wrenches tailored for appliance work also pays off. For example, I prefer ergonomically designed, magnetized screwdrivers to prevent dropping tiny screws into tight spaces. When diagnosing complex issues—like why an oven isn’t reaching temperature—I use a dedicated sensor tester, which can quickly identify faulty thermocouples or temperature sensors, a common point of failure in modern appliances. Regular calibration and testing of these tools ensure consistent and reliable diagnostics over time.
Why Regular Maintenance Becomes Easier with the Right Equipment
Consistent maintenance extends the lifespan of your appliances and minimizes unexpected breakdowns. With proper tools, routine tasks like cleaning filters, inspecting hoses, and checking wiring connections become straightforward. For instance, I recommend periodic use of a ultrasonic cleaner for cleaning spray arms or delicate sensor contacts—this prevents mineral buildup that can cause erratic operation. Advanced diagnostics, such as reprogramming control boards with manufacturer-specific software, are possible when you invest in tools like the OBDLink MX+ adapter combined with diagnostic apps.
Looking ahead, I predict that appliance repair will heavily integrate smart diagnostics, where apps and Bluetooth-enabled sensors provide real-time health reports. Early adopters who familiarize themselves with these emerging technologies will find troubleshooting both faster and more accurate. For now, however, mastering fundamental tools like multimeters and inspection cameras remains the best approach to keep your appliances running smoothly for years.
How do I maintain appliances over time?
The secret to long-term appliance health lies in consistent, proactive maintenance. Schedule quarterly inspections of key components like water valves, thermostats, and sensors using your diagnostic tools. Stay vigilant for minor issues such as sluggish float switches or small leaks, which can escalate if ignored. Regularly cleaning filters and spray arms with an ultrasonic cleaner helps prevent grime buildup, ensuring efficient operation and quiet cycles. Additionally, reviewing manufacturer repair manuals or troubleshooting guides—like those found here—can provide insight into advanced maintenance routines tailored for your appliance models. Integrating these practices will make your repair efforts more effective and reduce long-term costs. Don’t hesitate to try out a sensor test or clean your water inlet filter today—small steps that lead to big savings and frustration-free appliance performance.
The Hardest Lesson I Learned About dishwasher diagnostics and oven troubleshooting
One lightbulb moment was realizing that rushing to replace expensive parts often masks simple fixes like dirt-clogged filters or misaligned switches. Patience and a systematic approach saved me hundreds, proving that understanding the appliance ecosystem is the real key to effective repairs.
Secrets That Changed My Repair Game
Knowing the significance of sensor signals and wiring integrity transformed my troubleshooting. Instead of guessing, I now perform comprehensive tests with reliable tools, confirming that precise diagnosis prevents unnecessary expenses and repeats.
What I Wish I Knew Before Starting
From experience, I tell fellow enthusiasts to resist the urge to swap parts immediately. Instead, dive into manual diagnostics, and explore trusted guides like this troubleshooting guide. It’s about mastering the process, not just fixing what’s broken.
Curated Tools to Make Repairs Faithful
My essential toolkit includes a high-accuracy multimeter (like the Fluke 117) for sensor tests, a digital manometer for water pressure, and a flexible inspection camera—these help uncover hidden issues without disassembly. Investing in quality tools turns guesswork into precision repairs, saving time and money.
Your Turn to Tune Up and Thrive
Remember, diagnosing appliances isn’t just about fixing the problem; it’s about understanding your device deeply enough to prevent future issues. With the right mindset and tools, you turn repairs into empowering experiences, making your home more efficient and your wallet happier. So, what’s the next appliance challenge you’re ready to conquer? Share your stories below and let’s learn together!
Jameson Carter
I really appreciate how this post breaks down the troubleshooting process into manageable steps. When I had a similar issue with my dishwasher, I underestimated the importance of checking the water inlet valve first, and I ended up replacing the motor unnecessarily. It’s such a simple thing to overlook but can cause significant noise and operational issues. Using a multimeter to test the valve’s solenoid coil really saved me time and money. One thing I’d like to add for those tackling this problem is to ensure that the water pressure in your home is within the optimal range, as low pressure can mimic inlet valve issues. Have you guys found that high mineral content in the water affects the filter’s performance over time? In my experience, regular cleaning of the inlet screen can prevent many issues. It’s fascinating how so many problems have straightforward fixes once diagnosed correctly. Would love to hear from others if they’ve encountered similar water quality problems causing appliance noise—what solutions worked for you?