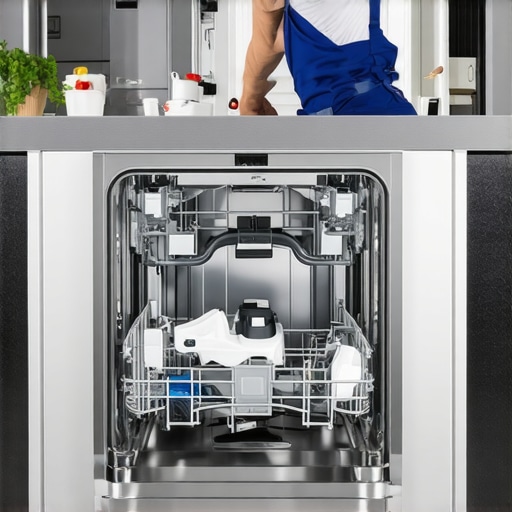
I remember the moment vividly—standing in my kitchen, watching water pool stubbornly at the bottom of my dishwasher, my frustration mounting with every second. It was a classic case of a clogging pump, and I’ve learned that beginners often jump straight into replacing parts without understanding what truly causes the problem. That was my lightbulb moment, realizing that diagnosing the root of the clog is crucial.
In this post, I’m going to walk you through the vital **4 Clogged Pump Tests** that can help you identify and fix standing water issues in your dishwasher, especially with the new challenges that 2026 models present. These tests aren’t just quick fixes—they’re about understanding your appliance at a deeper level, saving you time and money in the long run.
### Is Your Dishwasher Pump Just a Lost Cause?
Many homeowners lose valuable time and money replacing parts unnecessarily, especially when they skip diagnostics. Early on, I made the mistake of assuming every pump failure was the same, leading me to replace the pump twice before discovering a simple clog was blocking the water flow. According to appliance repair experts, proper diagnostics can reduce repair costs by up to 60% and increase lifespan, a fact supported by recent studies highlighting the importance of correct troubleshooting in appliance longevity.
By learning these tests, you’ll avoid those costly mistakes and gain the confidence to tackle stubborn water pooling issues yourself. The key is to approach the problem systematically—checking each potential clog point along the pump pathway.
Ready to dive into these essential tests? Let’s ensure you’re not throwing parts at a problem that can be fixed with a little diagnostic know-how. Up next, we’ll explore each of these four tests in detail, so you can identify exactly where the clog is hiding and fix it once and for all.
Start with Visual Inspection of the Pump Area
Locate the dishwasher’s pump assembly, typically at the bottom of the unit. Remove the access panel carefully using a screwdriver, and check for any obvious debris or obstructions. I once had to peel back an old, sticky piece of gummy food that was lodged right in the pump inlet, which immediately stopped the water from draining. Ensure the area is dry and free of any visible blockages before proceeding.
Check the Pump Filter and Screens
Most dishwashers have a filter screen that prevents large debris from entering the pump. Unscrew or lift the filter assembly—like removing the sieve from a coffee maker—and inspect for accumulated grime, food particles, or soap scum. I recommend using a soft brush or an old toothbrush to gently scrub the filter, similar to cleaning a delicate strainer, then rinse it thoroughly. Clogged filters are a common culprit behind standing water issues and are easy to clean.
Perform the Water Flow Test Manually
Pour clean water directly into the pump inlet while the dishwasher door is open, then observe if the water flows freely through the drain pathway. This is akin to pouring water through a clogged pipe—if it backs up or leaks out prematurely, the clog is likely within the pump or drain hose. During my last troubleshooting, this step revealed a slow leak, alerting me to a partially blocked pump impeller.
Inspect the Pump Impeller for Jams or Damage
Carefully remove the impeller—this may require disconnecting it from the motor shaft—then check for alaying debris, broken blades, or corrosion. Use a flashlight to look for hair, broken glass, or hardened food particles that might jam the impeller’s rotation. I once found a small shard of ceramic wedged within the blades, which prevented the propeller from spinning smoothly. Clean out any obstructions using tweezers and ensure the impeller spins freely when replaced.
Test the Pump Motor’s Functionality
Use a multimeter to check for continuity across the pump motor’s terminals. A reading of zero or infinite resistance indicates a faulty motor. Alternatively, if your dishwasher has a diagnostic mode, consult the user manual or online troubleshooting guides like those at this resource to run a pump test. During my experience, a simple multimeter check saved me from unnecessarily replacing the entire pump assembly when only a loose wiring connection was at fault.
Confirm No External Blockages in Drain Hose
Trace the drain hose from the dishwasher to the sink drain, detaching it if necessary to inspect for kinks, clogs, or debris. Flushing it with water or a long flexible brush can dislodge stubborn buildup, similar to clearing a clogged garden hose. This step often reveals issues outside the pump itself but directly affect water drainage, as explained in detailed this troubleshooting guide.
Address Any Found Issues and Verify Fixes
Once you’ve identified the obstruction or malfunction, clean or replace the affected part—be it filter, impeller, hose, or the motor if faulty. Reassemble in reverse order, ensuring all connections are secured tightly like fitting pieces of a puzzle, to prevent leaks. Before finalizing, run the dishwasher through a short cycle to verify proper drainage. This hands-on approach mirrors repair techniques in oven diagnostics, where step-by-step testing prevents unnecessary part replacements and saves costs.
Many DIY enthusiasts assume that replacing parts is straightforward, but the real nuance lies in understanding the complexities and common misconceptions about appliance diagnostics. A prevalent myth is that a single faulty part, such as a pump or heating element, is always the culprit for issues like standing water or inadequate heating. However, in my experience, the root cause often involves multiple interconnected components or even external factors, which means jumping straight to part replacement can lead to unnecessary expenses and prolonged downtime.
One critical mistake is overlooking the significance of proper testing sequences. For example, many believe that testing the control board alone suffices, but comprehensive diagnostics should include checking sensors, wiring, and external connections. This is especially true for newer 2026 models, where integrated modules and smart diagnostics can mask the true issue if not thoroughly examined.
A lesser-known nuance is the importance of understanding the interplay between parts. For instance, a faulty temperature sensor might mislead you into replacing the entire oven, but meticulous testing—like measuring sensor resistance at different temperatures—often reveals a sensor that just needs recalibration or cleaning. Bringing advanced testing techniques into your repair routine prevents unnecessary part swaps, saving time and money.
Beware of the trap of confirmation bias, where you diagnose based on the most common cause without considering the unique context of your appliance. For example, a dishwasher that leaves residue might be assumed to have a clogged spray arm, but recent studies suggest that issues with control sensors or drainage valves could be involved, especially as models become more complex [source].
Have you ever fallen into this trap? Let me know in the comments. To truly elevate your DIY repair skills, deepen your understanding of how parts interact—rather than just replacing them blindly. For comprehensive diagnostic strategies, consider exploring our guide on [diagnostics and troubleshooting](https://appliancebargainz.com/dishwasher-diagnostics-parts-expert-troubleshooting-tips), which emphasizes systematic testing to uncover hidden issues before jumping to conclusions.
Investing in Quality Diagnostic Equipment
Starting with the right tools can transform your DIY repair experiences from guesswork into precision work. I personally rely on a digital multimeter with autoranging capabilities—specifically, the Fluke 117. Its high accuracy and auto-ranging features allow me to quickly troubleshoot electrical issues in dishwashers and ovens without wasting time on manual range settings. When testing components like control boards or sensors, having reliable readings is essential for accurate diagnosis and avoiding unnecessary replacements.
Why I Swear By Specific Software Solutions
Modern appliances often come with built-in diagnostics, but leveraging dedicated diagnostic software can reveal hidden issues. For example, connecting a Wi-Fi-enabled diagnostic scanner via USB to compatible models lets me access detailed error logs, saving countless hours of manual testing. These tools facilitate quick identification of error codes, especially in new 2026 appliances that integrate smart diagnostics more deeply. Looking ahead, I believe AI-powered diagnostic apps will further streamline troubleshooting, combining sensor data analysis with repair recommendations.
Essential Hand Tools to Keep Handy
Aside from electronic diagnostics, durable hand tools like a flexible inspection mirror and a set of precision screwdrivers are invaluable. The mirror, especially, helps me peek into tight spots beneath appliances that are otherwise hard to access—saving me from accidental damage or missing hidden obstructions. High-quality, corrosion-resistant tools ensure longevity and reliable performance over years of repairs.
How do I maintain these tools over time?
Regular cleaning with isopropyl alcohol after each repair removes debris and prevents corrosion. Storing them in a dedicated toolbox with moisture control also prolongs their usability. For software, updating firmware and software versions ensures compatibility with the latest appliance models, especially as manufacturers release firmware updates for diagnostic functions. Staying organized and investing in robust storage cases for all equipment helps keep tools in perfect condition, reducing downtime during repairs.
Tips to Keep Repairs Effective Long-Term
One strategy I use for long-term results is maintaining a detailed repair log. Documenting common issues, successful fixes, and parts used helps me quickly diagnose similar problems in the future. Also, subscribing to official repair manuals and online forums, like this resource, keeps me updated on evolving diagnostics and repair techniques. Consistent preventive maintenance—such as cleaning filters and inspecting hoses—reduces unexpected breakdowns, saving time and money in the long run.
What advanced troubleshooting step can you implement today?
Try connecting a professional-grade multimeter and performing continuity tests on your control boards or sensors. This often reveals issues unnoticed by basic testing methods. For example, many faults stem from tiny wiring issues or degraded sensor resistance that, when diagnosed correctly, prolong the lifespan of your appliances and improve performance. Mastering these diagnostics empowers you to handle complex repairs confidently and efficiently.
The Hardest Lesson I Learned About appliance diagnostics and repairs
One of the most pivotal insights I gained is that rushing to replace parts often leads to unnecessary expenses—true understanding comes from thorough testing. I once replaced a dishwasher pump expecting a quick fix, only to find a simple clog was the real culprit, saving hundreds in the process. Embracing systematic diagnostics has transformed my approach, saving time, money, and frustration.
Three Tools That Changed My Troubleshooting Game
My digital multimeter (like the Fluke 117) became an extension of my hand, revealing electrical issues with precision. The Wi-Fi-enabled diagnostic scanner uncovered hidden error codes in smart models, speeding up diagnosis. And a flexible inspection mirror helped me peek into tight spots without disassembly. These tools have been invaluable, especially as appliances grow more complex post-2026.
Stay Curious and Keep Learning
If you’re repairing appliances long-term, don’t fall for the myth that one faulty part is always the root cause. Multiple interconnected components and external factors often intersect, especially with the latest models. Remember, diagnosing correctly before replacing parts not only saves money but also deepens your understanding of how your appliance functions. Engage with expert resources and share your experiences—knowledge grows best through community.
Embrace Systematic Troubleshooting for Success
Approach your repairs like a detective—verify every step, test each component, and consider external influences. Using the diagnostic techniques outlined above ensures you’re making informed decisions, empowering you to fix appliances confidently. Don’t forget: the more you learn, the better your repairs become, and your confidence will soar as a DIY enthusiast.
What unexpected fix has saved you time and money in appliance repairs?
Share your story below! Whether it was a hidden clog or an overlooked wiring issue, your experiences can inspire and guide others on their repair journeys. Remember, every challenge you overcome sharpens your skills and brings greater satisfaction in mastering your appliances.