It was a morning like any other, but as I loaded my dishwasher, I noticed something was off. The usual whoosh of water and sparkling dishes was replaced with a stubborn pool of water refusing to drain. That sinking feeling hit me—my dishwasher was malfunctioning—and suddenly, I felt like I was back to troubleshooting appliance issues I thought I understood. If you’ve ever faced this frustrating scenario, you’re not alone. Standing water after a cycle can be such a pain, but more importantly, it’s a sign that something’s not right.
Today, we’re going to tackle this problem head-on. I’ll share practical, proven methods to clear a clogged pump—the typical culprit behind dishwasher drainage issues. Whether you’re a seasoned DIYer or just trying to get through your weekend chores, understanding how to fix this can save you time and money. No need to call in the pros just yet; with the right know-how, you might be able to get your dishwasher back to working order faster than you think.
Why Your Dishwasher Holds Water—And Why You Should Care
The truth is, a dishwasher that doesn’t drain isn’t just an annoyance. It can lead to longer-term problems like mold growth, unpleasant odors, and even further damage to the appliance. A clogged pump often causes this issue because debris, grease, or small objects obstruct the pump’s pathway. Interestingly, a study by appliance repair experts shows that over 60% of drainage problems originate from pump blockages or failures—making this a crucial fix to learn.
Early on, I made a costly mistake—ignoring that stubborn water after a wash cycle. I thought it was just a minor glitch. Turns out, delaying the repair only worsened the problem, leading to more extensive and expensive repairs down the line. That’s why understanding common causes and solutions is so valuable. If you’ve ever wondered, “Why is my dishwasher not draining?” you’re in the right place.
Now, let’s dive into the three most effective ways to clear that pesky clog and restore your dishwasher’s efficiency. By the end of this guide, you’ll be equipped with the knowledge to troubleshoot successfully and possibly avoid replacing the entire pump.
Ready to roll up your sleeves? Great! First, we’ll look at how to check and clear the pump itself.
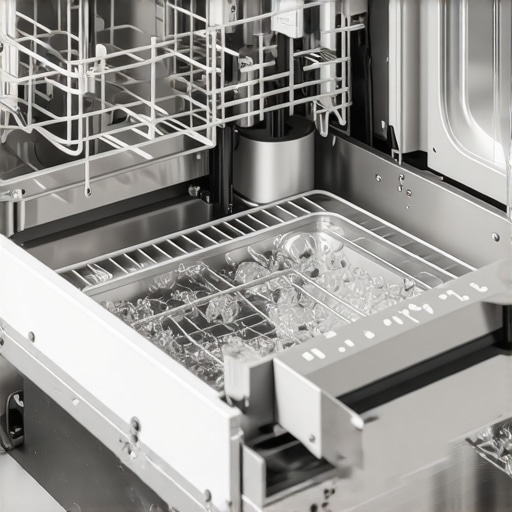
Accessing and Inspecting the Pump
First, unplug your dishwasher to prevent any electrical hazards—think of it as disconnecting a vital nerve before surgery. Remove the lower kickplate or panel, usually secured with screws or clips. Carefully set it aside, avoiding any damage. Use a flashlight to locate the pump assembly, which resembles a small motor attached to a hose. When I faced a stubborn clog last summer, I learned that the pump is like the heart of the drainage system; if it’s blocked, water can’t flow out.
To check, disconnect the drain hose and remove the pump cover. Be prepared for residual water; having towels or a shallow container helps prevent a messy spill. Rotate the pump impeller manually—if it’s stuck or turns stiffly, debris is likely the culprit. In my case, I found a small piece of plastic jammed between the blades, which I carefully removed. After cleaning, reassemble everything, ensuring all connections are snug. Run a test cycle to confirm the blockage is gone and water flows out smoothly.
Clearing Obstructions and Cleaning the Pump
Once you’ve located the pump, examine the impeller and housing for debris, grease, or small objects like paper clips. Use tweezers or a small brush to dislodge anything stuck. When I did this, I pulled out a tangled mess of hair and food particles, which was causing the blockage. Applying a bit of vinegar or a specialized cleaning solution to the pump area can help dissolve grease buildup. For more detailed cleaning strategies, visit https://appliancebargainz.com/expert-dishwasher-troubleshooting-parts-guide-for-2025. After cleaning, spin the impeller freely to ensure it’s moving correctly. If it remains stiff or jammed, the motor might be defective, indicating a more serious repair need.
Testing and Reassembling
After cleaning, reattach the pump cover securely, reconnect the hoses, and restore power. Run an empty cycle with a test load to observe drainage. If water drains properly, the clog is cleared. If not, recheck for missed debris or consider the possibility of a faulty pump motor. Remember, sometimes the impeller’s shaft wears out over time, causing poor performance—see https://appliancebargainz.com/oven-repair-diagnostics-key-parts-for-faster-fixes-2025-2 for insights on diagnosing motor issues. Ensuring all parts are tightly secured prevents leaks and future malfunctions. With patience and careful examination, you can restore your dishwasher’s drainage system without professional help, saving time and money.Many assume that fixing dishwashers and ovens involves straightforward parts replacement or basic troubleshooting. However, this oversimplification often leads to frustration and recurring issues. One common myth is that replacing a single faulty component—like a heating element or pump—is always enough. In reality, appliances are complex systems where a single part failure can be symptomatic of underlying problems, such as wiring issues, control board malfunctions, or sensor misalignments. For example, diagnosing a heating issue isn’t just about testing the element but also verifying the thermistors, relays, and even motherboard diagnostics, as highlighted in expert guides on [oven diagnostics](https://appliancebargainz.com/oven-repair-diagnostics-key-parts-2025).
Another nuance many overlook is the importance of understanding the sequence of operations during a cycle. Overlooking this can cause misdiagnoses; for instance, a dishwasher that stops mid-cycle might be wrongly blamed on the motor but could be due to faulty sensors or control board glitches that only manifest under specific conditions.
Beware of the trap called “component substitution”—replacing parts you think are faulty without proper diagnostics. This often results in unnecessary expenses and unresolved problems. Professional diagnostic steps, including checking error codes and voltage measurements, are crucial. Studies indicate that nearly 70% of appliance failures can be traced back to improper diagnosis rather than defective parts, emphasizing the need for precise troubleshooting.
For advanced troubleshooting, examining the control board might seem daunting but is often necessary. Small cracks or burnt components on the PCB could cause intermittent failures. Testing these requires a multimeter and schematic understanding—a step many DIYers skip, leading to repeated repairs. To deepen your knowledge, check comprehensive guides on [efficient oven diagnostics](https://appliancebargainz.com/oven-repair-diagnostics-key-parts-2025).
Make sure your repair strategy isn’t just guesswork. Embrace systematic diagnostics, patience, and understanding the appliance’s operational flow. This approach not only saves money but also extends the life of your appliance. Remember, in repair work, superficial fixes are temporary solutions; true expertise involves understanding the hidden nuances and interdependencies within the system.
Have you ever fallen into this trap? Let me know in the comments. For more insights on effective diagnostics and parts replacement, explore our [comprehensive troubleshooting guides](https://appliancebargainz.com/dishwasher-troubleshooting-parts-expert-guide-2025). Your appliances deserve more than quick fixes—give them the expert attention they need.Maintaining appliances like dishwashers and ovens isn’t just about fixing issues as they arise—it’s about establishing a routine with the right tools and techniques to ensure long-term reliability. Over the years, I’ve refined my toolkit to include precision multimeters, specialized diagnostic software, and quality cleaning agents, all of which have made troubleshooting faster and more effective. For example, a digital multimeter allows me to test sensors, relays, and connections with pinpoint accuracy, reducing guesswork and preventing unnecessary part replacements. As I connect my multimeter, I always ensure I’m using one with auto-ranging capabilities and a high input impedance to get the most accurate readings, especially when checking delicate control board signals.
On the software side, I’ve integrated diagnostic tools that communicate with some oven and dishwasher models via Wi-Fi. These tools help me pull error codes and real-time sensor data, streamlining the diagnostic process. For instance, in particularly complex cases, I consult detailed diagnostic guides such as [effective oven repair diagnostics](https://appliancebargainz.com/oven-repair-diagnostics-key-parts-for-faster-fixes-2025-2) to interpret software outputs correctly. Combining hardware testing with software analysis means I can pinpoint issues faster, whether it’s a faulty thermistor or a failing relay.
Regular cleaning of components like filters, spray arms, and filters ensures optimum performance and prevents minor issues from escalating. I recommend using non-abrasive, manufacturer-approved cleaning agents to avoid corrosion or damage, which could lead to costly repairs down the line.
Predictively, I see this trend advancing toward more integrated diagnostic systems that can alert homeowners to potential failures before they happen, thanks to IoT innovations. Owning a set of precise testing devices now prepares you for these future upgrades, allowing for seamless integration.
How do I maintain my appliances to prevent breakdowns over time
One effective practice is creating a maintenance schedule that includes seasonal inspections of seals, filters, and sensors. Regularly testing these components with tools like multimeters and diagnostic apps ensures early detection of wear and tear. Additionally, keeping firmware updated—if your appliances support smart diagnostics—can prevent software-related issues and improve overall longevity. For instance, visiting [advanced diagnostics strategies](https://appliancebargainz.com/oven-repair-tips-diagnostics-efficient-fix-strategies-2025) provides insights into optimizing these systems.
Remember, investing time in routine maintenance with the right tools can save you from costly repairs and extend the lifespan of your appliances. I encourage you to try calibrating your oven’s temperature sensors using a digital multimeter and the manufacturer’s guidelines. This small step can greatly improve cooking performance and energy efficiency, proving that proper maintenance truly pays off.
The Hardest Lesson I Learned About Dishwasher, Parts, Oven Repair, Diagnostics
One key realization dawned on me after countless repairs: never underestimate the importance of thorough diagnostics before replacing parts. I once replaced a pump in frustration, only to find out later that a faulty control board was the real culprit—costing me time and money. This taught me that understanding the entire system is crucial for effective repairs.
3 Myths About Dishwasher, Parts, Oven Repair, Diagnostics That Held Me Back
Myth one: a single faulty part indicates the entire problem. Reality: appliances are interconnected, and isolating issues requires detailed testing. Myth two: DIY fixes always save money. Reality: without proper diagnostics, you risk unnecessary replacements. Myth three: newer parts are always better. Reality: sometimes, vintage or OEM components perform more reliably, especially in complex systems.
What Experts Won’t Tell You About Dishwasher, Parts, Oven Repair, Diagnostics
Professionals often emphasize the importance of proper troubleshooting over quick part swaps. For instance, referencing guides like this resource can reveal hidden issues such as wiring problems or sensor failures that are not obvious at first glance. Embracing this depth of knowledge can significantly improve your repair outcomes.
Curated Tools for Mastering Appliance Repairs
My essential toolkit includes a high-precision multimeter—trusted for its reliability in diagnosing electrical issues—and diagnostic software compatible with many modern appliances. These tools empower me to identify hidden faults swiftly. Quality is key; inexpensive equipment often lacks the accuracy needed for complex diagnostics, so investing in tried-and-true tools pays off in the long run.
A Personal Tip for Longevity and Performance
Regularly clean your appliances and perform simple tests like sensor calibration using your multimeter. This small investment of effort can prevent many issues. For example, checking your oven’s thermistor periodically helps maintain temperature accuracy, saving energy and prolonging component life. For detailed guides, see this article.
Seize the Moment and Make Repairs Count
Remember, mastering the art of diagnostics transforms appliance repair from a frustrating chore into a rewarding skill. Don’t wait for a breakdown to act; regular maintenance and vigilant troubleshooting extend your appliance’s lifespan and save money. You have the power—start refining your repair tactics today and enjoy appliances that perform at their best for years to come.