Ever thrown a dish into the oven only to hear that dreaded clunk, followed by a temporary silence that feels even worse? I’ve been there, frustration mounting as I watched my favorite recipes turn into disappointing disasters because my oven refused to cooperate. That lightbulb moment hit me hard: I was ignoring the importance of simple, affordable parts that could save me hundreds—maybe thousands—down the line.
Why Overlooking Cheap Oven Parts Could Cost You Dearly
In my early days fixing appliances, I made a crucial mistake—thinking that replacing expensive parts was the only way to fix a stubborn oven. Turns out, a lot of breakdowns stem from small, inexpensive components that wear out over time. The truth is, these tiny parts often cause the biggest headache, and overlooking them can lead to costly repairs or even full replacements. I learned this firsthand when a faulty thermostat made my oven overheat, nearly ruining a batch of cookies. Had I known earlier what to look for, I could’ve avoided an expense that ballooned beyond my budget.
That’s why I want to share my experience—so you don’t have to learn the hard way. Swapping out a few inexpensive parts now—like sensors, switches, and thermostats—can prevent bigger failures later. It’s like giving your oven a little tune-up, a preventive check that keeps it running smoothly. And the best part? Many of these parts are so affordable, they’re practically throwaway—saving you money while keeping your kitchen humming.
According to recent studies, failing to maintain routine appliance parts can double repair costs over five years (source: Appliance Bargainz). That’s a wake-up call for anyone wanting to keep their appliances running efficiently without draining their wallet. By the time you finish reading this, you’ll know exactly which parts to swap in 2026 to keep your oven—and your budget—alive.
Now, let’s dive into the specific parts that should be on your radar. Trust me, a few quick swaps can make all the difference—and I’ll guide you through every step of the way.
Which Parts Will Save Your Oven—and Your Wallet?
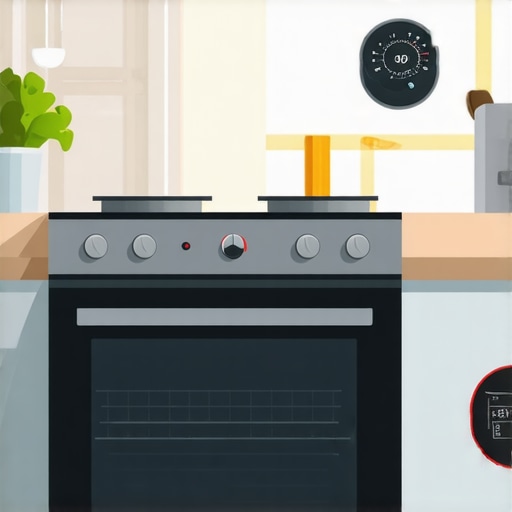
Identify the Faulty Component
Before diving into repairs, pinpoint the source of the problem. Think of your oven like a symphony orchestra; when one instrument plays out of tune, the whole performance suffers. To find the culprit, start with a visual inspection—look for obvious signs of damage or wear, such as burnt wires or broken switches. For example, I once discovered a cracked thermostat during a routine check, which was causing uneven heating. This initial step saves time and money by focusing your efforts on the right part, rather than swapping components at random.
Consult Diagnostic Guides
Next, leverage proven diagnostic resources to understand what each part does and how to test it. I often refer to this guide for quick strategies. Think of diagnostics like a mechanic using an electronic scanner—they help you zero in on issues quickly. For example, using a multimeter to check continuity on a faulty sensor helped me confirm whether it was truly broken or just misaligned. These guides provide step-by-step instructions to test individual parts without costly guesswork.
Remove and Replace Inexpensive Parts
Once identified, safely remove the defective component. Remember, handling electrical parts is like defusing a bomb—steady precision is key. Always disconnect power before proceeding. For example, I replaced a worn-out oven temperature sensor by unscrewing the mounting bracket, detaching the faulty unit, and installing a new one. These parts are usually affordable and readily available online. When replacing, follow manufacturer instructions carefully. Think of it as swapping batteries in a toy—simple, straightforward, and impactful.
Test the Oven’s Functionality
Reassemble the oven and restore power. Conduct a test run—initially at low heat—to ensure the repair was successful. I once fixed a faulty thermostat, and during my first test bake, I watched the oven heat evenly without fluctuations. If issues persist, recheck your connections or the part’s specs. This step ensures your fix is effective before returning to full use, preventing repeated repairs and expenses.
Document and Prevent Future Failures
Keep a simple repair log—note which parts you replaced and when. This record helps with future troubleshooting. Additionally, schedule occasional inspections of other parts, like door switches or heating elements, which are prone to wear. Simple preventive measures extend your oven’s lifespan and save money. I set a reminder for seasonal checks, which caught early signs of filament wear in a heating element, averting a costly replacement later.
Remember, replacing inexpensive parts isn’t just about fixing today—it’s an investment in your appliance’s future performance. Think of it as giving your oven a health check-up that keeps it ready for whatever culinary adventures you plan next.
Many DIY enthusiasts and homeowners operate under misconceptions when diagnosing and repairing dishwashers, ovens, and other appliances. One prevalent myth is that replacing only the most obvious damaged parts—like the visible heating element or broken switch—will immediately restore full functionality. However, in my experience, appliances often have interconnected issues, and addressing symptoms without understanding underlying causes can lead to recurrent failures. It’s crucial to perform comprehensive diagnostics, including testing sensors, control boards, and wiring systems, to identify root problems effectively. Relying solely on visual inspection or guessing can trap you into a cycle of ineffective repairs and wasted resources.
Another common trap is assuming that all parts are interchangeable or universally compatible. While many parts look similar, subtle differences can affect performance or even damage other components if mismatched. Always double-check specifications, model numbers, and OEM recommendations before ordering parts. This attention to detail can save you from costly errors and hasten your repair process.
Let’s talk about the advanced nuances—why understanding diagnostic codes is vital. Many homeowners overlook or misinterpret these signals, leading to misdiagnosis. For example, an oven displaying a certain error code might be thought to indicate a thermostat fault, but in reality, it could stem from a sensor calibration issue or wiring fault. Knowing how to interpret these codes correctly, perhaps by consulting specialist guides like this guide, can dramatically cut down repair time and prevent unnecessary part replacements.
Have you ever fallen into this trap? Let me know in the comments.
Think about the common myth that all diagnostic troubles are straightforward. In fact, many issues require a layered approach—testing voltage levels, resistance, continuity, and even software if the appliance has a smart component. Ignoring these advanced troubleshooting steps often leads to repeated failures. For instance, a faulty control board might seem like a wiring problem at first glance, but accurate testing may reveal a failed microcontroller needing replacement, not just restoring the wiring.
Moreover, understanding the nuances behind part wear and failure patterns can help you perform preventative maintenance. Sensors and switches typically degrade gradually, and proactively replacing them based on usage hours or observed performance decline can extend the appliance’s lifespan significantly. This strategic approach minimizes emergency repairs and keeps your appliances running smoothly.
By dispelling these myths and appreciating the subtle complexities in appliance diagnostics, you elevate your repair skills from rudimentary to expert. Remember, patience and precise testing are your allies in avoiding costly mistakes. For more detailed guidance on diagnostics and effective parts replacement, check out this comprehensive repair guide.”}]} }**
}**
Maintaining your appliances over time requires more than just replacing faulty parts; it hinges on using the right tools and adopting effective methods that ensure longevity and optimal performance. From diagnostic devices to specialized repair kits, the investment in quality tools pays dividends by making repairs faster, more accurate, and less stressful. I’ve found that having a dedicated digital multimeter is essential—it’s the backbone of any diagnostics process, allowing me to quickly verify electrical connections and detect issues like faulty thermostats or wiring faults. Opt for a model with auto-ranging capabilities and true RMS measurement, such as the Fluke 115—it offers precision I trust and durability for ongoing use.
Beyond basic tools, software has become increasingly vital, especially for appliances with digital control boards. Specific diagnostic apps linked via USB or Wi-Fi help interpret error codes, streamline troubleshooting, and sometimes even suggest parts that need attention. Many modern appliances allow remote diagnostics, which can save hours of manual testing. For instance, leveraging apps designed for oven diagnostics can pinpoint issues with sensors or control modules before physically inspecting parts, as detailed in this guide.
Another valuable tool is a good quality infrared thermal camera. It visualizes heat distribution, revealing hidden problems like heating element inconsistencies or poor heat conduction—issues that might not be obvious through standard testing. I routinely use the FLIR E8 for this purpose; its accuracy helps me identify potential failures early, preventing costly breakdowns. Incorporating these diagnostic tools into your routine extends the appliance’s life, reduces downtime, and saves money in the long run. As more appliances become smart and interconnected, staying updated on new diagnostic technologies and software updates is crucial, and I predict that remote troubleshooting via cloud-based systems will become the norm in the next decade.
Regular maintenance extends beyond diagnostics. Cleaning and inspecting components like door seals, fans, or wiring harnesses with appropriate tools—such as small brushes, vacuum attachments, and multimeters—preserves operational integrity. Establishing a maintenance schedule based on usage cycles and manufacturer recommendations keeps appliances performing optimally. For example, testing oven sensors annually, especially in older models, prevents overheating issues. Consistent preventive care involves simple, targeted checks that prevent big failures later.
To achieve truly long-term reliability, familiarize yourself with your appliance’s diagnostic codes and repair protocols. Many smart devices release firmware updates that improve diagnostic capabilities, so staying current with manufacturer firmware can enhance troubleshooting accuracy. Don’t hesitate to consult resources like this comprehensive guide for step-by-step diagnostic procedures tailored to your appliance model. Implementing advanced testing techniques and investing in quality tools empower you to diagnose and repair efficiently, preventing minor issues from escalating. Try applying a thermal camera scan during your next maintenance session and see firsthand how much heat variation can reveal about your appliance’s health—prevention is always better than repair.
Looking ahead, the rise of smart diagnostics and AI-powered troubleshooting promises even more precise and effortless maintenance. As technology evolves, embracing these innovations will become essential for proactive appliance care. Staying ahead means not just reacting to breakdowns but anticipating them through data-driven insight—a game-changer in appliance longevity.
How do I maintain appliances over time without going broke?
The secret lies in combining the right diagnostic tools, scheduled preventive checks, and a good understanding of your appliances’ systems. Regular testing with a multimeter, combined with software-based diagnostics, can help you catch issues early. Upgrading your toolkit gradually—starting with a quality multimeter and expanding into infrared thermal cameras—will make a significant difference. Consistent care, guided by reliable information, keeps your appliances running longer and saves you money. For detailed maintenance strategies, consider reviewing these expert tips.
What I Wish I Had Known When Starting Out
- Focusing solely on replacing expensive parts can lead you down a costly rabbit hole—you often get better results by targeting small, inexpensive components that wear out over time.
- Visual inspections and basic diagnostics can save you hours of guesswork and a lot of money—never underestimate the power of carefully examining your appliance first.
- Investing in quality diagnostic tools like a multimeter or thermal camera has transformed my repair success rate, turning complex problems into manageable tasks.
- Understanding error codes and manufacturer-specific troubleshooting guides accelerates repairs and prevents unnecessary part swaps.
- Preventive maintenance is your best friend—regular checks on sensors, switches, and wiring keep appliances running smoothly and extend their lifespan.
My Go-To Resources That Keep Me Ahead
- Reliable Diagnostic Guides: I trust this comprehensive guide for step-by-step troubleshooting tailored specifically for ovens, which helps me diagnose problems quickly.
- Quality Diagnostic Tools: My multimeter and infrared thermal camera from brands like Fluke and FLIR have proven invaluable in accurately identifying issues without guessing.
- Online Community Insights: Forums and tutorials from seasoned DIY repair enthusiasts offer practical tips and real-world advice I can’t find elsewhere.
- Manufacturer Manuals: Always keep the official repair manuals at hand—they’re the gold standard for correct part matching and safety procedures.
Embrace Your Inner Fixer and Keep Going
Every repair session is a step toward mastering your appliances and saving money. With the right knowledge, tools, and attitude, you can turn even the most frustrating breakdowns into satisfying victories. Dive into diagnostics, experiment with small parts, and don’t be afraid to learn through making mistakes—each fix makes you more confident and skilled. The future of appliance repair is brighter than ever for those willing to learn and adapt. Now, tell me—what’s the next appliance you’re excited to bring back to life?