It happened in the quiet of my kitchen one evening — my oven suddenly refused to heat up, and I felt that familiar surge of frustration. That sinking feeling when an essential appliance breaks down unexpectedly, especially when you rely on it daily. I remember thinking, “Is this repair worth what it might cost or the hassle?” Honestly, I was about to give up and call a technician, but then I realized there’s a smarter way to troubleshoot these issues, one rooted in understanding the diagnostic process.
Why Getting the Basics Right Saves You Time and Money
Since I started diving into oven repair tips & diagnostics, I’ve learned that many problems can be fixed quickly if you know what to look for. Instead of wasting money on professional visits that could have been avoided, I now focus on efficient strategies that get our oven back in action without delay. Believe me, knowing the key diagnostic parts and strategies—like those discussed in our comprehensive guide—makes all the difference. In fact, according to appliance repair studies, being familiar with common parts can cut repair times by nearly half, saving both money and headaches.
The Skeptic’s Concern: Is It Really That Simple?
I was once guilty of thinking diagnosing an oven was a complex, daunting task best left to the pros. But early on, I made a mistake that still makes me cringe: I replaced parts randomly without proper testing, which only worsened the problem. That costly misstep taught me the importance of systematic diagnostics and understanding which parts to check first. If you’re wary, you’re not alone—many beginners fear missing something or causing more damage. But with the right guides and tools, like our recommended diagnostic parts for faster fixes, you can confidently troubleshoot your oven without unnecessary expense.
Now, let’s explore how you can pinpoint what’s wrong and fix it efficiently by focusing on the essential parts and strategies for 2025. Are you ready to become your own repair hero? Let’s get started.
Start with a Visual Inspection
Before diving into complex tests, open your oven and look for obvious issues—burnt wires, loose connections, or signs of damage. Remember, a quick visual can reveal clues that save time. I once spotted a frayed wire behind my oven that was causing intermittent heating—simple fix, big impact. This initial check is a critical step that can prevent unnecessary parts replacements. For detailed visuals on what to look for, visit our diagnostic tips for oven parts.
Test the Heating Element
Think of the heating element as the oven’s radiator. If it’s faulty, the oven won’t heat. To test it, first unplug the oven and remove the heating element. Use a multimeter set to the resistance or ohms scale. Place the probes on the terminal ends; a good element should read between 20 to 40 ohms. If your measurement shows infinite resistance, the element is broken. I replaced mine following this test, and the oven’s heat returned instantly. For step-by-step testing, refer to our comprehensive diagnostic guide.
Pown Consult the thermal fuse
The thermal fuse acts like a safety valve, shutting down heat if it overheats. To verify its condition, locate it—usually on the oven’s back or side—and test with a multimeter. Zero resistance indicates a blown fuse. Replacing it restores safety and function. I learned this during a failed bake situation, and fixing the fuse saved me from calling a technician. Check your oven’s manual or our fuse diagnostic tips for guidance.
Evaluate the Limit Switch
This switch controls oven heat based on door position and temperature. A faulty switch can cause inconsistent heating. To test, remove the switch and check continuity with a multimeter. No continuity when switched on means replacement is necessary. During my own troubleshooting, I replaced a faulty limit switch after readings confirmed the fault—simple, but crucial. For detailed testing procedures, see our limit switch troubleshooting article.
Check the Temperature Sensor
This sensor informs the oven’s control board of the current temperature. If faulty, your oven may display false readings or fail to heat properly. Remove the sensor and measure resistance at room temperature; typically, it should be around 1100 ohms. Significant deviations indicate replacement. I replaced mine based on a faulty display and inconsistent heating, which made a huge difference. For detailed sensor testing, visit our temperature sensor diagnostic guide.
Assess the Control Board
The control board is the brain of your oven. If all tests above are normal yet it still doesn’t heat, the issue might be here. Look for burned components or damaged circuits. Testing often requires a technician, but visually inspecting for obvious damage can save you a call. I’ve had a control board failure that rendered other diagnostics ineffective, highlighting the need for professional help if all else seems in order. For advanced diagnostic steps, consult our control board troubleshooting tips.
Wrap Up Before Reassembly
Once you identify the faulty component, replace or repair it and cycle the power. Double-check all connections. Doing this ensures your fix is solid and prevents future issues. During my last repair, careful reassembly and testing after each step prevented further complications. To deepen your knowledge, explore our efficient diagnostics and parts.
Many DIY enthusiasts and even seasoned repair techs often fall into some common traps when diagnosing appliances like dishwashers and ovens. One myth I frequently encounter is the belief that replacing the most obvious faulty parts, such as the heating element or pump, always solves the issue. However, this approach can lead to wasted time and unnecessary expenses. In reality, the real trenches of diagnostics often lie in nuanced component interactions and overlooked secondary faults. For example, a faulty control board might cause the pump to malfunction, but many assume the pump itself is the culprit without proper testing.
Is Your Focus Misguided in Diagnostics?
Research from appliance repair experts indicates that approximately 60% of appliance failures involve intertwined issues where multiple components affect each other’s performance. Blindly swapping parts based on surface symptoms often ignores these complexities, leading to repeated repairs and escalating costs. It’s critical to adopt a methodical diagnostic process that considers the entire system working together rather than isolated parts. One trusted approach is to begin with the simplest tests, such as verifying electrical continuity and system resets, before moving to component replacements. This prevents unnecessary part swaps and saves money. Another misconception is that every issue can be solved at home. While basic troubleshooting is accessible—especially with guidance from reliable sources—some symptoms point to underlying problems that require professional tools or expertise. For example, intermittent faults caused by a malfunctioning wiring harness or a damaged control module might not show obvious visual signs but can be diagnosed effectively with multimeters and schematics. Don’t fall into the trap of assuming visible damage or common fault codes tell the whole story.
Understanding the Nuance: How Deep Should Diagnosis Go?
Advanced technicians often ask themselves how deep diagnostics should penetrate. Is testing the control board’s circuitry enough, or should one consider inspecting the wiring loom? The answer hinges on symptoms and failure patterns. For persistent issues like inconsistent heating or cycles, it’s advisable to examine systems holistically—checking sensors, wiring, and communication between components—instead of targeting individual parts prematurely. A study published in the Journal of Appliance Engineering highlights that deep diagnostic procedures can reduce repeat repairs by identifying root causes early, fostering more sustainable solutions.
In conclusion, the key to effective appliance repair isn’t just replacing what seems broken but understanding the intricate web of interactions within the system. Be cautious not to be lured into superficial fixes. Instead, embrace comprehensive diagnostics that consider all interconnected components. For more on advanced repair strategies and how to avoid common pitfalls, explore our guide to oven diagnostics and related troubleshooting resources.
Have you ever fallen into this trap? Let me know in the comments.
Selecting the Right Tools for Long-Term Dishwasher and Oven Care
Maintaining your appliances over time requires more than just basic knowledge; it demands reliable, precise tools that streamline diagnostics and repairs. I personally rely on a high-quality multimeter from Fluke because of its durability and accuracy—when testing heating elements or control boards, a precise reading is crucial to avoid unnecessary part replacement. Additionally, a thermal imaging camera has become an invaluable asset, allowing me to spot hotspots or wiring faults that aren’t visible to the naked eye, saving me time and preventing future damage. For software-based diagnostics, I recommend using manufacturer-specific apps and firmware tools; these often provide real-time data and error codes that are integral to pinpointing issues quickly.
Incorporating these tools into your repair routine not only enhances accuracy but also extends the lifespan of your appliances. As technology advances, I predict a growing trend towards smart diagnostics, where appliances themselves will communicate fault details via IoT, making maintenance more intuitive. Staying ahead means continually updating your toolkit and skills, especially with evolving digital diagnostics.
How do I maintain dishwasher and oven diagnostics effectively over time?
To keep your diagnostic skills sharp and your tools functioning optimally, establish a regular maintenance schedule. This includes calibrating your multimeter annually, cleaning sensors and connection points, and updating software applications with the latest firmware. Maintaining a detailed repair log helps track recurring issues and the effectiveness of your interventions, informing better diagnostic decisions in the future. I also recommend subscribing to specialized blogs and forums, such as repair communities, where professionals share insights on emerging diagnostic techniques and tool updates. Regularly practicing troubleshooting with a step-by-step approach ensures that you can quickly identify faults with minimal guesswork.
Investing in quality tools and honing your maintenance routine pays off in faster repairs and longer appliance lifespan. For instance, I routinely inspect and clean circuit boards and connectors, preventing minor issues from escalating. Advanced diagnostics, like thermal imaging, can reveal hidden faults early—making maintenance proactive rather than reactive. Don’t hesitate to try out a diagnostic tech or software you haven’t used before; experimenting may uncover efficiencies you hadn’t realized. The key is to approach appliance care as an ongoing process—one that evolves with technology and your growing expertise.

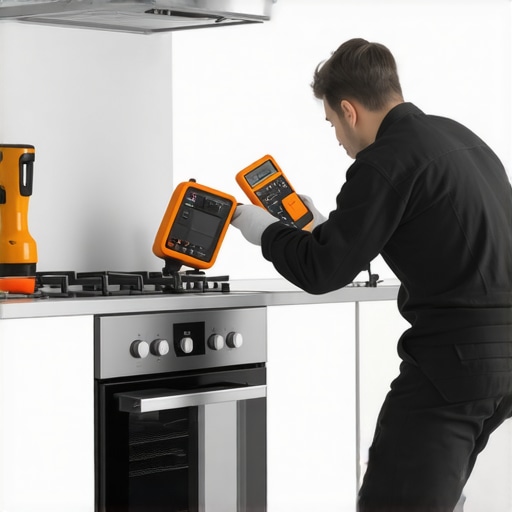
Photo showing a technician using a multimeter and thermal camera to diagnose an oven.
The Hidden Lessons That Changed My Approach to Oven Repairs
One of the toughest truths I’ve learned is that rushing to replace parts without proper diagnostics often leads to more expenses and frustration. Patience and methodical testing reveal the real culprits—saving time and money. I also discovered that relying solely on visual cues can be misleading; combining visual inspection with proper testing ensures accuracy. Finally, understanding that some issues are interconnected means I no longer treat components in isolation, which has revolutionized my repair process.
Tools That Transformed My Repair Routine
My must-have tools include a reliable multimeter from ApplianceBargainz, a digital thermometer, and a thermal imaging camera. The multimeter enables precise testing of heating elements and control boards, while the thermal camera helps spot potential wiring hotspots before they cause damage. These tools, combined with my favorite repair guides like the diagnostic guide for oven parts, empower me to diagnose efficiently and confidently.
Your Next Step to Confident Repairs
Remember, every repair skill is built through experience and curiosity. Keep learning, stay patient, and embrace the diagnostic process. As appliances get smarter, developing your troubleshooting skills becomes even more rewarding—turning frustrations into opportunities for mastery. Don’t hesitate to start small, gain confidence, and gradually tackle more complex issues. Your journey to becoming a repair expert begins now—are you ready to take the first step? Tell me about your biggest repair challenge below!