I remember the frustration vividly. My oven suddenly stopped heating right before a big family dinner. I was staring at it, feeling helpless, convinced I’d have to call in a pro or buy a new one. Then, I realized something — I was missing the crucial pieces of knowledge needed to diagnose and fix the problem myself. That lightbulb moment changed everything.
Why Knowing Your Oven Parts Can Save You a Fortune
If you’ve ever been caught in a situation where your oven refuses to turn on or heat properly, you know how stressful it can be. But here’s the truth: most oven issues aren’t as complicated as they seem, once you understand the key parts and how to troubleshoot them. Early on, I made the mistake of blindly replacing parts without diagnostics — a costly and unnecessary gamble. Instead, I learned that a systematic approach to diagnostics can make all the difference, especially with the right guide and tools.
In 2025, having a reliable Key Parts Guide at your fingertips is essential. It’s like having a trusted neighbor who knows exactly where to look and what to test. Whether it’s a faulty thermostat, a broken heating element, or a defective sensor, knowing the right parts to check saves time, money, and frustration.
Have you ever faced a stubborn oven problem that just wouldn’t go away?
If so, you’re not alone. I’ve been there. But with the right diagnostics, I’ve also learned how to identify the root cause quickly and fix it myself. This approach isn’t just about saving a few dollars; it’s about gaining confidence and control over your appliances. Ready to dive into the practical steps that will make your repairs faster and more effective? Keep reading — your oven will thank you!
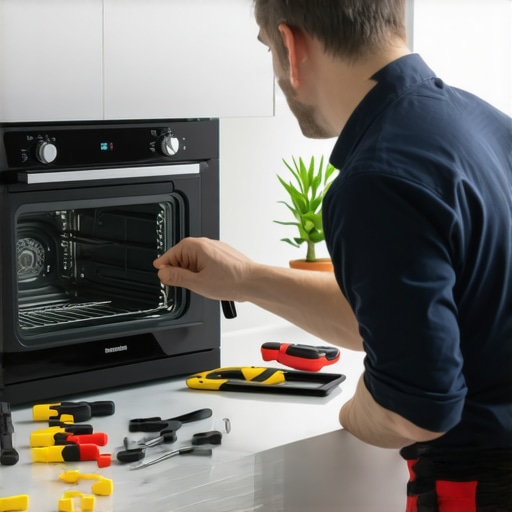
Begin with Visual Checks
Start by unplugging the oven and inspecting it for obvious issues like loose wires, burnt components, or obstructions. I once spotted a disconnected wire behind my oven during a quick visual check, which instantly solved my heating problem. This simple step can save hours of unnecessary troubleshooting.
Test the Thermostat for Accuracy
Using a multimeter, set it to measure resistance and check the thermostat’s continuity. If it shows no continuity when the oven is supposed to be heating, replace it. Remember, the thermostat acts like a gatekeeper—if it’s stuck, heat won’t pass. I replaced mine following a tutorial from this guide, and my oven fired up again.
Evaluate the Heating Element
Remove the oven’s back panel and visually examine the heating element for cracks or blisters. Test it with a multimeter for continuity; a broken element will show no resistance. In my case, a hairline crack in the element caused inconsistent heating, and swapping it out was straightforward with parts from this source. The fix immediately restored proper heat.
Check the Temperature Sensor or Thermistor
Locate the sensor at the oven’s top and disconnect it. Use a multimeter to check resistance at room temperature; compare it with manufacturer specs. A faulty sensor acts like a faulty thermometer—giving incorrect readings and preventing the oven from heating properly. Replacing a defective sensor is often the easiest fix, detailed in this article.
Inspect the Control Board and Fuses
Look for burnt spots, bulging capacitors, or broken traces on the control board. Use a multimeter to test fuses; if blown, replace them. Sometimes, the control board itself fails, acting like a brain that’s gone offline. A visual inspection with a flashlight and magnifier can reveal these issues. When I encountered a control board failure, I followed advice from this troubleshooting guide to identify the faulty component.
Use a Systematic Approach for Fast Results
Don’t jump straight to replacing parts. Instead, test each component in sequence, starting from the simplest (like fuses and sensors) to the more complex (like the control board). This method saves money and time. I once spent hours replacing parts blindly before realizing the issue was a blown fuse—an easy fix that cost next to nothing.
Leverage Diagrams and Schematics
Always consult your oven’s wiring diagram and schematics, which are often available online or in the user manual. They help you understand how parts connect and what signals to expect. When I repaired my oven, having a schematic made troubleshooting much clearer, especially when testing the control signals.
Keep these diagnostic steps in mind, and you’ll gain confidence in fixing common oven problems efficiently. For more detailed diagnostics and key parts, visit this comprehensive guide to streamline your repairs.
Many DIYers and even seasoned homeowners fall into traps when diagnosing oven problems, often believing in simplified or outdated notions that can lead to costly mistakes. Let’s dig deeper into some of these misconceptions and uncover the hidden nuances that can make or break your repair efforts.
Is It Always the Thermostat or Heating Element?
One of the most widespread myths is that the thermostat or heating element are the primary culprits in most heating failures. While these are common issues, relying solely on this assumption can cause you to overlook other critical components. For example, a faulty control board or sensor might be the actual root cause. Advanced diagnostics show that sometimes, a malfunctioning sensor or a corrupted control signal can mimic the symptoms of a bad thermostat. Proper testing with a multimeter and consulting detailed schematics are essential steps to avoid replacing parts unnecessarily. For more detailed guidance, check out this essential guide.
The Danger of Jumping to Replacements Without Diagnostics
A common mistake is to replace parts based on guesswork or visual inspection alone. It’s tempting to assume a cracked heating element must be the issue, but some cracks are superficial and don’t impact functionality. Conversely, a perfectly intact-looking part can be internally damaged or have broken connections. This is why systematic testing—using multimeters and schematic diagrams—is crucial. Skipping these steps can lead to unnecessary expenses and frustration. Remember, diagnostics are your best friend — they help you identify the real issue before you buy a new part. For advanced troubleshooting tips, visit this troubleshooting guide.
Can Control Boards Be Repaired or Just Replaced?
Many believe that control boards are either working perfectly or completely dead, with no in-between. However, some issues stem from minor component failures like bulging capacitors or burnt traces, which can often be repaired rather than replaced. Recognizing these nuances requires a good understanding of electronics and schematics. In fact, repairing a control board can save significant costs and time compared to full replacement. If you’re interested in mastering these skills, explore this expert resource.
Have you ever fallen into this trap? Let me know in the comments. The more we share, the better we get at DIY repairs!
How do I keep my oven running smoothly over time
Maintaining your oven’s performance isn’t just about fixing problems when they arise; it’s about implementing a proactive approach that ensures longevity and consistent operation. One of the most effective ways to do this is by investing in high-quality diagnostic tools that enable you to monitor and troubleshoot your oven before minor issues turn into costly repairs.
Personally, I rely heavily on a digital multimeter for its versatility and precision. A multimeter allows me to test components such as thermostats, heating elements, and sensors with confidence. I prefer models like the Fluke 115, which offers accurate readings and durability, making it ideal for frequent use. Additionally, a good infrared thermometer helps assess temperature variations and detect heat leaks or faulty heating elements quickly without opening up the oven repeatedly.
Beyond hardware, software tools are becoming increasingly valuable. For example, using oven schematics and diagnostic diagrams available through manufacturer websites or repair guides can dramatically cut down troubleshooting time. These diagrams help you understand complex wiring and signal pathways, enabling more targeted testing. For advanced diagnostics, some tech-savvy DIYers are exploring basic microcontroller setups, like Arduino-based testers, to automate some of the testing processes and log data for long-term analysis.
Regular cleaning and inspection are also vital. Clearing dust and debris from vents and control panels prevents overheating and ensures sensors and electronic parts function optimally. Establishing a routine check, say once every few months, keeps small issues from escalating. For instance, inspecting fuses and connectors for corrosion or looseness can prevent unexpected failures during busy cooking times.
Looking ahead, the trend in appliance maintenance is moving toward smarter diagnostics. Future tools might include apps that sync with your oven’s control board via Bluetooth or Wi-Fi, providing real-time performance data and alerting you about potential issues before they affect cooking. This integration will likely make DIY repairs even more accessible and reliable, empowering homeowners to maintain their appliances with confidence.
What’s the best way to keep my oven working efficiently for years?
Implementing a combination of proper tool use, routine maintenance, and staying informed about technological advances will maximize your oven’s lifespan. Start by investing in a quality multimeter and infrared thermometer, and familiarize yourself with your oven’s schematic diagrams. Regularly clean and inspect your appliance, and don’t shy away from exploring new diagnostic technologies as they become available. These small but impactful steps will help you catch issues early, save money, and enjoy cooking without interruptions. For deeper insights, check out this guide on maintaining your oven’s health over time. Try using an infrared thermometer today to detect temperature inconsistencies — a simple step that can prevent major problems down the line.
The Hardest Lesson I Learned About Oven Troubleshooting
One of the most valuable lessons I’ve picked up is that assumptions can lead you astray. I once replaced what I thought was a faulty heating element, only to find out later that the real culprit was a damaged sensor. This costly mistake taught me to always verify before replacing parts, emphasizing the importance of diagnostics over guesswork.
How My Toolkit Became My Best Friend in Oven Repairs
Initially, I relied on basic tools, but investing in a quality multimeter and infrared thermometer transformed my repair approach. These tools provided precise readings and quick diagnostics, saving me hours and money. I trust brands like Fluke for their durability and accuracy, and I recommend reading this guide to understand the key parts better.
Why Staying Curious About Your Oven’s Inner Workings Matters
Every time I open my oven, I remind myself that understanding its core components—thermostats, sensors, heating elements—empowers me to troubleshoot confidently. This curiosity leads to faster fixes and a deeper appreciation of how appliances work. Embracing continuous learning, especially through schematics and troubleshooting guides, keeps my repairs smooth and stress-free.
The Future of DIY Oven Maintenance Is Bright
With new diagnostic tools emerging—like apps that sync with your oven—the future promises even easier repairs. Staying informed and adaptable will ensure your oven remains a reliable kitchen partner for years to come. Remember, the more you learn, the less you’ll fear fixing your appliances. Dive into resources like this comprehensive guide to keep your skills sharp.