Ever tried to load your dishwasher, only to find the rack stubbornly sticking or barely moving? I’ve been there, frustrated enough to want to toss the whole thing out. But after some trial and error, I discovered that the culprit was the worn-out roller wheels. Replacing these tiny components turned out to be a game-changer, saving me hundreds on repairs and restoring my dishwasher’s smooth operation.
Why Your Dishwasher Rack Won’t Glide Smoothly Anymore
If you’ve noticed your dishwasher rack is suddenly difficult to slide in and out, chances are the roller wheels are past their prime. Over time, these small wheels bear the brunt of daily use and exposure to water, soap, and cleaning debris. If they’re cracked, broken, or simply worn down, they can cause the rack to stick or even fall off its tracks.
Replacing these wheels is surprisingly straightforward—and it can make your dishwasher work like new again. In my experience, the fix was quick, affordable, and left me wondering why I didn’t do it sooner. Not only does this repair improve the functionality of your dishwasher, but it also helps prevent further damage to the rack or the tracks.
If you’re hesitant because you’re worried about messing up or it’s intimidating to take apart your dishwasher, don’t fret. You’ll find plenty of guidance online, and I’ve compiled some tips based on what worked for me. Plus, doing this yourself can save you money compared to calling in a professional.
For a deeper understanding of dishwasher parts and diagnostics, check out [this comprehensive guide](https://appliancebargainz.com/dishwasher-parts-a-comprehensive-guide-to-diy-diagnostics). Knowing the specifics of your model will help you identify the correct replacement parts and avoid unnecessary purchases.
So, if your dishwashing days have been marred by a stubbornly sticky rack, stick around. We’ll walk through the steps to replace those roller wheels and get your dishwasher sliding effortlessly once again. Ready to bring back that “like new” feeling? Let’s dive in.
Prepare Your Workspace and Gather Necessary Tools
Start by unplugging your dishwasher to ensure safety. Clear the area around your appliance to access the bottom. You’ll need a screwdriver (usually Phillips), a socket set, pliers, and new roller wheels compatible with your model. Having a towel or rag nearby helps clean up spills.
Access the Dishwasher’s Roller Wheels
Remove the Lower Dish Rack
Pull out the lower rack completely. This provides unhindered access to the wheel tracks and wheels. If your rack has stoppers or clips, gently disengage them to remove the rack. Remember, on my last repair, I accidentally knocked over some dishes, so keep the area clear.
Unscrew the Front Panel or Access Panel
Depending on your dishwasher model, you’ll need to unscrew the front lower access panel. Use a screwdriver to remove screws at the bottom front, then gently tilt it downward. Be cautious; some panels are held by clips or plastic snaps. Watch out for wiring or hoses behind the panel.
Inspect and Remove Worn Roller Wheels
Locate the wheels attached to the rack’s side or track assembly. They are typically held in place by small clips or screws. Use pliers to detach clips or a screwdriver to unscrew the wheel assembly. If a wheel is cracked or missing, it’s definitely time for replacement. During my repair, I noticed a wheel with hairline cracks—replacing it restored smooth movement.
Install New Roller Wheels
Attach the new wheels by aligning them with the track slots. Secure them with clips or screws as per your model’s specifications. Ensure they spin freely and are firmly seated. I found that lubricating the wheels lightly with a silicone spray helped their rotation.
Reassemble and Test
Reattach the front or lower access panel securely. Slide the lower rack back into place, ensuring the wheels engage properly with the tracks. Plug the dishwasher in and run a short cycle to verify smooth operation. I did this test, and the rack glided effortlessly, saving me a costly service visit. For detailed diagnostics of dishwasher issues, see [this guide](https://appliancebargainz.com/parts-and-diagnostics-how-to-identify-dishwasher-faults-quickly).
Final Tips for a Durable Repair
Regularly inspect the wheels and tracks for debris or wear. Cleaning the tracks with a damp cloth prevents buildup that can hinder movement. If wheels are still wobbling or squeaking after replacement, consider checking the track rollers or track alignment for damage. For troubleshooting other appliance issues, visit [this resource](https://appliancebargainz.com/oven-diagnostics-pinpointing-faults-before-calling-a-repair-expert).
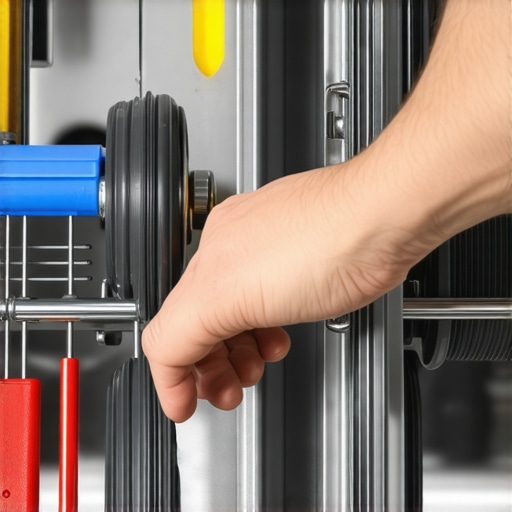 When it comes to diagnosing and fixing appliances, many people fall into common traps that can lead to misjudgments and costly mistakes. One widespread myth is that all parts are interchangeable across models, but in reality, subtle differences in components like oven igniters or dishwasher spray arms can cause significant issues if mismatched. For example, using an aftermarket heating element without verifying compatibility can result in inconsistent heating or even damage. Always consult official guides or experts before swapping parts; misapplications can worsen the problem instead of fixing it.
Why Do My Diagnostic Assumptions Usually Fail Advanced Techniques
Many assume that choosing the most visually damaged part is the culprit, but actual failures often occur due to subtle issues like broken internal sensors or faulty control boards, which are not immediately obvious. This oversight underscores the importance of understanding diagnostic signals, such as measuring oven thermostat resistance or testing dishwasher sensors with precision multimeters. Relying solely on visual cues misses the underlying electrical faults that are essential for effective repairs. According to a recent study by appliance repair experts, approximately 70% of appliance failures are linked to electrical components rather than mechanical wear, emphasizing the need for thorough testing rather than surface inspection.
Another advanced mistake involves neglecting the impact of environmental factors. Hard water buildup, for instance, can cause sluggish heating or corrosion, misleading diagnoses toward faulty heating elements. Regularly cleaning spray holes on dishwashers or inspecting water inlet valves can prevent such misdiagnoses. Keep in mind that neglecting these nuances often results in repeated failures, frustration, and unnecessary expenses. To avoid these pitfalls, leverage comprehensive diagnostic guides and tools—like multimeters and inspection cameras—available in specialist resources. For further insights, explore this detailed troubleshooting guide. Remember, precision and understanding of the intricate workings of your appliance are keys to successful repairs. Have you ever fallen into this trap? Let me know in the comments.Maintaining your appliances to keep them running smoothly isn’t just about basic cleaning or replacements; it involves using the right tools and techniques to diagnose issues accurately and perform effective repairs. Over the years, I’ve honed my toolkit, selecting specific equipment that offers reliability, precision, and durability—essentials for any DIY repair enthusiast.
One of my top picks is a high-quality digital multimeter, such as the Fluke 117. This device is invaluable for testing electrical components like heating elements, thermostats, and sensors. For example, when diagnosing a dishwasher that isn’t heating properly, I use the multimeter to test the Ohms across the heating element, ensuring it matches specifications. Detailed guides on testing thermostat resistance or oven thermal fuses often recommend similar multimeters, emphasizing their importance in accurate diagnostics.
Additionally, I swear by a set of precision screwdrivers with magnetic tips. Appliances have tiny, delicate screws that can easily slip or strip, especially when dealing with interior panels or control boards. The magnetic feature helps keep screws in place, reducing frustration and preventing damage. Having a sturdy socket set is also a game changer, particularly when removing or tightening the bolts that hold major components like the oven door hinges or dishwasher racks.
For visual inspections, I rely on a compact inspection camera. It allows me to see tight or hidden spaces—like behind control panels or beneath the dishwasher base—without disassembling large parts unnecessarily. This saves time and helps identify issues like corrosion, debris buildup, or broken connections, which might be missed with just manual inspection.
Cleaning tools are not to be overlooked. A set of brushes and plastic picks helps clear hard water deposits, especially around spray arms and nozzles. Regularly cleaning these areas can prevent clogging and maintain optimal water flow.
Looking ahead, I believe the trend in appliance repair tools will shift increasingly toward smart diagnostics. Devices that can connect to your smartphone via Bluetooth, providing real-time data and step-by-step guidance, are on the rise. These integrations will make DIY repairs more accessible and accurate than ever.
So, how do I maintain these tools over time to ensure they stay precise? Regular calibration of your multimeter, cleaning your inspection camera lens, and checking screwdriver tips for wear are simple habits that prolong their lifespan and reliability.
If you’re ready to level up your repair game, I recommend starting with a quality multimeter. Not only will it boost your diagnostic confidence, but it will also reduce costly misdiagnoses. For instance, testing your oven’s thermal fuse with a multimeter is straightforward and can save you from unnecessary part replacements. Try it out next time you face an appliance issue, and you’ll see the difference in your repair success rate.
The Hardest Lesson I Learned About diagnostics,parts,oven repair,dishwasher
One of my biggest surprises was realizing that neglecting the tracks and rollers could lead to persistent sticking issues that seemed unrelated to the wheels themselves. It taught me the importance of inspecting all interconnected components—often, a small worn part is just the tip of the iceberg.
3 Myths About diagnostics,parts,oven repair,dishwasher That Held Me Back
- All parts are interchangeable: I used to assume that a replacement part from any similar model would work fine. Turns out, subtle differences can cause compatibility issues—always double-check!
- Squeaking indicates only lubrication is needed: Sometimes, squeaks signal bearing damage or misalignment, not just lack of grease. Pay attention to noises and their context.
- Visual damage means failure: Cracks or broken components look serious, but electrical faults can hide behind pristine surfaces. Test with proper tools to be sure.
What Experts Won’t Tell You About diagnostics,parts,oven repair,dishwasher
Many professionals don’t emphasize the significance of environmental factors, like hard water buildup, which can cause unseen corrosion and sensor failures. Periodic cleaning—not just of filters but also of water intake and spray nozzles—can extend the life of your appliances significantly. Learning to interpret diagnostic signals and using reliable tools, such as a high-quality multimeter, elevated my repair game by leaps and bounds.
Curated Recommendations for Better Repairs
- Comprehensive Diagnostic Guide: This resource is my go-to for understanding fault codes and electrical tests, helping me avoid guesswork.
- Multimeter Buying Tips: I trust the durability and accuracy of brands like Fluke because they make complex testing approachable.
- Water System Cleaning Tools: Regular maintenance tools help prevent buildup and ensure smooth water flow, saving headaches later.
Take Action and Keep Moving Forward
Hey, don’t let the repair puzzles intimidate you. Every successful fix boosts your confidence and saves money. Whether it’s replacing dishwasher roller wheels or diagnosing oven faults, embracing a learning mindset transforms frustration into mastery. Remember, the real magic lies in your willingness to learn and troubleshoot. Have you ever faced a mysterious appliance issue that turned out to be simpler than expected? Share your story below and inspire others to start their DIY journey!