Ever faced that sinking feeling when your dishwasher won’t close properly, and you realize the latch is busted? I remember the first time it happened—frustration boiling over as I muttered, “There’s gotta be a way to fix this myself.” It was late, and calling a plumber felt unnecessary for a minor repair. That lightbulb moment led me down a rabbit hole of DIY fixes, and I want to share what I learned so you don’t have to sweat it alone.
Why does a broken dishwasher latch matter so much? Well, a faulty latch isn’t just an inconvenience; it can prevent your dishwasher from operating at all. That means no clean dishes, extra hand-washing, and a lingering mess that just keeps getting worse. Instead of rushing to call a repair technician, I decided to tackle the problem myself. And trust me, it’s more doable than you might think.
Common Causes of Dishwasher Latch Failures
Before diving into the fix, it’s essential to understand what causes these latches to break. Sometimes, it’s just wear and tear from constant use. Other times, a misaligned door or an accidental yank can cause damage. Often, debris or grime build-up can jam the latch mechanism, making it impossible to close fully. Recognizing these signs can save you time and help you determine whether a simple fix will do the job or a replacement part is needed.
Did you know that according to Appliance Repair Experts, latch failures account for nearly 30% of dishwasher malfunctions? This highlights how common and fixable this issue is if you know where to look.
If you’ve ever felt your frustration mounting as the door refuses to stay closed, you’re not alone. I’ve been there too. Now, instead of stressing over calling a professional for what might be a minor glitch, you can follow some straightforward steps to get your dishwasher back in action. Ready to learn how?
Let’s jump into the practical part—how to replace your broken dishwasher latch without unnecessary help, saving you time and money. It’s easier than it looks, and I’ll guide you through every step, so stick around.
Power Off and Prepare Your Workspace
Before starting, unplug your dishwasher from the power outlet to ensure safety. Open the door fully and clear the area around the appliance. Wear gloves if necessary to protect your hands from sharp edges. Removing the lower kickplate can often give easier access to the latch assembly. Use a screwdriver to remove screws holding the kickplate in place, then set it aside carefully.
Locate the Faulty Latch
Find the door latch mechanism, usually at the top of the door’s inner panel. Press the door switch to see if the latch triggers correctly. A faulty latch may look worn or broken. If the latch hook is visibly damaged or there’s excessive movement, it’s time to replace it. Remember that debris or soap scum can sometimes jam the latch, so clean the area to check if it frees up while testing.
Remove the Old Latch Assembly
Unscrew the latch from its mounting bracket using a Phillips screwdriver. Keep track of all screws and small parts—they’ll be needed for the new latch. If the latch is connected to the door interlock, disconnect any wiring harnesses carefully. A good analogy is like unhooking a plug from a socket: gently, without force, to avoid damaging the wires or connector.
Diagnose if Wiring Is the Issue
If you’re unsure whether the latch or wiring is at fault, perform a simple continuity test with a multimeter on the wiring harness. This is akin to checking if the electrical road is clear for the signal to pass through. If the wiring checks out but the latch still won’t engage, focus on replacing the latch itself.
Install the New Latch
Place the new latch in the mounting position, aligning it with the screw holes. Tighten the screws securely to prevent any movement during operation, much like securing a door lock firmly so it functions smoothly. Reconnect any wiring harnesses exactly as they were, ensuring proper connection. It’s important that the latch hooks and engaging components align correctly to simulate the original setup.
Test the Repair Before Final Assembly
Before replacing the kickplate, restore power to the dishwasher. Close the door fully and run a short cycle to verify if the latch engages and the dishwasher operates without error messages. If the door stays closed and the cycle proceeds normally, you’ve successfully replaced the latch. If issues persist, double-check the installation or consider inspecting the door alignment as misalignment can also cause latch failures. For more diagnostics tips, see this guide.
Reassemble and Finalize
Once satisfied with the operation, reattach the kickplate and any other panels removed. Tighten all screws firmly but avoid overtightening, which could crack plastic parts. Regular maintenance, like cleaning the latch area to prevent grime buildup, can prolong its lifespan. Remember, if unsure about electrical testing or mounting procedures, seek professional help or consult detailed tutorials.
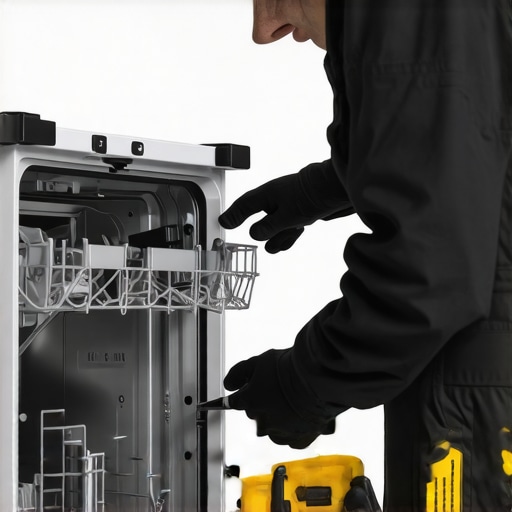 Many DIY enthusiasts believe that repairing appliances like dishwashers and ovens is straightforward—just replace a part or follow a tutorial. However, this oversimplification overlooks crucial nuances that can lead to costly mistakes. One common misconception is that all parts are interchangeable or that generic parts are just as good as OEM components. In reality, using incompatible or low-quality parts can cause further damage, increased energy consumption, or even safety hazards. Experts recommend always verifying the specific model requirements, which you can do by consulting detailed guides like [this diagnostic resource](https://appliancebargainz.com/parts-and-diagnostics-how-to-identify-dishwasher-faults-quickly). Another myth is that visible damage is the only indicator of a faulty component. However, some issues, such as misaligned thermostats or faulty sensors, are hidden and require proper diagnostics to identify accurately. Rushing to replace visibly broken parts without proper testing can waste time and money, emphasizing the importance of thorough troubleshooting. For instance, many assume that a clicking sound signifies a faulty relay, but sometimes it’s a wiring issue or a sensor misread, which calls for advanced diagnostics rather than immediate replacement. Avoid the trap of over-reliance on trial-and-error; instead, understanding the hidden nuances, like the interplay between electrical and mechanical components, can elevate your repair skills.
What are the most overlooked signs indicating a deeper issue in appliance diagnostics?
Recognized experts state that subtle symptoms, such as uneven heating or inconsistent cycles, often point to underlying problems like failing control boards or worn-out sensors, which are not immediately apparent. Diagnosing these correctly saves time and prevents unnecessary part replacements, a strategy supported by professional repair guides. Remember, rushing into repairs without comprehensive testing is the leading cause of repeat failures. Always approach repairs with a mindset of uncovering the root cause, not just patching the symptom. If you want to refine your diagnostic skills further, I recommend reviewing detailed troubleshooting articles, like [these oven issues](https://appliancebargainz.com/oven-repair-essentials-troubleshooting-common-issues-with-parts). Recognize these nuances, and you’ll avoid costly mistakes that many DIYers encounter—make sure to validate your assumptions with proper diagnostics before replacing parts.
Maintaining your home appliances like dishwashers and ovens requires more than just basic knowledge; it demands reliable, precise tools that can handle diagnostics, repairs, and routine upkeep efficiently. Over the years, I’ve found that investing in quality equipment not only speeds up repairs but also minimizes the risk of causing further damage. In this post, I will share the specific tools I recommend for maintaining your appliances over time, based on my personal experience and industry standards.
The Multimeter: Your Diagnostic Companion
One tool I consider indispensable is a digital multimeter. I personally prefer one with a true RMS feature, such as the Fluke 115, because it provides accurate readings even on complex circuits. This device allows you to perform simple continuity tests, measure resistance, and verify voltage and current—crucial steps in diagnosing issues like faulty thermostats or broken wiring harnesses. Building a diagnostic process around precise multimeter readings ensures you identify problems correctly before ordering parts or attempting repairs.
Specialized Screwdriver Sets for Appliance Repair
When working with appliances, I recommend a screwdriver set that includes Phillips, flathead, and Torx bits, preferably with magnetic tips. Brands like Wiha or Klein Tools are my go-to because they offer durability and precision. Appliances often have tight, recessed screws, especially around control panels and internal compartments. Using the correct screwdriver minimizes damage to fasteners and prevents stripping screws—saving time and frustration during reassembly.
Precision Pliers and Tweezers for Handling Small Components
Tiny clips, wire connectors, and springs frequently come into play during repairs. I rely on needle-nose pliers and anti-static tweezers from reputable brands like Snap-on to maneuver small parts delicately. They provide the control needed to handle delicate wiring or small fasteners without risking damage, which is essential when working on intricate components like control boards or sensors.
Infrared Thermometers for Temperature Monitoring
An infrared thermometer allows me to quickly assess component temperatures—especially heating elements or sensors—without contact. I often use a Fluke 62 MAX, which offers reliable readings even in high-heat environments. Consistent temperature checks help confirm whether a heating element is working correctly or if a sensor is failing, streamlining the diagnostic process significantly. Regular temperature monitoring can extend the lifespan of your appliances by avoiding overheating issues.
Software and Apps for Diagnostics and Maintenance Tracking
Beyond physical tools, I utilize diagnostics software compatible with appliance control boards (when applicable) and maintenance tracking apps like Everdo. These help log repair histories, set reminders for preventive maintenance, and even run basic diagnostic tests on smart appliances. Technology can elevate your repair practices from reactive to proactive, ensuring appliances stay healthy over their lifespan.
Predicting Future Trends in Appliance Care
Looking ahead, I believe smart diagnostics will become more integrated, with IoT devices alerting homeowners about issues before they become serious. This evolution will demand tools that interface seamlessly with Wi-Fi-enabled appliances and cloud-based diagnostic platforms—making regular upkeep even more accessible and precise.
How do I maintain appliances to prolong their lifespan?
Consistent cleaning and inspection of critical parts, paired with using the right tools for diagnostics and repairs, is key. For example, regularly checking the condition of door seals, spray arms, or heating elements with a multimeter or infrared thermometer can preempt major failures. Furthermore, always verify compatibility when replacing parts by consulting detailed guides like this resource. Don’t forget, investing in quality tools will pay off by making maintenance safer, faster, and more reliable. Try calibrating your temperature sensors with your infrared thermometer now, and experience firsthand how precise diagnostics can be a game changer.
What I Wish I Knew About Appliance Fixes Before I Started
One of the most valuable lessons I learned was that even seemingly complex issues often have simple solutions if you approach them with patience and proper diagnostics. I once thought that a broken dishwasher door latch meant replacing the entire unit, but with some careful troubleshooting, I found that a worn-out latch or debris was often the culprit. recognizing that most problems are rooted in common, fixable parts saved me time and money.
Another insight was understanding the importance of quality tools. Rushing into repairs with cheap screwdrivers or a multimeter that provides inaccurate readings only complicated the process. Investing in reliable equipment, like a true RMS multimeter and precision screwdrivers, transformed my DIY approach from frustrating to rewarding.
Lastly, I discovered that thorough research—using trusted resources and diagnostic guides—prevents unnecessary part replacements. Learning to interpret symptoms accurately and verify issues with simple tests makes all the difference. This mindset shift made me more confident, and I believe it can do the same for you.
What Tools and Resources Keep My Repairs on Track
My essential toolkit for appliance diagnostics includes a digital multimeter, which I trust for its accuracy in testing continuity and voltage—crucial for pinpointing electrical faults (read more about diagnostics tools here). A good set of Phillips, flathead, and Torx screwdrivers from brands like Klein Tools ensures that I don’t strip screws or damage panels during disassembly. For handling small components, I rely on anti-static tweezers and needle-nose pliers—I prefer Snap-on for their durability.
An infrared thermometer has been a game-changer when diagnosing heating elements or sensors in ovens. It allows quick, contactless temperature readings, helping me assess whether parts are functioning properly. Additionally, I use maintenance tracking apps like Everdo to schedule preventive checks and keep logs of repairs—approaching appliance care proactively rather than reactively.
For in-depth knowledge, I frequent trusted sources such as appliance troubleshooting articles, especially those offering detailed step-by-step guides. Regularly consulting these resources improves my diagnostic accuracy and extends the lifespan of my appliances.
Your Turn to Take Action
Repairing your dishwasher or oven might seem intimidating at first, but with the right tools, mindset, and resources, you can turn it into a manageable and even enjoyable challenge. Remember, every repair is a chance to learn more about your appliances and save money. So why not start with something small today—perhaps inspecting your dishwasher latch or testing a heating element? Share your experiences or ask questions below, and let’s empower each other to become appliance repair experts.