It was late at night when I glanced over at my oven, only to find it stubbornly refusing to heat up. I’d already spent hours trying to troubleshoot, reading endless online guides that seemed to be written in a foreign language. Frustration started creeping in, and I wondered—was this the end of my DIY kitchen repair dreams? That was my lightbulb moment: realizing I was missing some key parts that could save me hours of stress.
Your Kitchen Hero: 4 Essential Oven Components for Stress-Free Fixes
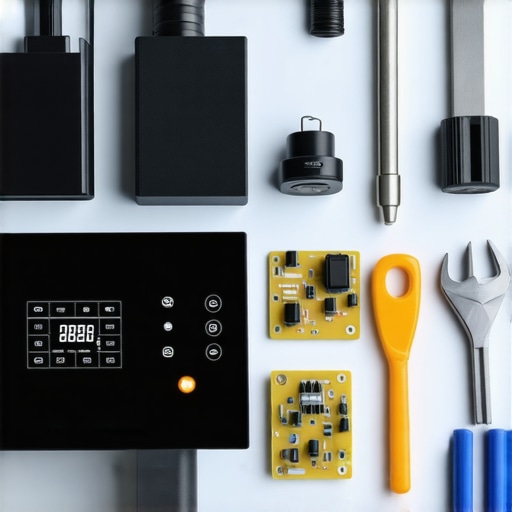
Many homeowners face the same struggle I did—seeing their trusted oven falter, feeling helpless, and resorting to costly professional repairs or replacement. But what if I told you that with just a few strategic upgrades, you could turn your oven into a DIY-ready powerhouse? And no, you don’t need to be a certified technician to handle these parts. Instead, you just need the right tools, some guidance, and an understanding of these four must-have oven components that can revolutionize your repair experience.
Is the hype around DIY oven repair really justified?
I remember early on making a critical mistake—thinking all parts are interchangeable or that buying cheap replacements would do the trick. Spoiler: it doesn’t. That mistake cost me extra time and money. Now I know that choosing authentic, compatible parts is essential. According to appliance repair experts, investing in quality diagnostics and core components not only extends your appliance’s lifespan but also simplifies troubleshooting in the long run. To stay ahead of common oven issues, I’ve compiled these essential parts, so you’re never left scratching your head. Want to learn more? Check out [this expert guide](https://appliancebargainz.com/oven-repair-secrets-key-diagnostics-parts-for-faster-fixes-in-2025-2) to get started.
What’s your most frustrating oven problem right now? Facing recurring heat loss, uneven baking, or maybe the igniter refusing to spark? Hold tight—because in the next sections, I’ll walk you through how these four parts can make your DIY repairs more predictable, efficient, and downright satisfying.
Identify the Fault Precisely
Start by narrowing down the issue. Use a multimeter to test the bake element by disconnecting it and checking for continuity. A failed element often shows no reading, indicating it needs replacement. Remember, a faulty element can cause the oven to not heat uniformly or not heat at all. To get a systematic approach, consult the [oven diagnostics guide](https://appliancebargainz.com/oven-repair-secrets-key-diagnostics-parts-for-faster-fixes-in-2025-2) for detailed troubleshooting steps.
Remove and Access the Broken Part
Carefully unplug the oven and shut off the power supply. Use a screwdriver to remove the oven’s back panel or access panel, exposing internal components. For instance, to replace a baked-out bake element, remove its mounting screws and disconnect the wiring clips. Be mindful of the wiring order—taking a photo can help during reassembly. This hands-on step is crucial for safe and effective repairs.
Test Critical Components On-Site
Before installing a new part, verify its function. For the igniter, disconnect it and perform a visual check for cracks or breaks. You can also use a multimeter for testing continuity. If the igniter doesn’t glow or shows no continuity, it’s a clear sign it needs replacing. Use a quick test like the [5-minute igniter diagnostic](https://appliancebargainz.com/test-your-oven-igniter-a-5-minute-diagnostic-fix-2026) to confirm its failure. This avoids unnecessary replacements and saves time.
Replace Parts with Authentic Components
Always select genuine parts compatible with your oven model. For example, using a verified OEM bake element or igniter ensures durability and proper function. When installing, connect wiring exactly as before, matching terminals to avoid shorts. Tighten mounting screws firmly but avoid overtightening, which can cause damage. Proper installation reduces the risk of future failures and guarantees safety.
Perform Functional Testing
Restore power and run the oven through a test cycle. Check for proper heating, even temperature distribution, and safe operation. For issues like uneven baking, verify if the temperature sensor functions correctly. Testing the sensor with a multimeter can prevent recurring problems. If the oven heats up as expected, your repair is successful. Otherwise, revisit troubleshooting steps or explore other diagnosing techniques using the [diagnostics guide](https://appliancebargainz.com/oven-repair-diagnostics-parts-effective-fix-tips-2025-3).
Document and Reflect for Future Fixes
Keep a record of the problem, parts replaced, and steps taken. Note any irregularities or challenges encountered. This practice accelerates future repairs and helps identify patterns. For instance, if the bake element frequently fails, consider upgrading to a higher-quality component or inspecting power supply issues. Building a repair journal enhances your DIY skills over time and reduces dependency on professional help.
When it comes to appliance repairs, many homeowners rely on generic advice or assumptions that can lead to costly mistakes. One common misconception is believing that all repair parts are interchangeable or that diagnostics are straightforward. However, **the real nuance lies in understanding the specific functions and subtle differences of each component**. For example, replacing a dishwasher pump without verifying compatibility or correct installation can cause persistent leaks or complete failure, despite seemingly simple fixes. According to appliance repair experts, such as those cited in the [expert troubleshooting guides](https://appliancebargainz.com/diagnose-fix-dishwasher-problems-fast-expert-troubleshooting-tips), recognizing these subtle discrepancies is vital for effective repairs.
A typical trap many fall into is assuming that a Visual Inspection suffices for diagnosing issues. But often, components like heating elements or sensors develop microfractures or internal failures that aren’t visible. This is especially true with oven temperature sensors, which may look intact but have lost their calibration. Advanced diagnostic steps, such as testing with multimeters or performing specific function tests, are essential. Unfortunately, homeowners often overlook these nuanced tests, leading to repeated failures or misdiagnoses.
Another commonly overlooked aspect is the importance of **using authentic parts**. Many believe that generic replacements will save costs, but this can compromise safety and longevity. For instance, a cheap dishwasher drain valve might fit temporarily but fail prematurely, causing water damage. The importance of authentic, model-specific parts is underscored by the fact that they adhere to safety standards and are engineered to withstand specific operational stresses. To deepen your understanding, review the [effective repair techniques](https://appliancebargainz.com/effective-dishwasher-troubleshooting-parts-expert-repair-guide-2025) that highlight the significance of proper parts selection.
From an advanced diagnostics perspective, the misconception that resetting or ‘power cycling’ can fix complex faults is widespread. While a reset might temporarily clear some error codes or glitches, underlying issues—such as faulty sensors or worn-out heating elements—require targeted testing and component replacement. This nuance is crucial; blindly resetting may delay necessary repairs, causing further damage or appliance failure. Expert guides emphasize a systematic approach: diagnose accurately before executing repairs.
Finally, understanding the ‘oops’ factor is vital. A frequent mistake is misinterpreting diagnostic codes or signals. For example, an oven displaying a certain error code might tempt a quick part swap, but that code could refer to a variety of issues, from sensor faults to control board failures. Dismissing these nuances can lead to wasted time and money. Professional advice suggests consulting trusted diagnostic charts and performing component-specific tests to pinpoint the true cause.
In summary, *the hidden nuances in dishwasher and oven repairs* revolve around precise diagnostics, correct parts, and thorough understanding of appliance components. Avoid the trap of superficial troubleshooting; instead, embrace a detailed, informed approach. These details significantly improve repair success rates and prolong appliance life. Want to master these subtle aspects? Dive into the [diagnostics and parts guides](https://appliancebargainz.com/oven-repair-diagnostics-parts-effective-fix-tips-2025-3) to sharpen your skills. Have you ever fallen into this trap? Let me know in the comments.To ensure your kitchen appliances keep running smoothly, investing in high-quality tools and adopting effective maintenance routines is essential. I personally recommend a digital multimeter for diagnosing electrical issues; it’s precise and versatile, allowing me to quickly verify components like heating elements and sensors. For example, when testing an oven’s bake element, I use my multimeter to check continuity, ensuring it’s functioning properly before replacement. Additionally, a good infrared thermometer helps monitor temperature consistency during repairs, which is crucial for achieving accurate cooking results and diagnosing faults like uneven heating. These tools have become indispensable in my toolkit, saving me time and avoiding costly mistakes. Future trends suggest a shift toward smart diagnostic devices that connect via apps, providing real-time appliance health updates and predictive maintenance alerts—making it easier to keep everything in top shape. How do I maintain my dishwasher over time? I set a monthly schedule to clean filters, run cleaning cycles with vinegar, and check spray arms for blockages. Regular maintenance like this extends appliance life and prevents minor issues from becoming expensive repairs. Remember, understanding your tools and staying proactive with routine checks is the best way to keep your appliances working reliably for years to come. For instance, incorporating diagnostic tools like my recommended multimeter and infrared thermometer can help you quickly identify issues—try testing your oven’s heating element today to get familiar with these techniques and stay ahead of potential problems. For more detailed troubleshooting, consult resources like [this expert diagnostic guide](https://appliancebargainz.com/oven-repair-secrets-key-diagnostics-parts-for-faster-fixes-in-2025-2).
Reflecting on my repair adventures, I’ve uncovered some priceless lessons that no manual could teach—like the importance of patience and meticulous diagnostics. Sometimes, the smallest overlooked component, such as a faulty sensor or a worn-out gasket, can cause a cascade of problems, reminding me that attention to detail is everything. I’ve learned to trust high-quality, authentic parts over cheap knock-offs, as they ensure durability and safety. This journey has shown me that embracing the learning curve, rather than fearing it, transforms repair challenges into empowering experiences, ultimately saving time and money.
Emma Johnson
I really relate to the frustration of troubleshooting an oven that refuses to heat and feeling unsure about which parts need replacing. After several attempts, I found that investing in quality, authentic components made a huge difference, not just in fixing the issue but also in preventing future failures. Using a multimeter to test the elements and sensors on-site has saved me a lot of time and guesswork, especially when dealing with internal microfractures that can be invisible during a visual inspection. I’ve also started documenting each repair step, which makes future troubleshooting much smoother.
One thing I’ve noticed is that these diagnostic techniques are particularly helpful for avoiding unnecessary replacements. Has anyone experimented with smart diagnostic tools or app-connected devices? I’m curious if they truly make the process more efficient or if traditional multimeters and visual checks still hold the advantage in home repairs. It seems like technology is advancing rapidly—would love to hear others’ experiences or recommendations about integrating these tools into DIY repairs.